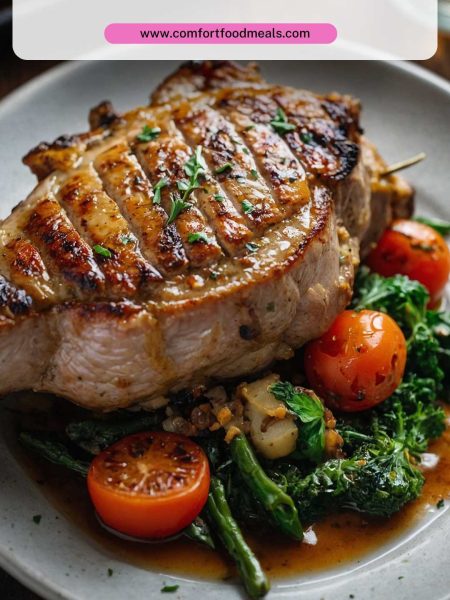
Brining a turkey ensures juicy, flavorful meat, perfect for your holiday feast. Pair it with tart cranberry sauce, especially homemade with a touch of orange zest, to brighten the savory flavors.
Garlic mashed potatoes are creamy and perfect for soaking up turkey juices, while roasted root vegetables add sweetness that balances the meal. Stuffing or dressing, rich with herbs and bread, is a classic must-have side.
Top it all off with rich, homemade gravy drizzled over the turkey to elevate every bite. These pairings make your brined turkey unforgettable.
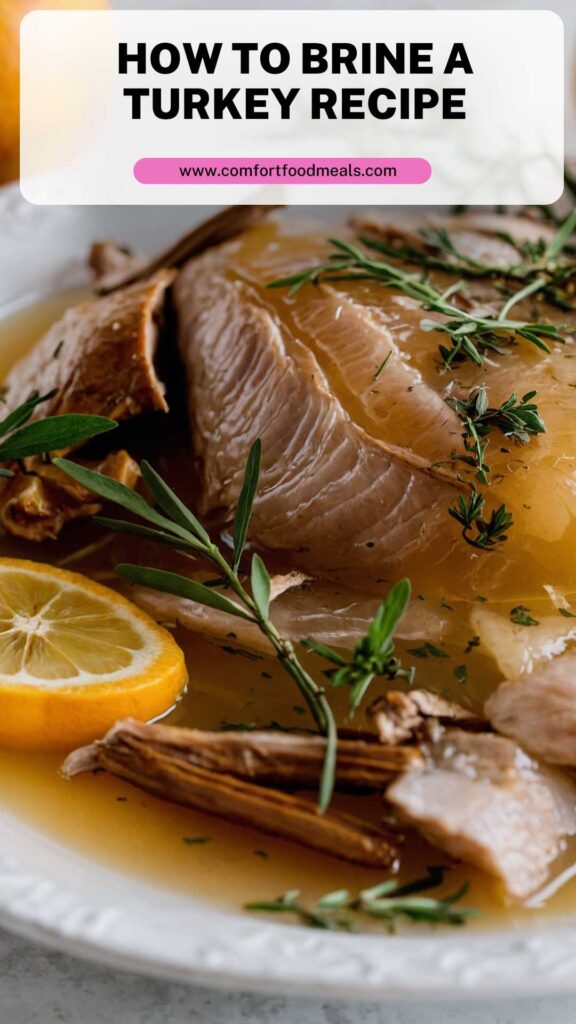
I have to confess, brining a turkey might sound like an intimidating culinary endeavor. But, I assure you, it’s simpler than it appears. Brining is essentially soaking your turkey in a seasoned solution before cooking.
This process enhances flavor and locks in moisture, resulting in a juicy, flavorful bird that will leave your guests singing your praises.
Having taken the plunge and brined many turkeys over the years, I’ve observed how the right brine recipe can make all the difference.
But the truth is, it hasn’t always been successful for me. My early attempts were marked by oversalting and muddled flavors. However, the magic truly manifested when I found the right balance between salt, sugar, and aromatic flavors.
What can you expect? Well, let’s just say, you’ll be left with protein so tender it practically melts in your mouth, with skin that crisps perfectly, a true feast for the senses.
You Might Also Like These Recipes!
What is Brining a Turkey?
At its core, brining involves soaking the turkey in a salty solution, typically made of water, salt, and additional flavorings. This creation of a brine encourages osmosis, allowing the meat to absorb moisture and flavors.
The salt works its wonders by breaking down some of the protein structures in meat, resulting in a texture that’s both juicy and tender.
Brining can be done wet or dry. Wet brining is the most common method, where a turkey is submerged in a liquid, like the one I will share later.
Dry brining, on the other hand, involves rubbing salt directly on the turkey’s skin. Both yield incredible results, but I’ll be blending flavors with a wet brine for this recipe.
How Does It Taste?
Let’s cut to the chase. After brining, the turkey offers a depth of flavor that’s rich yet balanced. The saline solution penetrates deeply, seasoning every bite.
Now throw in some aromatic herbs and garlic, and what do you get?
A bird bursting with flavor that tantalizes your taste buds. The sweetness from the brown sugar balances saltiness and rounds out the flavors beautifully.
Why You’ll Love This?
There are a slew of reasons everyone should try brining their turkey this holiday season. Here are just a few:
- Increased Flavor: The flavor infused throughout the meat is unbeatable.
- Juicy Texture: Say goodbye to the dreaded dry turkey!
- Cook with Confidence: A brined turkey practically cooks itself to perfection.
- Versatility: You can tailor the brine to your taste with various flavor options.
Ingredients
To create your incredible brine, gather the following ingredients:
- 2 gallons chilled water
- 1 1/2 cups coarse kosher salt
- 2 cups packed dark brown sugar
- 3 cups natural apple cider or pressed apple juice
- 2 Tbsp. apple cider vinegar
- 5 cloves garlic, finely minced
- 4 Tbsp. chopped fresh rosemary sprigs
- 1 Tbsp. dried thyme leaves
- 5 dried bay leaves
- Zest from 3 large oranges
Step-by-Step Directions
Let’s break this down into manageable steps.
Step 1: Prepare the Brine
Start by combining 2 gallons of chilled water in a large pot. In a separate bowl, mix the coarse kosher salt and dark brown sugar. Stir until it’s well integrated to ensure the sugar dissolves. Gradually add this mixture to the water, stirring continuously.
Step 2: Add Flavor
Once the salt and sugar are dissolved, add the apple cider, apple cider vinegar, minced garlic, fresh rosemary, dried thyme, dried bay leaves, and orange zest. Stir gently, allowing the aroma to fill your kitchen.
Step 3: Cool the Brine
If your brine mixture is warm, let it cool completely. This is super important. Placing a turkey into hot brine is a no-go; it can dry your bird out before the process even begins.
Step 4: Submerge the Turkey
Once your brine is cool, it’s time for the star of the show. Place your thawed turkey into a large, food-safe container, or an extra-large resealable plastic bag. Carefully pour the cooled brine over the turkey ensuring it is completely submerged. You may need to weigh it down with a plate or something similar.
Step 5: Time to Chill
Seal the container or bag and place it in the refrigerator. Let it brine for a minimum of 12 hours, up to 24 hours for larger turkeys. The longer the brine, the more flavor and moisture absorbed.
Step 6: Rinse and Dry
When it’s time, carefully remove the turkey from the brine. Rinse it thoroughly under cold water to remove excess salt. Pat it dry with paper towels. You can’t roast a wet turkey, remember that!
Step 7: Roast Away
Roast your turkey in the oven as per your preferred method. Venturing for a nice golden-brown skin? Yes, please!

Tips for Making a Brined Turkey
- Use High-Quality Salt: Coarse kosher salt is the gold standard for brining. Avoid table salt, as it can lead to an overly salty turkey.
- Experiment with Flavors: Don’t hesitate to personalize the brine! You can add spices like peppercorns for a kick or herbs like thyme for added flavor.
- Ensure Proper Cooling: Always use chilled ingredients to keep your turkey safe from bacteria while brining.
- Don’t Over-Brine: While longer is generally better, overly brining can lead to a turkey that’s too salty. Stick within the recommended time.
- Keep It Cold: Maintain the turkey’s temperature below 40°F throughout the brining process to prevent any food safety issues.
Nutrition Information
How To Brine A Turkey Nutrition Facts


How Do You Store a Brined Turkey?
If you’ve brined your turkey but need to store it before cooking, it’s essential to keep it refrigerated. After the brining period, place it back in the refrigerator in its brining container. If you decide to keep it unbrined in the fridge for up to 2 days, that’s fine too.
Just remember, once it’s cooked, store leftovers in airtight containers in the fridge. Enjoy those turkey sandwiches!
What Other Substitutes Can You Use in Brining?
You might not have all listed ingredients on hand or prefer different flavors. Here are five solid substitutes you can try:
- Lemon Juice: Swap orange zest with fresh lemon zest for a zippy alternative.
- Maple Syrup: Replace brown sugar with maple syrup for a distinct sweetness that complements the savory.
- Garlic Powder: No fresh garlic? Use garlic powder instead.
- Thyme Alternatives: Substitute dried thyme leaves with dried oregano for a unique herbal twist.
- Fruit Juices: Instead of apple cider, mix it up with grapefruit or even pomegranate juice for an unexpected twist.
Conclusion
Brining a turkey is an art that yields delicious results. While the steps may seem extensive, the rewards pay off with every tender, flavorful bite.
Remember the importance of balance in flavor, and feel free to experiment with different ingredients to match your taste. Your extended family will surely appreciate this twist on a classic recipe.
Beyond the turkey, consider the joy of sharing hearty meals with loved ones. Whether it’s a holiday feast or a weeknight dinner, a well-executed brined turkey brings warmth to any table.
So roll up your sleeves and get ready to impress this season! Happy cooking!
You Might Also Like These Latest Recipes!

How To Brine A Turkey Recipe – Comfort Food Meals
Description
I have to confess, brining a turkey might sound like an intimidating culinary endeavor. But, I assure you, it's simpler than it appears. Brining is essentially soaking your turkey in a seasoned solution before cooking.
This process enhances flavor and locks in moisture, resulting in a juicy, flavorful bird that will leave your guests singing your praises.
Ingredients
Instructions
-
Let’s break this down into manageable steps.
Step 1: Prepare the Brine
-
Start by combining 2 gallons of chilled water in a large pot. In a separate bowl, mix the coarse kosher salt and dark brown sugar. Stir until it’s well integrated to ensure the sugar dissolves. Gradually add this mixture to the water, stirring continuously.
Step 2: Add Flavor
-
Once the salt and sugar are dissolved, add the apple cider, apple cider vinegar, minced garlic, fresh rosemary, dried thyme, dried bay leaves, and orange zest. Stir gently, allowing the aroma to fill your kitchen.
Step 3: Cool the Brine
-
If your brine mixture is warm, let it cool completely. This is super important. Placing a turkey into hot brine is a no-go; it can dry your bird out before the process even begins.
Step 4: Submerge the Turkey
-
Once your brine is cool, it's time for the star of the show. Place your thawed turkey into a large, food-safe container, or an extra-large resealable plastic bag. Carefully pour the cooled brine over the turkey ensuring it is completely submerged. You may need to weigh it down with a plate or something similar.
-
Step 5: Time to Chill
-
Seal the container or bag and place it in the refrigerator. Let it brine for a minimum of 12 hours, up to 24 hours for larger turkeys. The longer the brine, the more flavor and moisture absorbed.
Step 6: Rinse and Dry
-
When it’s time, carefully remove the turkey from the brine. Rinse it thoroughly under cold water to remove excess salt. Pat it dry with paper towels. You can’t roast a wet turkey, remember that!
Step 7: Roast Away
-
Roast your turkey in the oven as per your preferred method. Venturing for a nice golden-brown skin? Yes, please!
Nutrition Facts
Servings 18
- Amount Per Serving
- Calories 81kcal
- % Daily Value *
- Total Fat 1.5g3%
- Saturated Fat 0.3g2%
- Cholesterol 1mg1%
- Sodium 9453mg394%
- Total Carbohydrate 17g6%
- Sugars 16g
* Percent Daily Values are based on a 2,000 calorie diet. Your daily value may be higher or lower depending on your calorie needs.
Note
- Use High-Quality Salt: Coarse kosher salt is the gold standard for brining. Avoid table salt, as it can lead to an overly salty turkey.
- Experiment with Flavors: Don’t hesitate to personalize the brine! You can add spices like peppercorns for a kick or herbs like thyme for added flavor.
- Ensure Proper Cooling: Always use chilled ingredients to keep your turkey safe from bacteria while brining.
- Don’t Over-Brine: While longer is generally better, overly brining can lead to a turkey that’s too salty. Stick within the recommended time.
Keep It Cold: Maintain the turkey's temperature below 40°F throughout the brining process to prevent any food safety issues.