Before diving into the delightful recipe for garlic dill oyster crackers, let's explore some delicious pairings. These little snacks are incredibly versatile. You can serve them alongside soups, salads, or even as part of a charcuterie board.
Soup: Creamy tomato soup creates a match made in heaven with these crunchy morsels. The textures contrast, amplifying your dining experience.
Salads: Toss them over a green salad. The crunch adds a delightful twist and keeps the salad interesting.
Dips: Whether it's hummus, creamy spinach dip, or a classic onion dip, garlic dill oyster crackers bring a punch that complements and enhances their flavors.
Cheese boards: They provide a delightful crunch alongside soft cheeses, cured meats, and fruits.
Veggies: Pair them with fresh veggies like carrots and celery for a guilt-free snack that keeps the munchies at bay.
Alright, let's jump into the world of garlic dill oyster crackers and explore why they’re worth making.
Garlic dill oyster crackers are more than just snacks; they are a testament to the delightful experiences that food can create. I remember the first time I encountered them. I was at a friend's gathering, and these little crunchy bites captured my heart. They disappeared quickly, and I found myself rifling through the bowl for just one more. It got me thinking: if I love them this much, how does one make them?
As a registered dietitian and food blogger, I’ve always been fascinated by the culinary potential of simple ingredients. Garlic dill oyster crackers hit all my sweet spots. They are easy to make, bursting with flavor, and the ideal companion to a variety of dishes. Let’s take a deeper look at what these delightful snacks entail.
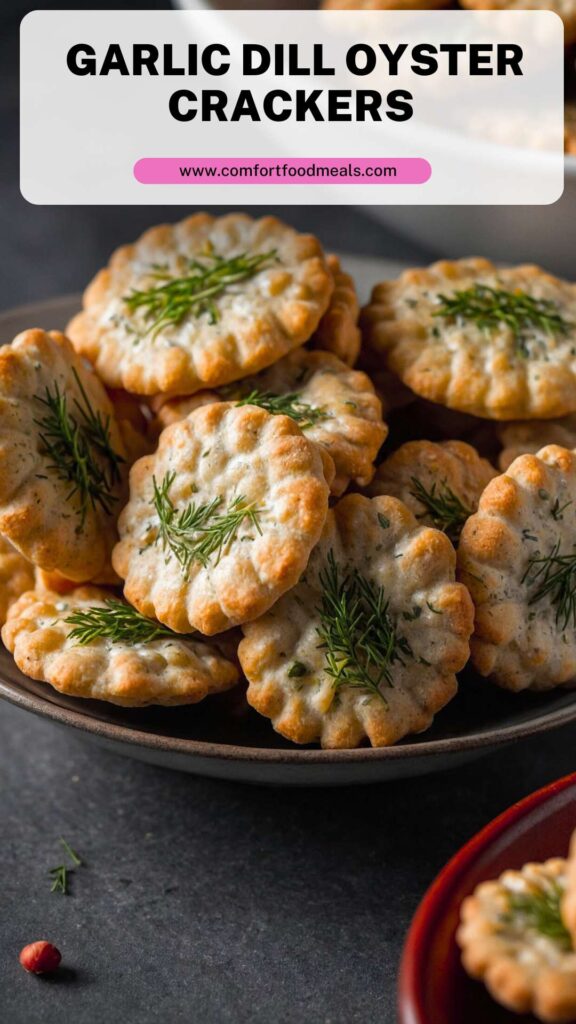
At their core, garlic dill oyster crackers are small, crunchy crackers seasoned with garlic powder and dill, providing a distinct flavor that sets them apart from typical snack options. Originating from the classic oyster cracker, these treats take a basic cracker and elevate it to something truly wonderful. Each bite strikes a perfect balance between herby and savory notes, making your taste buds dance with joy.
The beauty of garlic dill oyster crackers lies in their simplicity. With just a handful of easily accessible ingredients, you can create an unforgettable snack that pairs well with many dishes.
Why This Recipe Works
This recipe combines flavors and textures in optimal harmony. Using roasted garlic powder intensifies the savory notes while marrying beautifully with the freshness of dill weed. Vegetable oil ensures the seasoning sticks to each cracker evenly, delivering flavor in every bite. Plus, the use of flaky kosher salt enhances the overall taste, while the oyster crackers provide a perfect canvas, balancing crunch and flavor.
Besides being tasty, these crackers are incredibly flexible. You can make them for a gathering, game day, or just for yourself—because let’s be honest, snacks should be enjoyed daily!
What You'll Need to Make Garlic Dill Oyster Crackers
Let’s gather our ingredients:
1 tablespoon roasted garlic powder: This adds depth and a savory flavor to the crackers.
2/3 cup neutral vegetable oil: Helps the seasoning coat each cracker evenly.
¼ teaspoon onion powder: This introduces a subtle savory-sweet note.
½ teaspoon flaky kosher salt: This elevates the overall taste.
1½ – 2 tablespoons dried dill weed: Brings a fresh herby punch to the flavor profile.
18 oz oyster crackers: The perfect crunchy base for this recipe.
How to Make Garlic Dill Oyster Crackers
Now that we have our ingredients, let’s dive into the preparation. This is where the real fun begins!
Step-by-Step Instructions
Step 1: Preheat Your Oven
Before you do anything, preheat your oven to 325°F (165°C). A hot oven is crucial for achieving that perfect crunch.
Step 2: Prepare the Seasoning Mixture
In a mixing bowl, combine the roasted garlic powder, onion powder, dried dill weed, and flaky kosher salt. Stir the dry ingredients well to ensure an even distribution of flavors.
Step 3: Add the Oil
Pour in the vegetable oil. This is where your concoction starts to come together. Mix until the ingredients form a smooth paste.
Step 4: Coat the Crackers
In a large bowl, combine the oyster crackers and the seasoning mixture. Toss gently but thoroughly to ensure every cracker is coated with the flavorful mix. It’s key to cover them all so none feel left out!
Step 5: Spread on a Baking Sheet
Line a baking sheet with parchment paper for easy cleanup, and pour your coated oyster crackers onto the sheet. Spread them out evenly, allowing each cracker enough space for the magic to happen.
Step 6: Bake
Pop your baking sheet into the preheated oven. Bake for about 12–15 minutes. This will get them crispy and lightly golden. Give them a stir halfway through baking to ensure even crunchiness.
Step 7: Cool and Store
Once out of the oven, allow the crackers to cool on the baking sheet. Once cooled, transfer them to an airtight container, where they can last for several days. Trust me; they won’t last that long once you start munching!
Tips for Making Delicious Garlic Dill Oyster Crackers
Customize Your Flavor: Feel free to experiment by adding other spices. Consider paprika for a hint of smokiness or cayenne pepper for some heat.
Watch the Baking Time: Always keep an eye on your crackers as they bake. They can go from perfect to overdone in a matter of minutes.
Use Fresh Dill If Available: If you have fresh dill on hand, it provides an even bolder flavor profile. Just chop it finely and use it in place of dried.
Store Properly: Ensure you store them in a completely airtight container to maintain their crunch. Any exposure to air can change their texture.
Double the Batch: It’s easy to make a larger batch, especially if you're serving a crowd. Just double the ingredient amounts and bake them on two sheets.
How to Store Leftovers
If you end up with any leftovers (though I highly doubt it), keep your garlic dill oyster crackers in an airtight container at room temperature. They stay fresh and crunchy for up to a week—though they are typically devoured long before that.
Nutrition Information
These crackers can be a healthy snacking option. Here's an approximate breakdown based on typical servings:
Serving Size: About 1 ounce (approximately 25 crackers)
Calories: About 140 calories
Total Fat: 8g
Saturated Fat: 1g
Cholesterol: 0mg
Sodium: 200mg
Total Carbohydrates: 15g
Dietary Fiber: 1g
Sugars: 0g
Protein: 2g
These nutritional values can vary based on specific brands and the exact amount of seasonings used, but they provide a good foundation for assessing their health benefits.
How Would I Recommend Serving Garlic Dill Oyster Crackers?
Here are a few great recommendations:
As a Crunchy Element in Salads: Pair these crackers with your favorite salad for some texture. The garlic and dill flavor contrasts wonderfully with fresh vegetables.
With Soups: Perfect alongside a steaming bowl of tomato, clam chowder, or lentil soup. Just toss a handful on top!
As a Snack with Cheese: Serve alongside slices of sharp cheddar or creamy brie for a delightful contrast of textures.
At Parties: They’ll shine on a charcuterie board, complementing meats, cheeses, and fruits.
What Alternatives Can You Use for the Ingredients if Not Available?
Sometimes, you might not have every ingredient on hand. Here are some alternatives:
Garlic Powder: Fresh garlic minced finely can work in place of garlic powder. Just use about 2-3 cloves for the same flavor impact.
Vegetable Oil: Olive oil can be a wonderful alternative. It adds a different flavor profile and is generally a healthier option.
Onion Powder: If you're out of onion powder, finely chopped shallots can provide a similar taste.
Dill Weed: If you don’t have dried dill, try using fresh parsley for a different, yet fresh, herbal note.
Conclusion
And there you have it—the delightful journey of garlic dill oyster crackers. These snacks are not only easy to prepare but also incredibly gratifying to eat. Whether you pair them with soups or serve them at a gathering, they are sure to impress.
I hope you find joy in making these crackers as much as I do. They remind us that even simple ingredients can create something unforgettable. So roll up your sleeves, mix those flavors, and let your taste buds thrive! Happy snacking!
Garlic dill oyster crackers are more than just snacks; they are a testament to the delightful experiences that food can create. I remember the first time I encountered them. I was at a friend's gathering, and these little crunchy bites captured my heart. They disappeared quickly, and I found myself rifling through the bowl for just one more. It got me thinking: if I love them this much, how does one make them?
As a registered dietitian and food blogger, I’ve always been fascinated by the culinary potential of simple ingredients. Garlic dill oyster crackers hit all my sweet spots. They are easy to make, bursting with flavor, and the ideal companion to a variety of dishes. Let’s take a deeper look at what these delightful snacks entail.
Ingredients
Let’s gather our ingredients:
1tablespoon roasted garlic powder: This adds depth and a savory flavor to the crackers.
2/3cup neutral vegetable oil: Helps the seasoning coat each cracker evenly.
¼teaspoon onion powder: This introduces a subtle savory-sweet note.
½teaspoon flaky kosher salt: This elevates the overall taste.
11½ –2tablespoons dried dill weed: Brings a fresh herby punch to the flavor profile.
18oz oyster crackers: The perfect crunchy base for this recipe.
Instructions
1
Now that we have our ingredients, let’s dive into the preparation. This is where the real fun begins!
2
Step-by-Step Instructions
Step 1: Preheat Your Oven
3
Before you do anything, preheat your oven to 325°F (165°C). A hot oven is crucial for achieving that perfect crunch.
Step 2: Prepare the Seasoning Mixture
4
In a mixing bowl, combine the roasted garlic powder, onion powder, dried dill weed, and flaky kosher salt. Stir the dry ingredients well to ensure an even distribution of flavors.
Step 3: Add the Oil
5
Pour in the vegetable oil. This is where your concoction starts to come together. Mix until the ingredients form a smooth paste.
Step 4: Coat the Crackers
6
In a large bowl, combine the oyster crackers and the seasoning mixture. Toss gently but thoroughly to ensure every cracker is coated with the flavorful mix. It’s key to cover them all so none feel left out!
Step 5: Spread on a Baking Sheet
7
Line a baking sheet with parchment paper for easy cleanup, and pour your coated oyster crackers onto the sheet. Spread them out evenly, allowing each cracker enough space for the magic to happen.
Step 6: Bake
8
Pop your baking sheet into the preheated oven. Bake for about 12–15 minutes. This will get them crispy and lightly golden. Give them a stir halfway through baking to ensure even crunchiness.
Step 7: Cool and Store
9
Once out of the oven, allow the crackers to cool on the baking sheet. Once cooled, transfer them to an airtight container, where they can last for several days. Trust me; they won’t last that long once you start munching!
Nutrition Facts
Servings 20
Amount Per Serving
% Daily Value *
Total Fat8g13%
Saturated Fat1g5%
Sodium200mg9%
Total Carbohydrate15g5%
Dietary Fiber1g4%
Protein2g4%
* Percent Daily Values are based on a 2,000 calorie diet. Your daily value may be higher or lower depending on your calorie needs.
Note
Customize Your Flavor: Feel free to experiment by adding other spices. Consider paprika for a hint of smokiness or cayenne pepper for some heat.
Watch the Baking Time: Always keep an eye on your crackers as they bake. They can go from perfect to overdone in a matter of minutes.
Use Fresh Dill If Available: If you have fresh dill on hand, it provides an even bolder flavor profile. Just chop it finely and use it in place of dried.
Store Properly: Ensure you store them in a completely airtight container to maintain their crunch. Any exposure to air can change their texture.
Double the Batch: It’s easy to make a larger batch, especially if you're serving a crowd. Just double the ingredient amounts and bake them on two sheets.
Keywords:
Garlic Dill Oyster Crackers
Lauren Miller
Registered Dietitian & Food Enthusiasts
Lauren Miller is a Maryland-based registered dietitian and the creator of Comfort Food Meals, where she shares easy, nutritious, and heartwarming recipes inspired by her love for comforting, home-cooked meals. With a focus on using wholesome ingredients, Lauren aims to balance indulgence with nutrition in every dish. Her goal is to help others create meals that nourish both body and soul.