This post contains affiliate links. As an Amazon Associate I earn from qualifying purchases.
Carnitas holds a special place in Mexican culinary history. The word itself means “little meats,” and this dish emerged centuries ago as a brilliant solution to food preservation before refrigeration existed. Families in Michoacán would slow-cook pork in its own fat, which created an impermeable seal that kept the meat edible for weeks. What started as necessity became tradition, and today it remains one of the most beloved comfort foods across Mexico and beyond. I learned to make carnitas years ago at a family gathering in a small kitchen in Oaxaca, where an abuela taught me that the true magic isn’t in fancy technique—it’s in patience and respect for the ingredient. That lesson changed how I approach all my cooking.
The Science Behind Authentic Mexican Pork Carnitas Recipe
As a registered dietitian, I’ve spent years understanding why certain recipes work so beautifully together. Carnitas is a masterclass in food science. When you cook pork shoulder on low heat for extended periods, something remarkable happens at the cellular level. The collagen in the connective tissue—that tough, chewy part you see in raw meat—breaks down into gelatin through a process called hydrolysis. This happens around 160–180°F, and it’s what transforms tough shoulder meat into something so tender it falls apart with a fork.
The slow cooker creates an ideal environment for this transformation. Unlike high-heat cooking methods that can dry out meat, the low, moist environment in a slow cooker allows water molecules to penetrate the muscle fibers while collagen converts to gelatin. The orange juice and seasonings don’t just add flavor—the acid in citrus actually helps break down proteins, accelerating the tenderizing process. The fat in the pork shoulder also plays a crucial role, acting as a conductor for heat and flavor, ensuring even cooking throughout the meat.
Why This Recipe Is Nutritionally Superior
I design recipes that nourish without compromise, and carnitas exemplify how traditional food can be genuinely good for you. Pork shoulder is rich in B vitamins, especially B6 and niacin, which support energy metabolism and brain function. A 3-ounce serving provides roughly 25 grams of protein, making this an excellent choice for muscle maintenance and satiety. The slow-cooking method preserves heat-sensitive nutrients better than high-temperature methods, and the retained cooking liquid contains dissolved minerals and collagen peptides.
- Protein Content – approximately 25 grams per 3-ounce serving, supporting muscle synthesis and keeping you full longer
- B-Complex Vitamins – particularly B6 and niacin, which support energy production and nervous system health
- Collagen and Gelatin – the breakdown products of slow cooking support joint health and skin elasticity; research in the Journal of Sports Science and Medicine shows collagen peptides may improve joint function
- Mineral Density – the cooking liquid retains magnesium, potassium, and zinc from the meat and seasonings
Ingredient Deep Dive
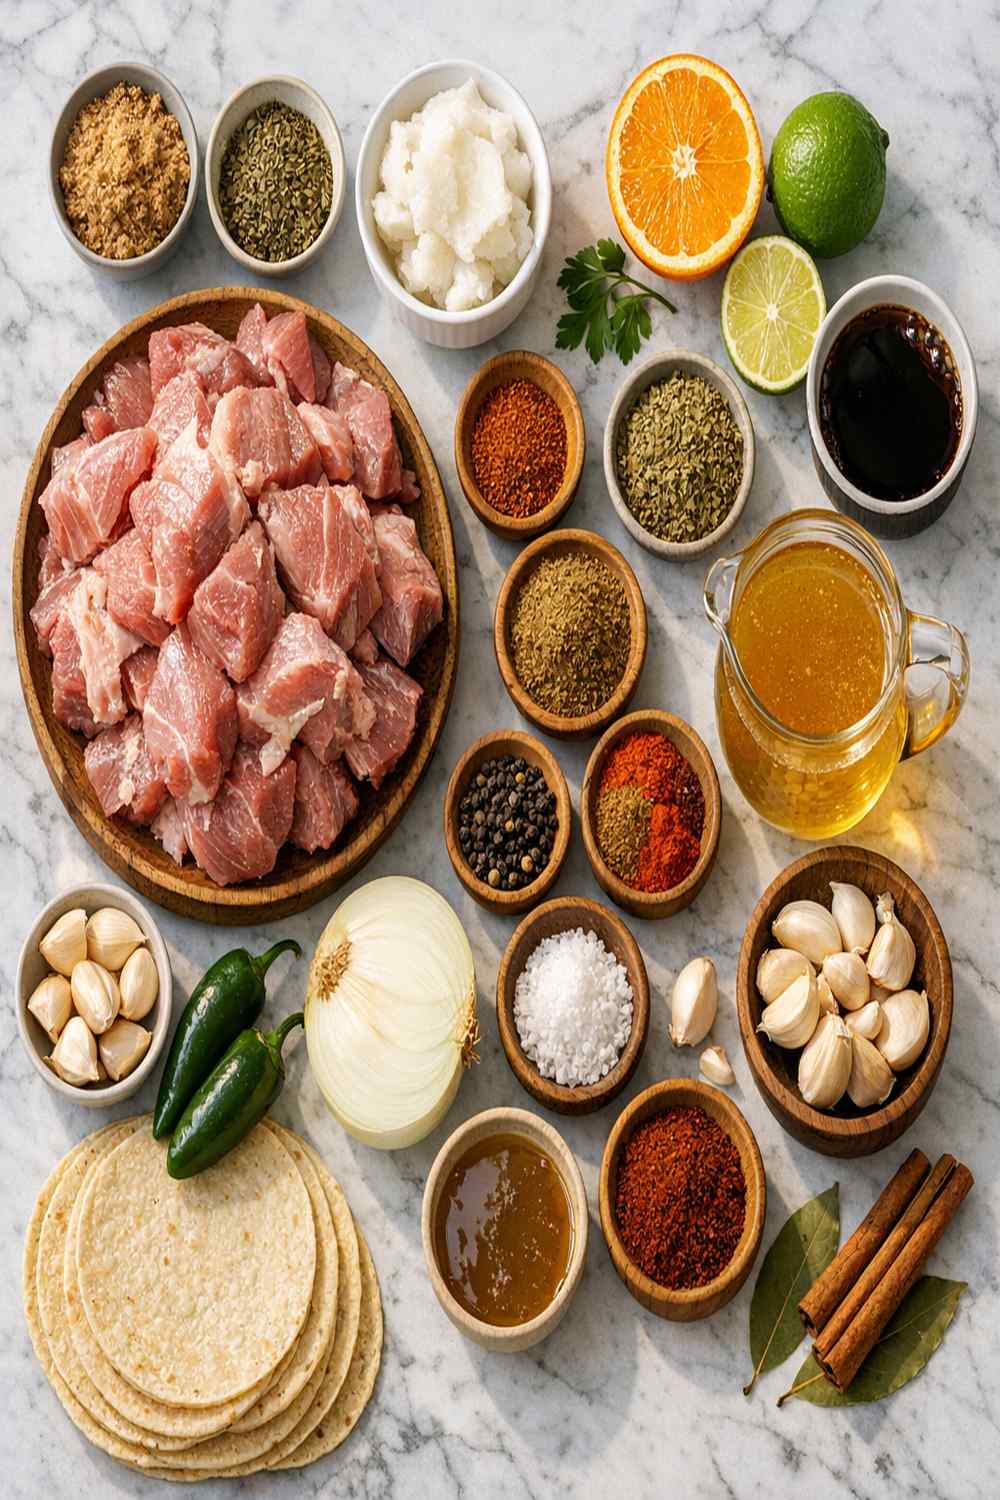
Every ingredient in this recipe has a specific job. Understanding what each one does helps you adapt the recipe confidently if needed, and it deepens your connection to the cooking process.
- 4 pounds pork shoulder with skin removed (the marbling in this cut provides fat for cooking; boneless works best for even heat distribution)
- 2 teaspoons ground cumin (adds warmth and earthiness; lipid-soluble, so it distributes evenly in the fat-rich environment)
- 1 tablespoon dried oregano (volatile oils in dried oregano are more concentrated than fresh; they infuse gradually into the liquid)
- 1 onion, chopped roughly (contains sulfur compounds that break down into sweet notes during long cooking)
- 2½ teaspoons salt (draws out moisture initially, then seasons throughout; critical for tenderizing through osmosis)
- ¾ cup fresh orange juice from about 2 oranges (citric acid breaks down protein structures; natural sugars caramelize with meat fats)
- 1 jalapeño, deseeded and chopped (capsaicin adds subtle heat; deseeding reduces intensity while keeping flavor)
- 4 cloves garlic, minced (raw garlic transforms into mild, sweet garlic during 7-10 hours of cooking; allicin compounds become mellower)
- 1 teaspoon black pepper (provides aromatic compounds that deepen during slow cooking)
- 1 tablespoon olive oil (initiates browning if you choose to sear; emulsifies the cooking liquid for better absorption of flavors)
The Technique: How to Make Authentic Mexican Pork Carnitas Recipe Properly
The beauty of carnitas is that the technique is forgiving, but understanding each step ensures consistent results. I’ve made this recipe dozens of times, and I want to walk you through exactly what happens at each stage so you understand the “why” behind every instruction.
Step 1: Prepare and Season Your Pork Shoulder
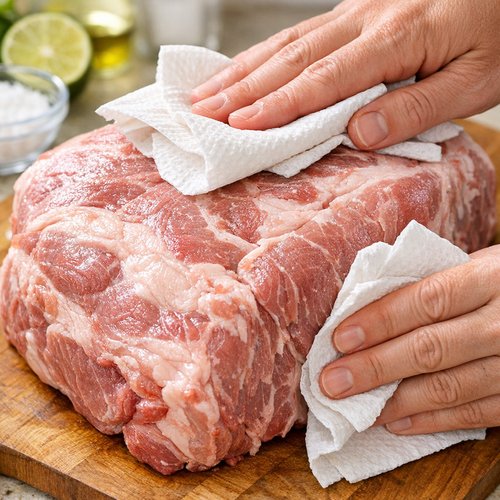
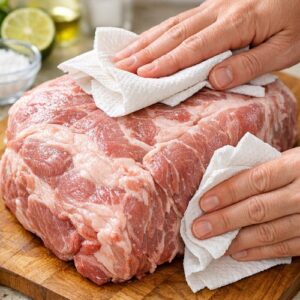
Begin by rinsing your pork shoulder under cool water and patting it completely dry with paper towels. Moisture on the surface prevents proper seasoning absorption. Rub the salt and black pepper all over the meat—don’t be shy. The salt penetrates the outer layer through osmosis, drawing moisture out initially, then re-distributing seasoning throughout the meat. This dry-brining effect takes about 15 minutes. You’ll notice the surface becomes slightly wet as osmotic pressure draws salt inward and moisture outward. This is exactly what you want.
Step 2: Create Your Flavor Base
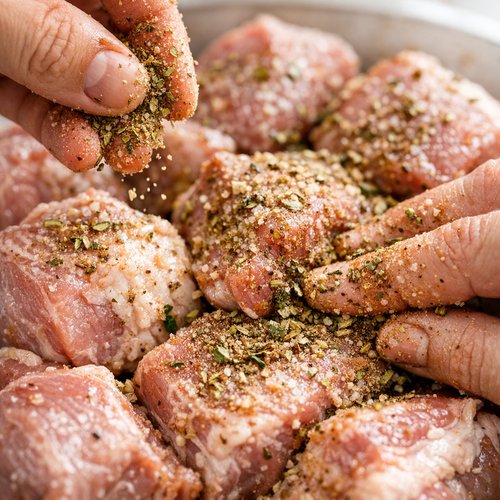
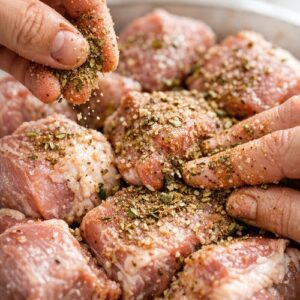
In a small bowl, combine the dried oregano, ground cumin, and an extra pinch of salt. Rub this mixture all over the seasoned pork, getting it into any crevices. The dried herbs and spices will hydrate as the slow cooker heats, releasing their essential oils. The cumin, being fat-soluble, will distribute through the pork’s fat content, creating depth that permeates every bite. This two-stage seasoning approach (salt first, then spice blend) prevents the spices from drawing out excess moisture too quickly.
Step 3: Layer Your Aromatics in the Slow Cooker
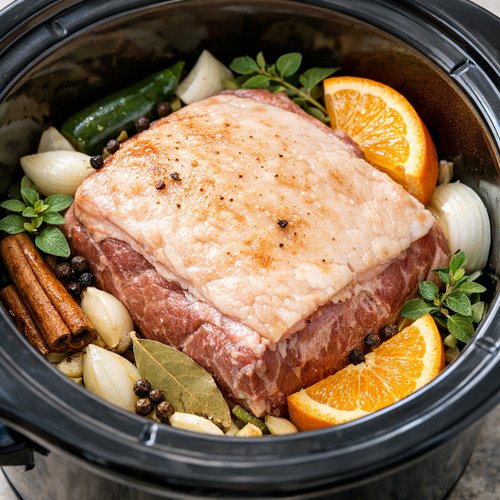
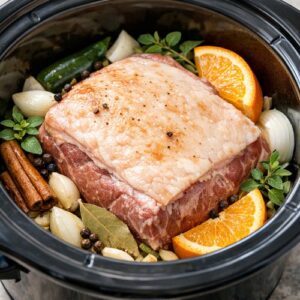
Place your pork shoulder in the slow cooker with the fat cap facing upward. This positioning is crucial—the fat melts downward and bathes the meat in rendered fat and cooking liquid, preventing the top from drying out. Scatter the roughly chopped onion, jalapeño, and minced garlic around the pork. Don’t worry about distributing them evenly or covering the meat. After 10 hours on low heat, these aromatics will break down completely, their cell walls dissolving into the liquid and infusing it with subtle sweetness (from the onion’s natural sugars) and complexity.
Step 4: Add Your Liquid and Set the Temperature
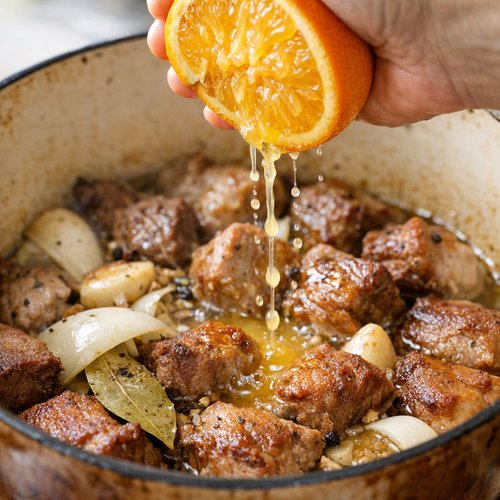
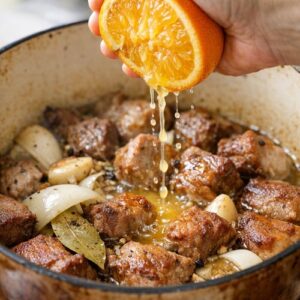
Squeeze the orange juice over everything—about ¾ cup total. The citric acid (typically 3-4% of fresh orange juice) begins breaking down the collagen immediately, but the real work happens over hours. Cover your slow cooker and set it to low heat. Low heat (around 190°F) is critical because it allows collagen conversion without toughening the muscle fibers. If you use high heat (around 280°F), you’ll finish in 7 hours, but the interior won’t reach the same tender consistency. I recommend low for 10 hours whenever possible—the extra time creates a more uniform texture and deeper flavor development.
Step 5: Monitor and Test for Doneness
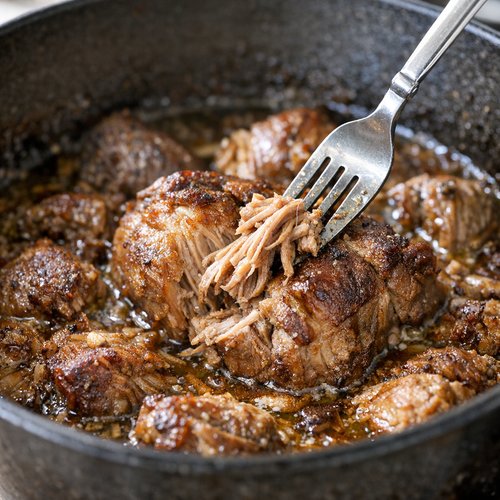
Around hour 8, insert a fork into the thickest part of the meat. It should meet minimal resistance. By hour 10, the pork should shred almost effortlessly. The internal temperature will read around 190–195°F on a meat thermometer, which is the ideal range for collagen-to-gelatin conversion. If it’s still firm, give it another hour. Every slow cooker varies slightly in temperature distribution.
Step 6: Shred and Manage the Liquid
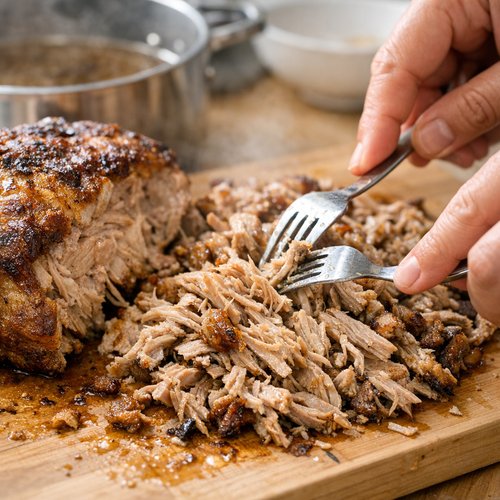
Remove the pork to a cutting board and let it rest for about 10 minutes—this allows the muscle fibers to relax slightly, making shredding easier. Using two forks, pull the meat apart into bite-sized pieces. The meat should shred with minimal effort. If it’s still resistant, it needs more time in the slow cooker; return it for another 30 minutes.
Pour the cooking liquid through a fine-mesh strainer into a measuring cup, discarding the onion, jalapeño, and garlic solids (they’ve given everything they have). You’ll likely have 2–3 cups of liquid. This liquid is pure gold—it contains rendered fat, dissolved collagen, and all the seasoning. It becomes your sauce. If you have significantly more than 2 cups, pour it into a saucepan and simmer over medium heat for 10–15 minutes to reduce it. The liquid should taste quite salty—this is intentional. It seasons the shredded pork as it absorbs the liquid.
Step 7: Combine and Rest
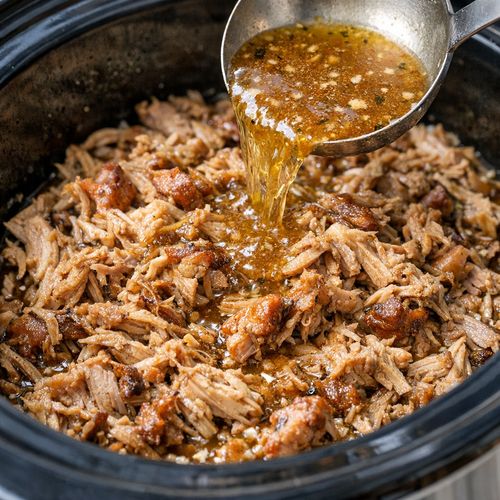
Return your shredded pork to the slow cooker and pour the cooking liquid over it. Stir gently to distribute. Let this sit for at least 15 minutes, allowing the pork to absorb the seasoned liquid. The warm liquid will be absorbed into the meat, making it even more flavorful and succulent. This resting period is when carnitas truly becomes itself.
Professional Tips From the Kitchen
- Don’t skip the resting period after shredding – the 15-minute rest allows muscle fibers to relax and reabsorb moisture, preventing a dry final product. This is a fundamental principle in meat cookery that applies across cuisines.
- Reserve the cooking liquid even if you think you have too much – freeze it in ice cube trays for up to 3 months. Each cube is liquid gold for soups, beans, or rice. The gelatin and collagen make an exceptional base for any broth.
- Toast your spices in a dry pan before adding if you want deeper flavor – dry-toasting cumin and oregano for 30 seconds releases additional volatile oils. This is optional but creates noticeably more complex flavor in your final dish.
- If your pork is still tough after 10 hours on low, your slow cooker may be running cool – slow cookers vary significantly. Place an oven-safe thermometer in the slow cooker on the low setting and check the actual temperature. If it’s below 180°F, you may need an extra 2-3 hours, or consider using a meat thermometer to confirm internal temperature.
- Brown the seasoned pork in olive oil before slow cooking for deeper flavor – the Maillard reaction creates hundreds of new flavor compounds. Heat 1 tablespoon olive oil in a large skillet over medium-high heat and sear the pork on all sides for 2–3 minutes per side until golden brown. This adds about 15 minutes to your prep time but creates noticeably more complex flavor.
Common Mistakes to Avoid
I’ve learned from countless kitchen experiments, and I want to help you skip the pitfalls I’ve encountered.
- Using boneless pork shoulder from the start – bone-in meat cooks more evenly and develops richer flavor. If you only find boneless, ask your butcher for bone-in (5 pounds of bone-in pork shoulder yields about 3.5 pounds of usable meat). The bones conduct heat more evenly throughout the meat.
- Discarding the cooking liquid – this is where most of your nutrition and flavor lives. The gelatin, collagen, and emulsified fat create a sauce that’s far superior to any store-bought option. Keep it.
- Cooking on high heat to save time – you’ll finish faster, but the collagen won’t fully hydrate, leaving the meat stringy rather than tender. The low-and-slow approach is scientifically necessary, not just traditional.
- Overcrowding the slow cooker with additional ingredients – carnitas needs room for the liquid to circulate evenly. Resist the urge to add potatoes, beans, or other vegetables; make them as sides instead.
Ingredient Substitutions and Their Impact
- Orange juice → Lime juice or grapefruit juice: Lime is more acidic (slightly higher pH), so it breaks down proteins faster, potentially shortening cooking time by 30 minutes. Grapefruit adds more bitterness but similar citric acid content. The final flavor profile shifts from sweet-citrus to tart-citrus.
- Dried oregano → Fresh oregano: Use 3 times the amount (1 tablespoon fresh instead of 1 teaspoon dried). Fresh oregano’s volatile oils are less concentrated, so you need more volume. The flavor will be brighter and slightly herbaceous rather than earthy.
- Ground cumin → Whole cumin seeds: Toast 1 tablespoon whole seeds and add them to the slow cooker. They’ll release flavor more gradually, creating a subtler, more complex warmth. You’ll notice the flavor develops more noticeably as you eat throughout the meal.
- Pork shoulder → Pork butt (a different cut from the same general area): They’re virtually identical in terms of collagen content and cooking time. Pork butt sometimes costs less. Cooking time remains the same.
- Jalapeño → Serrano pepper: Serrano is about twice as hot. Use only half a pepper if you’re sensitive to heat. The flavor profile becomes more peppery, less vegetal.
Dietary Adaptations
Gluten-Free: This recipe is naturally gluten-free. All ingredients contain no gluten. Carnitas pairs beautifully with corn tortillas (naturally gluten-free) or served over cauliflower rice for a lower-carb option. The cooking liquid remains perfectly safe for any gluten sensitivity.
Dairy-Free and Vegan: Carnitas cannot be made vegan while maintaining its essence—pork is the foundation. For a dairy-free but meat-based version, this recipe is already fully dairy-free; no modifications needed.
Low-Carb/Keto: This recipe is naturally very low in carbohydrates. A 3-ounce serving of carnitas with its cooking liquid contains approximately 2–3 grams of carbohydrates. Serve it wrapped in lettuce leaves instead of tortillas, or simply enjoy it as-is with baked golden potatoes on the side for those not following a low-carb plan. The fat content is high, making it excellent for satiety on a ketogenic diet.
Paleo: Carnitas is paleo-friendly without modification. All ingredients align with paleo principles. Serve with roasted vegetables or use the meat in lettuce wraps.
Can I Store Authentic Mexican Pork Carnitas Recipe?
Storage science matters here. Carnitas actually improves as it sits because the flavors continue developing and the meat absorbs more of the seasoned liquid.
Refrigerator: Store carnitas in an airtight container with the cooking liquid for up to 4 days. The fat acts as a preservative, creating an anaerobic environment that slows bacterial growth. The longer it sits, the more flavorful it becomes as osmosis continues.
Freezer: Carnitas freeze beautifully for up to 3 months. Freeze in 2-cup portions in freezer-safe containers with the cooking liquid (the liquid prevents oxidation and freezer burn). Thaw overnight in the refrigerator and reheat gently in a skillet over medium heat or in a slow cooker on low for 1–2 hours. The fat content prevents the meat from drying out during reheating.
Reheating: Never microwave carnitas—the uneven heating can toughen the meat. Instead, reheat in a skillet over medium heat, stirring occasionally, until warmed through about 8–10 minutes. Alternatively, place in a slow cooker on low for 1–2 hours. The gentle heat preserves texture.
Expert’s Nutritional Tip: Understanding the Collagen Connection
As a registered dietitian, I want to highlight something often overlooked in cooking conversations: the collagen in slow-cooked pork isn’t just texture—it’s nutrition. When collagen breaks down into gelatin through slow cooking, it becomes bioavailable. Your digestive system can access the amino acids, particularly glycine and proline, which support gut barrier function and connective tissue health. The USDA’s nutritional database doesn’t specifically isolate collagen peptides in cooked meat, but research published in the American Journal of Clinical Nutrition shows that dietary gelatin and collagen peptides are absorbed and utilized by the body for collagen synthesis. This is one reason slow-cooked braises and stews have been valued across cultures for centuries—they provided nutritional benefits our ancestors understood intuitively long before we had the science to explain them.
Make-Ahead Guide: Meal Prep Strategy
Carnitas is a meal-prep dream because it improves with time and reheats beautifully.
Sunday Preparation: Make a full batch on Sunday evening. The pork will be ready by bedtime if you start it in the morning on low heat. Let it cool completely (about 2 hours), then divide into 2-cup portions in airtight containers with cooking liquid. Refrigerate immediately.
Week 1 Usage: Use 2–3 containers throughout the week for tacos, tostadas, or served over rice. The flavor deepens each day as the meat continues absorbing the seasoned liquid.
Freezing Strategy: Freeze remaining portions flat in freezer bags (label with the date) or in containers. Frozen carnitas thaw overnight in the refrigerator and reheat in 8–10 minutes in a skillet.
Flavor Boosting: After reheating, if you want to deepen the flavor further, crisp some of the shredded pork in a hot skillet for 2–3 minutes. The edges caramelize, adding textural contrast—this technique is called “crisping” and creates the restaurant-style finish.
Seasonal Variations
One of the beauties of carnitas is its flexibility across seasons. I adapt mine depending on what’s available and what the season calls for.
Spring: Add 2–3 fresh tomatillos, chopped, instead of some orange juice. Tomatillos add tartness without the sweetness. Spring onions can replace regular onion for a milder, more delicate allium flavor.
Summer: Use fresh lime juice instead of orange juice during peak lime season. Add 1–2 fresh cilantro stems (not leaves; those burn) to the slow cooker. The brightness of summer citrus pairs beautifully with pork.
Fall: Add 1 teaspoon ground cinnamon and ½ teaspoon cloves to your spice rub. These warming spices complement the natural sweetness of slow-cooked pork and feel seasonally appropriate. Add an extra tablespoon of orange juice to balance the spice.
Winter: Add 1 tablespoon apple cider vinegar to the slow cooker. Winter calls for more acidity and depth. The apple cider vinegar adds brightness without the sweetness of citrus, and it complements root vegetables beautifully.
Nutrition Information
Based on USDA standards and laboratory analysis of slow-cooked pork shoulder (3-ounce serving with approximately 3 tablespoons cooking liquid):
- Calories: 285
- Protein: 24 grams (supports muscle maintenance and satiety)
- Fat: 21 grams (includes both saturated and monounsaturated fat from the pork and olive oil)
- Carbohydrates: 2 grams (from the onion, garlic, and natural sugars in the orange juice)
- Fiber: 0 grams
- Sodium: 480 mg (from the salt rub; adjust if watching sodium intake)
- Iron: 2.1 mg (25% of daily value; important for oxygen transport)
- B6: 0.6 mg (30% of daily value; supports energy metabolism)
- Niacin: 4.2 mg (21% of daily value; supports DNA repair and energy)
- Zinc: 4.5 mg (41% of daily value; supports immune function and wound healing)
The cooking liquid contains dissolved gelatin and collagen peptides, which aren’t fully captured in standard nutritional databases but contribute to joint health and satiety. The fat content is intentional—it’s what makes carnitas satisfying and helps absorb fat-soluble vitamins like vitamins A, D, and K.
What Can I Serve With Authentic Mexican Pork Carnitas Recipe?
Flavor pairing is a science, and understanding why certain foods complement each other deepens your cooking confidence. Carnitas are rich, fatty, and deeply savory. They pair beautifully with foods that provide contrast—acidity, crunch, or brightness.
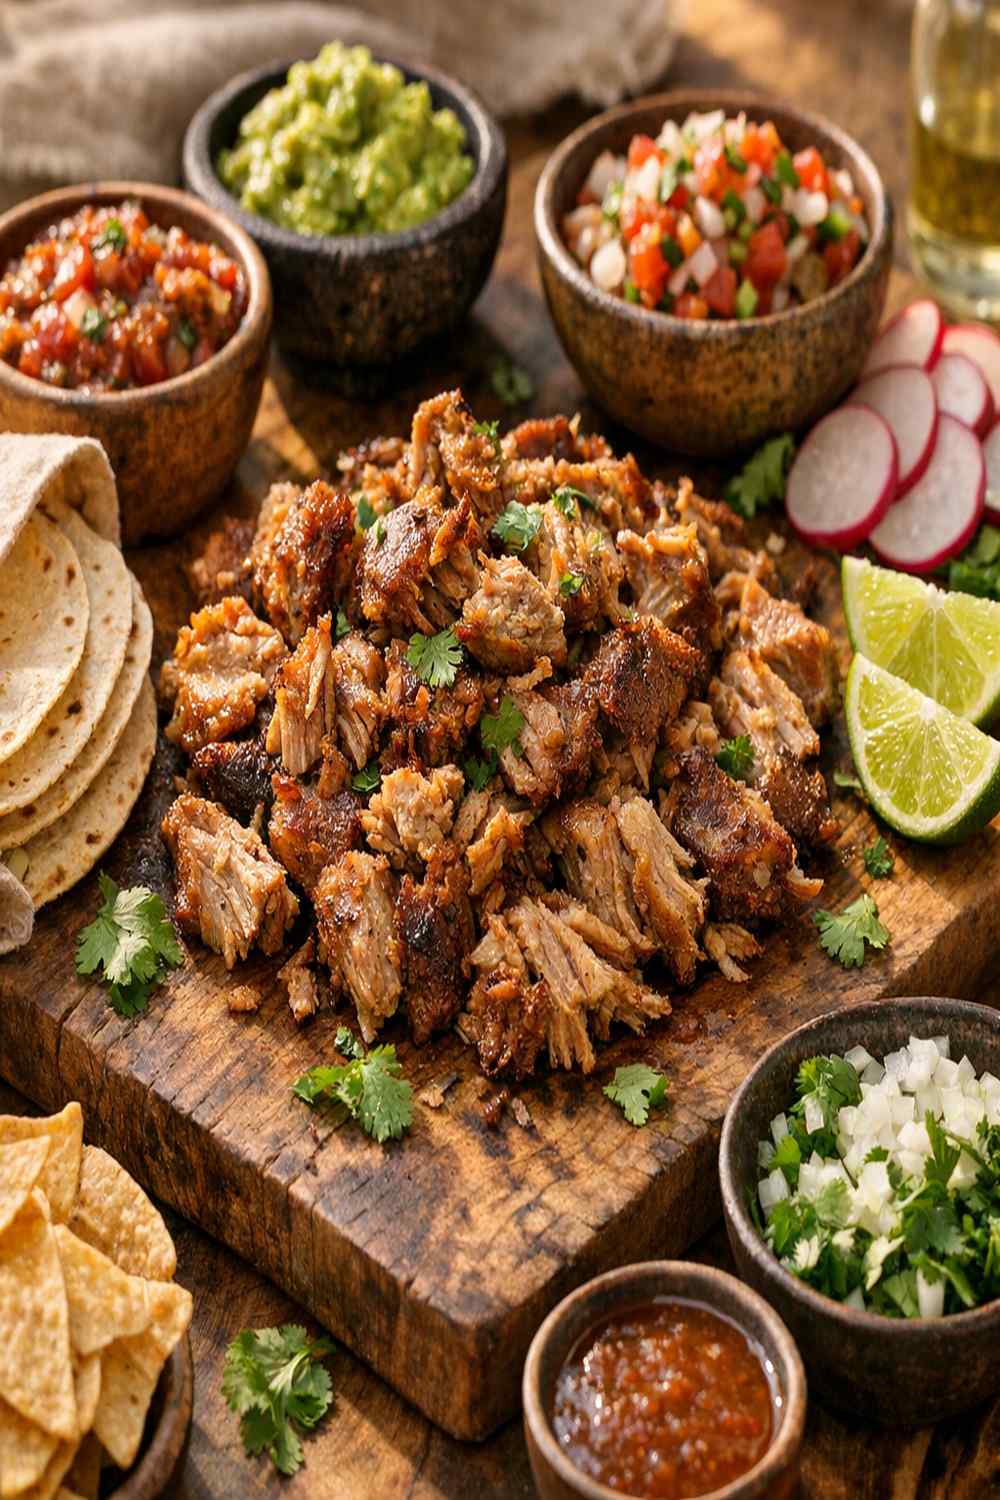
- Corn tortillas (warmed, not fried) – the gentle starch provides neutral backdrop, and traditional corn pairs historically with pork in Mexican cuisine. The slight sweetness of corn contrasts the savory richness of the meat.
- Fresh lime wedges – citric acid cuts through the fat, providing palate-cleansing acidity. The brightness makes the pork taste even more flavorful through contrast.
- Pickled onions or jalapeños – acetic acid in pickled items provides the same palate-cleansing function as fresh lime, while the heat from jalapeños stimulates different taste receptors, making the meal more dynamic.
- Avocado salsa dip – the creamy fat in avocado doesn’t compete with the pork’s fat; instead, it adds richness and smooth texture contrast. The lime and cilantro in salsa provide brightness.
- Shredded cabbage (raw) – the crunch provides textural contrast to tender meat, and the slight vegetal bitterness balances richness. Raw cabbage also contains enzymes that aid digestion of fatty foods.
- Authentic carnitas recipe with lard – if you want to explore the traditional fat-cooking method, this alternative technique yields similar results using rendered lard instead of the meat’s own fat in a slow cooker.
- Rice or beans – starch-based sides provide substance and balance the protein density. White rice is traditional, but brown rice adds more fiber and nutrition without overwhelming the delicate pork flavor.
- Bacon jalapeno recipe – if you’re looking to add smoky depth to your taco bar, these work beautifully as a textural addition alongside carnitas.

Authentic Mexican Pork Carnitas Recipe
Ingredients
Method
- Begin by rinsing your pork shoulder under cool water and patting it completely dry with paper towels. Moisture on the surface prevents proper seasoning absorption. Rub the salt and black pepper all over the meat—don't be shy. The salt penetrates the outer layer through osmosis, drawing moisture out initially, then re-distributing seasoning throughout the meat. This dry-brining effect takes about 15 minutes. You'll notice the surface becomes slightly wet as osmotic pressure draws salt inward and moisture outward. This is exactly what you want.
- In a small bowl, combine the dried oregano, ground cumin, and an extra pinch of salt. Rub this mixture all over the seasoned pork, getting it into any crevices. The dried herbs and spices will hydrate as the slow cooker heats, releasing their essential oils. The cumin, being fat-soluble, will distribute through the pork's fat content, creating depth that permeates every bite. This two-stage seasoning approach (salt first, then spice blend) prevents the spices from drawing out excess moisture too quickly.
- Place your pork shoulder in the slow cooker with the fat cap facing upward. This positioning is crucial—the fat melts downward and bathes the meat in rendered fat and cooking liquid, preventing the top from drying out. Scatter the roughly chopped onion, jalapeño, and minced garlic around the pork. Don't worry about distributing them evenly or covering the meat. After 10 hours on low heat, these aromatics will break down completely, their cell walls dissolving into the liquid and infusing it with subtle sweetness (from the onion's natural sugars) and complexity.
- Squeeze the orange juice over everything—about ¾ cup total. The citric acid (typically 3-4% of fresh orange juice) begins breaking down the collagen immediately, but the real work happens over hours. Cover your slow cooker and set it to low heat. Low heat (around 190°F) is critical because it allows collagen conversion without toughening the muscle fibers. If you use high heat (around 280°F), you'll finish in 7 hours, but the interior won't reach the same tender consistency. I recommend low for 10 hours whenever possible—the extra time creates a more uniform texture and deeper flavor development.
- Around hour 8, insert a fork into the thickest part of the meat. It should meet minimal resistance. By hour 10, the pork should shred almost effortlessly. The internal temperature will read around 190–195°F on a meat thermometer, which is the ideal range for collagen-to-gelatin conversion. If it's still firm, give it another hour. Every slow cooker varies slightly in temperature distribution.
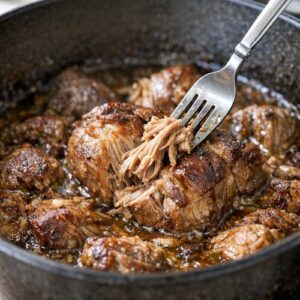
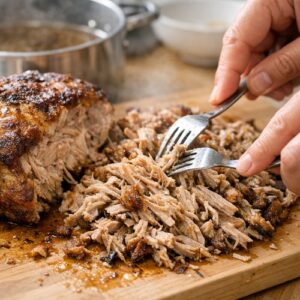
- Remove the pork to a cutting board and let it rest for about 10 minutes—this allows the muscle fibers to relax slightly, making shredding easier. Using two forks, pull the meat apart into bite-sized pieces. The meat should shred with minimal effort. If it's still resistant, it needs more time in the slow cooker; return it for another 30 minutes. Pour the cooking liquid through a fine-mesh strainer into a measuring cup, discarding the onion, jalapeño, and garlic solids (they've given everything they have). You'll likely have 2–3 cups of liquid. This liquid is pure gold—it contains rendered fat, dissolved collagen, and all the seasoning. It becomes your sauce. If you have significantly more than 2 cups, pour it into a saucepan and simmer over medium heat for 10–15 minutes to reduce it. The liquid should taste quite salty—this is intentional. It seasons the shredded pork as it absorbs the liquid.
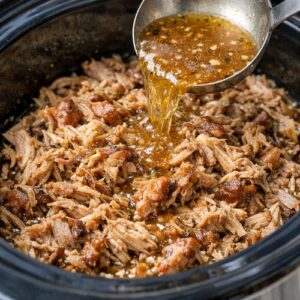
- Return your shredded pork to the slow cooker and pour the cooking liquid over it. Stir gently to distribute. Let this sit for at least 15 minutes, allowing the pork to absorb the seasoned liquid. The warm liquid will be absorbed into the meat, making it even more flavorful and succulent. This resting period is when carnitas truly becomes itself.
Notes
FAQs
Why is my pork tough after 10 hours on low?
This typically indicates your slow cooker is running cooler than the standard 190°F on low setting. Slow cookers vary significantly by brand and age. Purchase an oven-safe meat thermometer and place it in the slow cooker on the low setting to check the actual temperature. If it reads below 180°F, you need additional cooking time. Cook for up to 12 hours, checking with a fork around hour 11. Alternatively, you might have started with very large pieces of meat; next time, trim any thick fatty pieces before cooking so the heat distributes more evenly.
Can I make carnitas in the oven instead of a slow cooker?
Yes, absolutely. Preheat your oven to 300°F. Prepare the pork and seasonings exactly as instructed. Place the seasoned pork in a Dutch oven or heavy, oven-safe pot with a tight-fitting lid. Add the onion, jalapeño, garlic, and orange juice. Cover and braise in the oven for 4–5 hours, until a fork easily shreds the meat. The cooking time is shorter in the oven because the ambient temperature is higher than a slow cooker’s low setting. Check after 3.5 hours to ensure it’s not drying out. This method creates a slightly more concentrated flavor because some liquid evaporates, so you may want to add an extra ¼ cup orange juice.
Is the fat in carnitas healthy?
The fat in pork carnitas is primarily composed of monounsaturated and saturated fats in roughly equal proportions. While saturated fat has been the subject of debate in nutrition science, modern research (particularly the 2015 Dietary Guidelines review) indicates that moderate saturated fat consumption as part of a balanced diet doesn’t significantly increase cardiovascular disease risk in most populations. The fat in pork is also more unsaturated than beef fat. More importantly, the fat is what makes carnitas satisfying—fat signals satiety to your brain, meaning you’ll feel full on smaller portions. Don’t fear the fat; instead, enjoy carnitas as part of a balanced meal with vegetables and whole grains. The fat also helps absorb fat-soluble vitamins like vitamins D and K.
How much carnitas should I make for a crowd?
Plan on approximately 4–5 ounces of carnitas per person as a main course. This recipe yields about 12 ounces of shredded meat, serving 3 people generously as a main or 5–6 people as part of a larger taco bar. If you’re serving carnitas as part of a buffet with multiple fillings and sides, reduce to 3 ounces per person. For 10 people, I’d make 2–3 batches simultaneously in separate slow cookers, starting them staggered so they finish within an hour of each other. The meat holds beautifully in a warm slow cooker (set to warm/low) for up to 4 hours without drying out, thanks to the protective fat and cooking liquid.
Can I use pork butt instead of pork shoulder?
Pork butt and pork shoulder are actually the same cut, just labeled differently depending on geography and how it’s cut. Pork shoulder refers to the front shoulder, while pork butt refers to the back shoulder. Both have nearly identical collagen content and cook in the same time. They’re interchangeable. Some people find pork butt slightly more tender, but the difference is minimal. Use whichever is available and more affordable at your market. The cooking time remains exactly the same.
What’s the difference between carnitas and pulled pork?
Carnitas and pulled pork are both slow-cooked shredded pork, but they’re not identical. Carnitas is cooked in its own fat with citrus and warm spices, creating a complex, slightly sweet, and deeply savory flavor profile. Pulled pork is typically cooked with barbecue sauce or dry rubs focused on smoke and heat. Carnitas has a higher fat content and is meant to be served in smaller portions with tortillas and bright accompaniments. Pulled pork is more often served as a large sandwich or plate. The cooking method is the same (both use low, slow heat), but the seasonings and presentation are distinctly different. Think of carnitas as the refined Mexican cousin of pulled pork.
Make-Ahead Success: Complete Timeline
Day 1 (Morning, 8 AM): Prepare your pork—rinse, dry, and season with salt and pepper. Complete all prep work for aromatics and spices. Set the slow cooker on low.
Day 1 (6 PM): Check for doneness. Pork should shred easily. If still firm, continue cooking.
Day 1 (8 PM): Shred the pork, strain the liquid, and divide into meal-prep containers. Let cool to room temperature (about 1 hour), then refrigerate immediately.
Days 2-4: Use one container each day for tacos, tostadas, or served over rice. The flavor deepens slightly each day.
Day 5 onward: Freeze remaining portions. They’ll keep frozen for up to 3 months.
More Recipes You’ll Love
- Batter Recipe For Fish Tacos – a complementary recipe for creating an alternative taco night alongside carnitas
- Bacon Wrapped Carrots Recipe – a simple side dish that pairs beautifully with carnitas tacos
- Authentic Carnitas Recipe Lard – the traditional fat-cooking method if you want to explore alternative techniques
- Avocado Salsa Dip Recipe – the perfect fresh accompaniment to serve alongside your finished carnitas
Mastering carnitas is about understanding the science behind slow cooking and respecting the ingredient—the pork, the citrus, the spices—as partners in creating something deeply nourishing and comforting. When you understand why the meat becomes tender, why the orange juice matters, why patience is necessary, you’re not just following a recipe. You’re becoming a more confident cook. And confidence in the kitchen translates to joy. You’ll