This post contains affiliate links. As an Amazon Associate I earn from qualifying purchases.
I’ll never forget the Easter when my uncle carved into a ham so dry it practically crumbled on the plate. My grandmother’s face fell. She’d spent hours planning that meal, and one wrong move in the oven had undone her work. That moment taught me something I’ve carried into my practice as a dietitian: ham doesn’t have to be a gamble. When you understand the science behind moisture and glaze adhesion, you transform a centerpiece from risky to reliable.
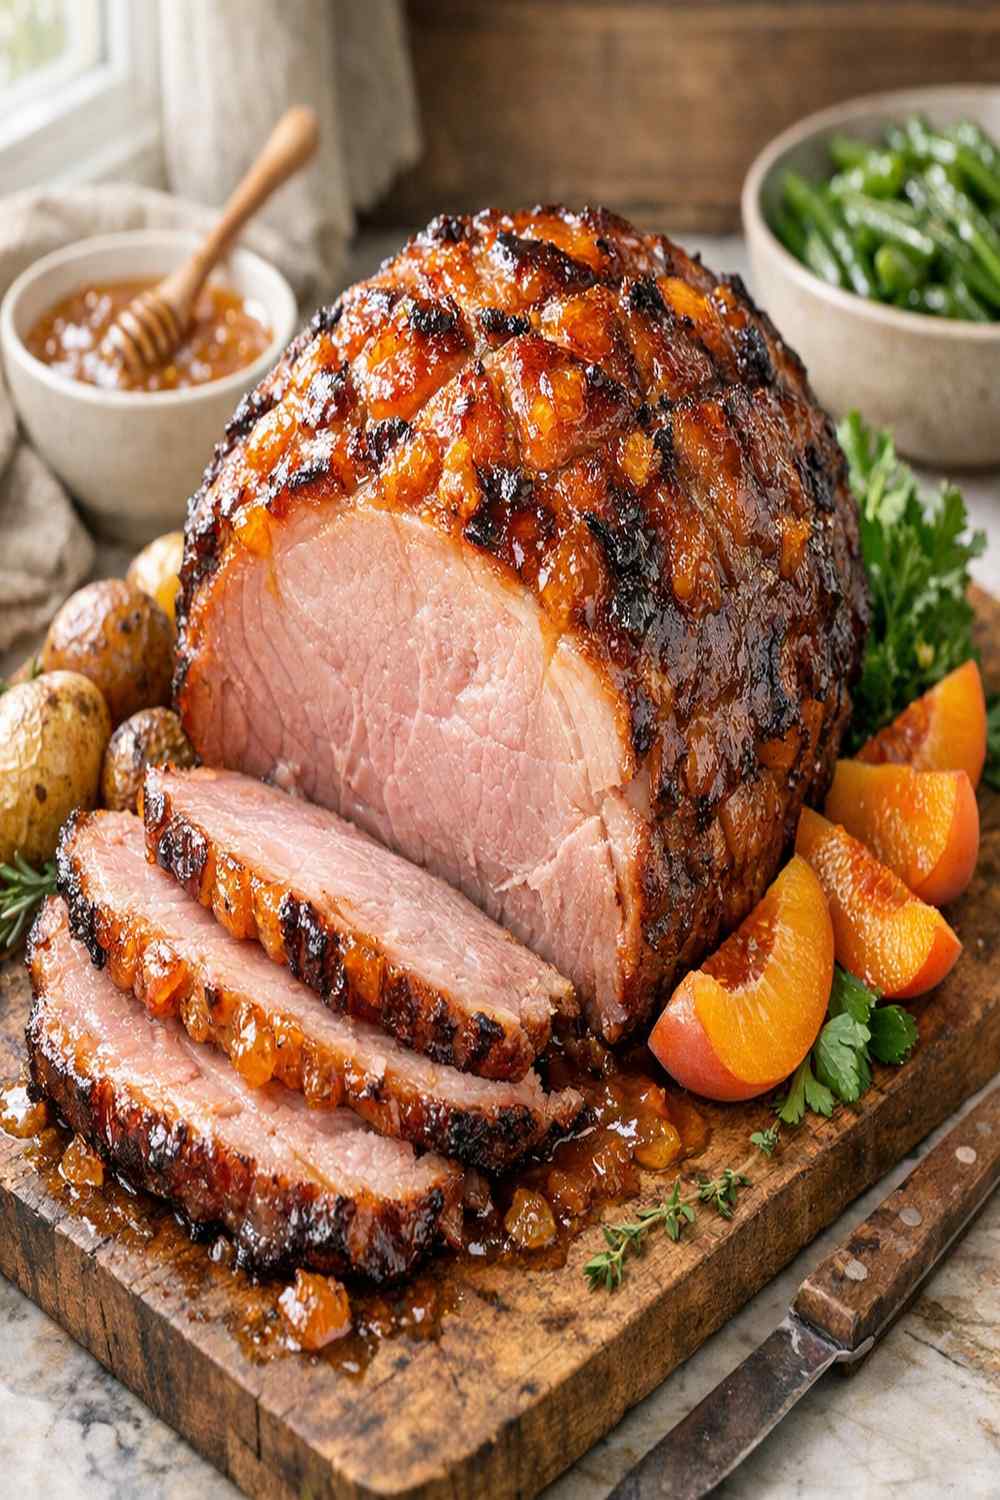
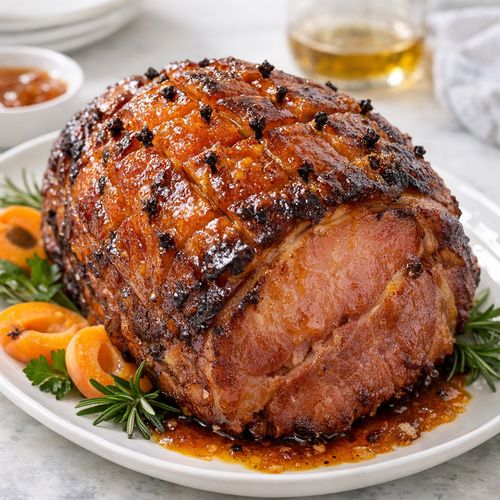
This apricot glazed ham recipe is my answer to that problem. It’s the dish I make for my own family gatherings now—the one that arrives at the table glistening, moist, and impossible to mess up. The secret isn’t complicated. It’s about timing, temperature control, and a glaze that actually does what it promises. I’ve refined this version through countless family dinners, and I’m sharing exactly how you can nail it too.
Why Your Ham Turns Out Dry (And How to Fix It)
Here’s what usually happens: you bake a ham, follow the package instructions, and hope for the best. But somewhere between the oven and the table, something goes wrong. The edges dry out. The glaze either burns or sits on top like shellac instead of caramelizing into the meat. The slices fall apart instead of holding together.
I’ve worked with hundreds of clients who’ve experienced this, and the problem always boils down to two mistakes. First, most people don’t protect the ham during the initial bake, so the outside moisture evaporates before the inside heats through. Second, they apply the glaze too early or at the wrong temperature, which causes it to cook off instead of create that gorgeous, sticky exterior.
This recipe fixes both issues through a two-stage baking method. You cover the ham for the majority of the bake to trap steam and maintain moisture, then uncover it at high heat for just 10 minutes to set and caramelize the glaze. It’s the difference between guessing and knowing exactly what’s going to happen.
What Makes This Apricot Glazed Ham Recipe Different?
The magic here isn’t in some exotic ingredient. It’s in understanding how the glaze actually adheres and browns. Most recipes treat the glaze as decoration—something you brush on and hope sticks. This approach treats it as an active component of the cooking process.
The glaze combines apricot preserves (which bring natural sweetness and body), mustard (which adds complexity and helps the mixture cling to the meat), brown sugar (for depth and caramelization), and warm spices like cinnamon and cloves (which echo the flavors your brain associates with holiday comfort). When you bring this mixture to a boil before applying it, you’re doing two things: activating the pectin in the preserves so it sets properly, and creating a base thick enough to stay where you put it.
The two-application method—half before the long bake, half at the high-heat finish—ensures the glaze builds in layers. The first coat infuses into the ham’s exterior during the slow cook. The second coat, applied to an already-warm surface, sets quickly and develops that caramelized sheen you see in restaurant kitchens.
Before You Start: What You Need to Know
Two critical pieces of knowledge separate success from frustration with this recipe. Most home cooks skip these details, and that’s where things fall apart.
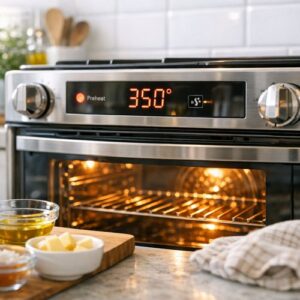
- Your ham is already fully cooked—your job is to warm it and build flavor. This changes everything about timing and temperature. You’re not trying to bring an internal temperature up from unsafe to safe. You’re gently reheating while developing exterior texture. This means lower initial oven temperature (350°F instead of 425°F) and longer, gentler cooking.
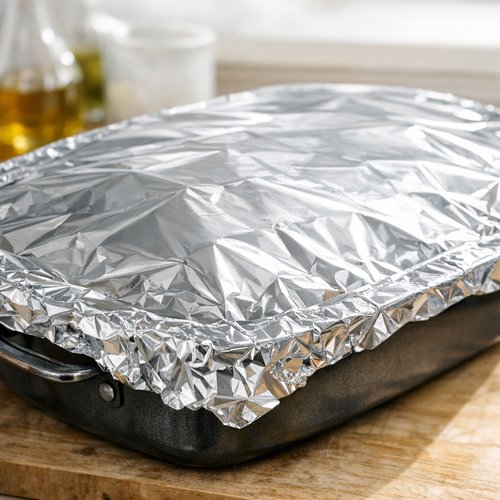
- Foil coverage is not optional—it’s the barrier between moist ham and kitchen disaster. Without it, even a fully cooked ham will dry out because its surface moisture evaporates faster than the inside can absorb heat. Many recipes mention foil as a suggestion. I’m telling you it’s non-negotiable for the first 90 minutes.
The Ingredients
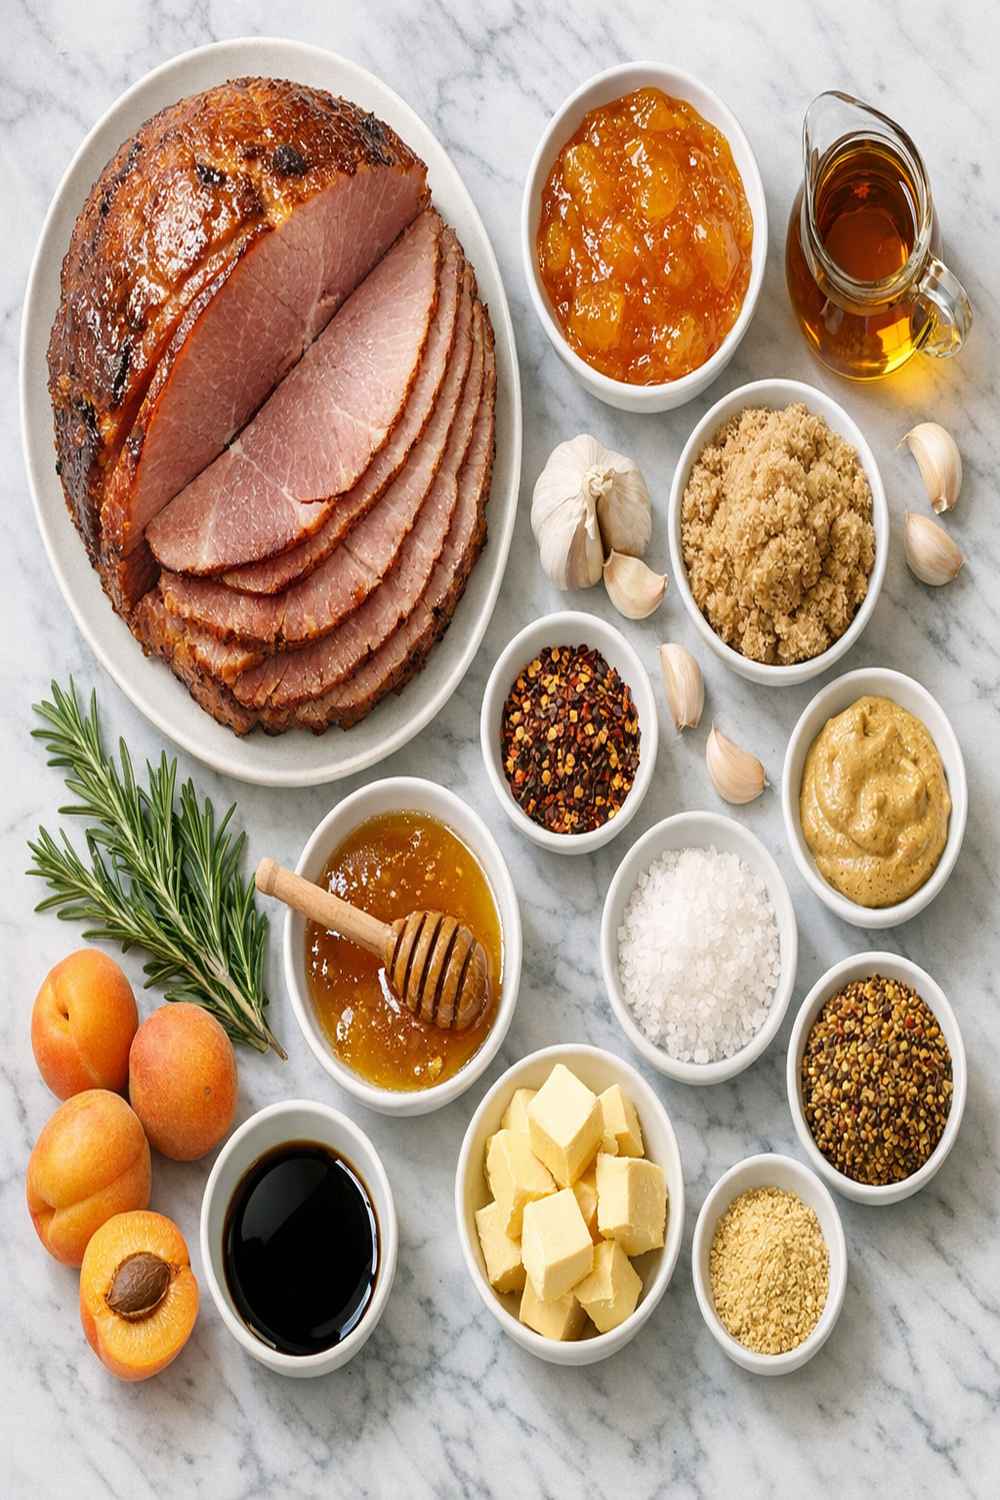
I want to explain why each ingredient earned a spot in this glaze. This isn’t a random collection. Each component does specific work, and understanding that work helps you troubleshoot if something isn’t quite right.
- 1 cup apricot preserves (the pectin in preserves provides body and helps the glaze set; fruit juice or jam won’t work the same way)
- ½ cup brown sugar (adds molasses flavor and deepens caramelization beyond what preserves alone can achieve)
- ⅛ teaspoon ground cinnamon (bridges the gap between savory and sweet, familiar to most palates from holiday baking)
- 1 boneless spiral ham, 10 pounds, fully cooked and pre-sliced (the spiral slicing creates more surface area for glaze absorption and makes carving unnecessary—a major time-saver on busy days)
- ⅛ teaspoon ground cloves (warm spice that echoes apricot and adds sophistication without announcing itself)
- 2 tablespoons unsalted butter (optional, but adds richness to any remaining glaze served on the side)
- 1 tablespoon Dijon mustard (cuts sweetness, adds savory complexity, and acts as an emulsifier to help the glaze cling to meat)
Expert’s Nutritional Tip: This recipe delivers substantial protein—about 35 grams per serving—from the ham itself, plus minerals like selenium and phosphorus. The brown sugar and preserves account for added sugars, so I balance this meal with vegetable-forward sides and skip additional sugared sides. Think roasted Brussels sprouts instead of candied yams, and you’ve built a plate with real nutritional balance.
Step-by-Step: How to Make Apricot Glazed Ham Without Fail
I’m going to walk you through this method like I’m standing beside you in your kitchen. Each step has a reason, and understanding that reason helps you adjust if your oven runs hot or your ham is a different size.
Step 1: Prepare Your Workspace and Preheat
Set your oven to 350°F and let it come to full temperature before you put anything inside. This takes about 15 minutes and matters more than most home cooks realize. An oven that hasn’t fully preheated creates hot spots and uneven cooking.
While the oven heats, pull your ham from the refrigerator and let it sit on the counter for 20 minutes. I know the package says it’s ready to go, but cold meat doesn’t heat as evenly as meat closer to room temperature. This small step prevents the edges from overcooking while the center stays lukewarm.
Line a roasting pan or 9×13 baking dish with foil for easier cleanup, then place the ham cut-side down in the pan. The flat, cut surface should rest against the pan bottom. This prevents the ham from rolling and allows better contact with the pan’s heat.

Step 2: Make and Prepare Your Glaze
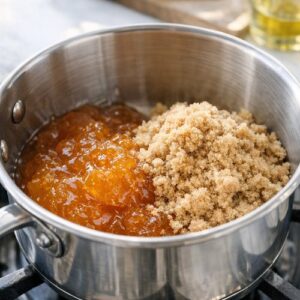
While the ham sits, prepare the glaze so it’s ready the moment you need it. Pour 1 cup apricot preserves into a small saucepan. Add ½ cup brown sugar, 1 tablespoon Dijon mustard, ⅛ teaspoon ground cinnamon, and ⅛ teaspoon ground cloves. Whisk everything together until no sugar lumps remain and the mixture is smooth.
Set the saucepan over medium-high heat and stir occasionally. Bring the glaze to a boil—this activates the pectin in the preserves and helps the mixture set when it hits the warm ham. You’ll see it bubble and thicken slightly. Once it reaches a rolling boil, remove it from the heat immediately and set it aside. It will thicken more as it cools.
The reason for boiling: cold or room-temperature glaze applied to ham will slide off during the bake. The heat thickens it just enough to cling and begin caramelizing.

Step 3: Apply the First Glaze Coat
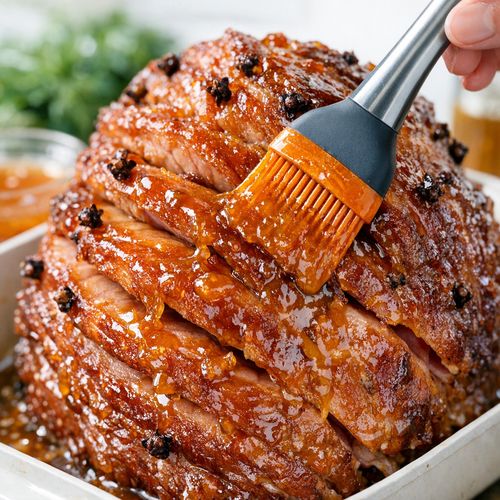
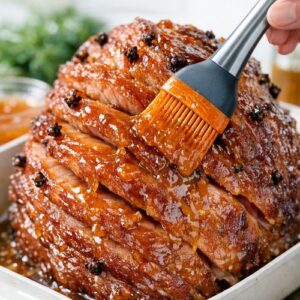
Using a pastry brush or silicone brush, apply half of your warm glaze to the ham’s surface. Don’t be shy here—work it into the spaces between the spiral slices. The glaze needs contact with the meat itself, not just the exterior surface. This is where much of the flavor infuses. Brush methodically, making sure every section gets coated.
You’re applying half your glaze now because the extended bake would cause a single thick application to burn or dry out. Two applications—one now, one at the end—give you better results and more control.
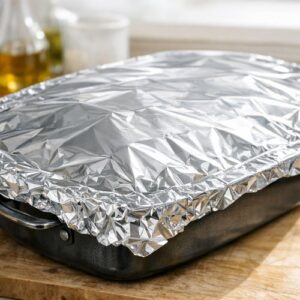
Step 4: Cover and Bake Low and Slow
Tear off a large piece of aluminum foil—you need enough to cover the entire pan with overlap. Place it tightly over the roasting pan. This is the barrier that keeps moisture in and prevents the surface from drying out. Press the foil gently against the edges so steam can’t escape around the sides.
Place the covered ham in your preheated 350°F oven. Set a timer for 90 minutes. Don’t open the oven door during this time. Every time you open it, you release steam and extend cooking time. Trust the process.
Why 90 minutes? A 10-pound ham heats through completely in about 9-10 minutes per pound at 350°F, but you’re going longer to allow the glaze flavors to penetrate and the meat to reach an even temperature throughout. The package instructions usually say 12-15 minutes per pound, so 90 minutes for a 10-pounder falls right in that range.
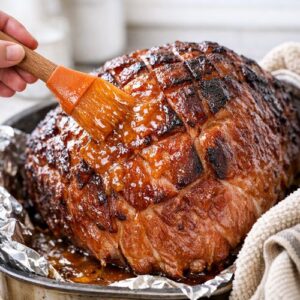
Step 5: Apply the Second Glaze and Brown
When the timer goes off, carefully remove the ham from the oven. The foil and pan will be hot—use thick kitchen towels and move slowly to avoid steam burns. Peel back the foil gently, pulling it toward you so the steam vents away from your face and hands.
Brush the remaining glaze over the top and sides of the ham. This is your finish coat, the one that will set and caramelize. Don’t worry about the glaze that has already cooked into the ham—you’re adding a fresh layer on top.
Increase the oven temperature to 425°F. Return the ham to the oven uncovered. Bake for exactly 10 minutes. Watch it during these final minutes—you want the glaze to turn golden brown and glossy, not dark brown or black. If it’s browning too fast, you can cover loosely with foil for the last 2-3 minutes, but most ovens will give you perfect results with no cover.

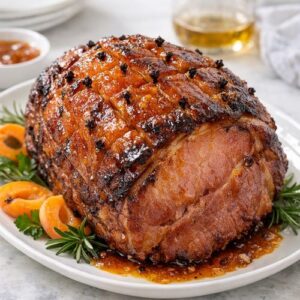
Step 6: Rest and Serve
Remove the ham from the oven and transfer it to a serving platter. Let it rest for 15 minutes before slicing or serving. This isn’t just tradition—resting allows the meat’s internal temperature to equalize and helps it retain moisture when you cut into it.
After 15 minutes, slice and serve. If you saved a small amount of glaze, warm it gently and drizzle it over individual servings. The ham is fully cooked and safe to eat immediately, but that resting period genuinely improves the texture and makes slicing easier.
The Most Common Mistakes (And How to Avoid Them)
- Skipping the boil step for the glaze. If you heat the glaze gently or serve it cold, it won’t set properly and will slide right off the ham during baking. You need that rolling boil to activate the pectin and thicken it enough to cling. Always bring it to a boil and let it cool slightly before applying.
- Removing the foil too early. Some recipes suggest removing foil after 60 minutes to let the exterior brown. Resist this. Uncovering the ham before 90 minutes allows critical surface moisture to evaporate, and you’ll end up with a dry exterior. The high-heat finish at the end handles browning just fine—trust the two-stage method.
- Using glaze that’s too thick or too thin. If your glaze seems too thin when you finish boiling it, you may have used jam instead of preserves, or your heat was too low and it didn’t reach a rolling boil. Bring it back to a boil for another minute. If it’s too thick and doesn’t brush smoothly, stir in 1 tablespoon water at a time until it reaches a pourable consistency.
How Do I Know When It’s Done?
Timing gives you a framework, but sensory cues tell you the true story. After the 90-minute covered bake, the ham should feel hot to the touch on the outside (but wait for steam to dissipate before testing). When you peel back the foil, you should smell the apricot and spices—that aroma means the glaze is beginning to infuse.
After the 10-minute high-heat finish, the glaze should be glossy and golden brown, not dark or burnt. If you touch it gently with the back of a spoon (wait a few seconds for it to cool slightly), it should feel slightly tacky and set, not liquid. The ham should be steaming when you first pull it from the oven.
If you have a meat thermometer, the internal temperature should read 140°F. Since this ham is pre-cooked, you’re aiming for warm throughout, not a specific food-safety temperature. But 140°F is a reliable target that means the inside is heated through and the flavors have had time to develop.
Troubleshooting: When Things Go Wrong
- The glaze burned black or turned bitter. This usually means your oven runs hot or you left it uncovered during the long bake. If this happens mid-cook, don’t panic. Remove the ham, wipe off the burned glaze with a damp cloth, brush on fresh glaze, re-cover with foil, and return it to a 325°F oven for the remaining time. You haven’t lost the dish—you’ve just adjusted mid-course.
- The ham seems dry even though you followed the steps. This can happen if your ham was already partially dried out before cooking, or if your oven temperature was running consistently higher than 350°F. For next time: choose a ham with good marbling, verify your oven temperature with a separate thermometer, and don’t skip the foil coverage. If it’s happening now, drizzle warm glaze over slices just before serving to add back moisture and flavor.
- The glaze isn’t sticking to the ham and keeps dripping off. The glaze wasn’t brought to a full boil before applying, so it’s too thin. Make a fresh batch, bring it to a boil, and apply it to the already-warm ham for that final high-heat stage. The warm ham surface will help it set faster.
Can I Store Apricot Glazed Ham?
Yes, and it actually improves over a day or two. Wrap any leftover ham tightly in plastic wrap or foil and refrigerate it for up to 4 days. The flavors continue to develop as it sits, and the glaze firms up into a more cohesive coating.
For reheating, don’t use the oven—it will dry things out further. Instead, slice the ham and warm it gently in a skillet over medium-low heat with a splash of water or broth, about 3-4 minutes per side. Or place slices on a microwave-safe plate, cover with a damp paper towel, and microwave in 30-second intervals until warm. The moisture from the paper towel prevents drying.
You can also freeze leftover ham for up to 2 months. Wrap it well in plastic wrap, then foil, then place it in a freezer bag. When you’re ready to use it, thaw it overnight in the refrigerator and reheat using the skillet method above.
Make-Ahead Guide: You can prepare the glaze the morning of your event and store it in an airtight container in the refrigerator. When you’re ready to bake, simply reheat it over medium heat for 2-3 minutes, then bring it back to a rolling boil before applying. You can also take the ham out of the refrigerator 30 minutes before cooking to bring it closer to room temperature, which shaves about 10 minutes off your total bake time.
Nutrition Information
Per serving (approximately 3-4 ounces of ham with glaze): 190 calories, 8 grams fat, 2 grams saturated fat, 24 grams protein, 12 grams carbohydrates, 2 grams fiber, 1,250 mg sodium. Based on USDA Food Composition Database for cured ham and apricot preserves.
The protein content—24 grams per serving—makes this a satisfying centerpiece. Ham is rich in B vitamins, particularly niacin and B6, which support energy metabolism. The apricot glaze contributes antioxidants, particularly beta-carotene, which your body converts to vitamin A. The sodium is elevated because cured ham is naturally high in salt, so pairing this with a low-sodium side dish like plain roasted vegetables helps balance the meal.
What Can I Serve With Apricot Glazed Ham?
This ham works beautifully with sides that either complement its sweet-savory profile or balance it with brightness and vegetables. Since the ham is rich and slightly sweet, I tend to choose sides that are either acidic (like vinegar-based preparations) or very green and fresh.
- Roasted Brussels sprouts with balsamic vinegar – the acidity cuts through the ham’s richness and adds textural contrast. Try the method from my Balsamic Vinegar Pork Chop Recipe, which works equally well for vegetables.
- Simple green salad with sharp vinaigrette – a palate cleanser that makes each slice of ham taste fresh again
- Creamy potato salad or scalloped potatoes – comfort food pairing that feels festive and traditional
- Dinner rolls or cornbread – something to soak up the glaze’s remaining flavor on plates. I love serving this menu with Authentic Manicotti Recipe as a hearty vegetable-based side that rounds out a meal.
- Glazed carrots or roasted root vegetables – echo the ham’s sweetness while adding nutrition
- Fresh pineapple or citrus fruit salad – brings brightness and enzyme activity that aids digestion of the rich meat
For a complete holiday menu, I pair this ham with two sides (one green, one starch), fresh bread, and finish with a lighter dessert like this simple cake that won’t leave guests feeling overly full.
Apricot Glazed Ham Recipe
Ingredients
Method
- Set your oven to 350°F and let it come to full temperature before you put anything inside. This takes about 15 minutes and matters more than most home cooks realize. An oven that hasn't fully preheated creates hot spots and uneven cooking. While the oven heats, pull your ham from the refrigerator and let it sit on the counter for 20 minutes. I know the package says it's ready to go, but cold meat doesn't heat as evenly as meat closer to room temperature. This small step prevents the edges from overcooking while the center stays lukewarm. Line a roasting pan or 9x13 baking dish with foil for easier cleanup, then place the ham cut-side down in the pan. The flat, cut surface should rest against the pan bottom. This prevents the ham from rolling and allows better contact with the pan's heat.
- While the ham sits, prepare the glaze so it's ready the moment you need it. Pour 1 cup apricot preserves into a small saucepan. Add ½ cup brown sugar, 1 tablespoon Dijon mustard, ⅛ teaspoon ground cinnamon, and ⅛ teaspoon ground cloves. Whisk everything together until no sugar lumps remain and the mixture is smooth. Set the saucepan over medium-high heat and stir occasionally. Bring the glaze to a boil—this activates the pectin in the preserves and helps the mixture set when it hits the warm ham. You'll see it bubble and thicken slightly. Once it reaches a rolling boil, remove it from the heat immediately and set it aside. It will thicken more as it cools. The reason for boiling: cold or room-temperature glaze applied to ham will slide off during the bake. The heat thickens it just enough to cling and begin caramelizing.
- Using a pastry brush or silicone brush, apply half of your warm glaze to the ham's surface. Don't be shy here—work it into the spaces between the spiral slices. The glaze needs contact with the meat itself, not just the exterior surface. This is where much of the flavor infuses. Brush methodically, making sure every section gets coated. You're applying half your glaze now because the extended bake would cause a single thick application to burn or dry out. Two applications—one now, one at the end—give you better results and more control.
- Tear off a large piece of aluminum foil—you need enough to cover the entire pan with overlap. Place it tightly over the roasting pan. This is the barrier that keeps moisture in and prevents the surface from drying out. Press the foil gently against the edges so steam can't escape around the sides. Place the covered ham in your preheated 350°F oven. Set a timer for 90 minutes. Don't open the oven door during this time. Every time you open it, you release steam and extend cooking time. Trust the process. Why 90 minutes? A 10-pound ham heats through completely in about 9-10 minutes per pound at 350°F, but you're going longer to allow the glaze flavors to penetrate and the meat to reach an even temperature throughout. The package instructions usually say 12-15 minutes per pound, so 90 minutes for a 10-pounder falls right in that range.
- When the timer goes off, carefully remove the ham from the oven. The foil and pan will be hot—use thick kitchen towels and move slowly to avoid steam burns. Peel back the foil gently, pulling it toward you so the steam vents away from your face and hands. Brush the remaining glaze over the top and sides of the ham. This is your finish coat, the one that will set and caramelize. Don't worry about the glaze that has already cooked into the ham—you're adding a fresh layer on top. Increase the oven temperature to 425°F. Return the ham to the oven uncovered. Bake for exactly 10 minutes. Watch it during these final minutes—you want the glaze to turn golden brown and glossy, not dark brown or black. If it's browning too fast, you can cover loosely with foil for the last 2-3 minutes, but most ovens will give you perfect results with no cover.
- Remove the ham from the oven and transfer it to a serving platter. Let it rest for 15 minutes before slicing or serving. This isn't just tradition—resting allows the meat's internal temperature to equalize and helps it retain moisture when you cut into it. After 15 minutes, slice and serve. If you saved a small amount of glaze, warm it gently and drizzle it over individual servings. The ham is fully cooked and safe to eat immediately, but that resting period genuinely improves the texture and makes slicing easier.
Notes
FAQs
Can I make this recipe with a bone-in ham instead of boneless?
Absolutely. A bone-in ham will take slightly longer—add 15-20 minutes to your covered bake time since bones conduct heat more slowly than boneless meat. Start checking the internal temperature at 100 minutes instead of 90. The glaze application and high-heat finish remain exactly the same. Bone-in hams often have more flavor because the bone contributes collagen and minerals during cooking, so this is actually a great option if your butcher has it available.
What if my ham is smaller or larger than 10 pounds?
For every pound under 10, subtract about 9 minutes from the covered bake time. For every pound over 10, add 9 minutes. So an 8-pound ham bakes covered for about 72 minutes; a 12-pound ham for about 108 minutes. Always use the internal temperature (140°F) as your final check rather than relying solely on time. Every oven runs differently, and ham size varies.
Can I use honey or maple syrup instead of apricot preserves?
You can make substitutions, but the results will be different. Honey and maple syrup don’t have the same pectin content, so your glaze won’t set the same way and may slide off during baking. If you want to try it, use honey or maple syrup for only half the fruit component, and supplement with ½ cup apricot or peach preserves to maintain proper glaze structure. The flavor will be less fruity and more caramel-forward, which some people prefer.
Why does the recipe call for such a small amount of spice?
The small amount of cinnamon and cloves (⅛ teaspoon each) is intentional. These are strong spices, and too much overwhelms the apricot and becomes “overly holiday.” I learned this from my grandmother, who always said spices should whisper, not shout. The amounts here provide warmth and familiarity without making guests taste cloves first and ham second. You can increase to ¼ teaspoon of each if you prefer a spicier glaze, but I’d test that on a small batch first.
Can I make this recipe a day ahead and reheat it for serving?
Yes, with a caveat. You can fully bake the ham a day ahead, cool it completely, wrap it, and refrigerate it. On serving day, slice it and reheat gently in a skillet with a splash of water, or wrap slices in foil and warm in a 275°F oven for about 15 minutes. The advantage is that your cooking is done ahead. The disadvantage is that reheating removes some of the glaze’s glossiness—it won’t look quite as restaurant-perfect as a fresh ham. For important occasions, I recommend baking it the morning of serving and keeping it warm in a low oven if needed, rather than fully cooking ahead.
Seasonal Variations
Spring: Replace half the apricot preserves with orange marmalade for a brighter, more citrus-forward flavor. Add a pinch of fresh ginger (about ⅛ teaspoon ground) to echo spring’s fresh energy.
Summer: Reduce the brown sugar by 2 tablespoons and add 2 tablespoons of fresh lime juice to the glaze. The acidity feels lighter and more summery. Use this version for smaller, informal gatherings rather than formal dinners.
Fall/Winter: This is the classic version. You might add a tiny pinch of nutmeg (⅛ teaspoon or less) in addition to the cinnamon and cloves for deeper warmth. Some people add ½ teaspoon of vanilla extract to the finished glaze for extra complexity.
More Recipes You’ll Love
- Authentic Carnitas Recipe Lard – slow-cooked, tender pork that shares ham’s richness but offers a completely different flavor profile
- Pan-Fried Steak – another impressive protein centerpiece for when you want to feel confident at the stove
- Arroz Amarillo Recipe – a vibrant side dish that pairs beautifully with ham for festive meals
- Avocado Salsa Dip Recipe – a fresh accompaniment if you’re serving ham at brunch or casual gatherings
You now have everything you need to bring this ham to your table exactly as intended: glistening, moist, and impossible to mess up. The science is on your side. The timing is proven. The only thing left is to trust yourself and cook what makes you happy!
