This post contains affiliate links. As an Amazon Associate I earn from qualifying purchases.
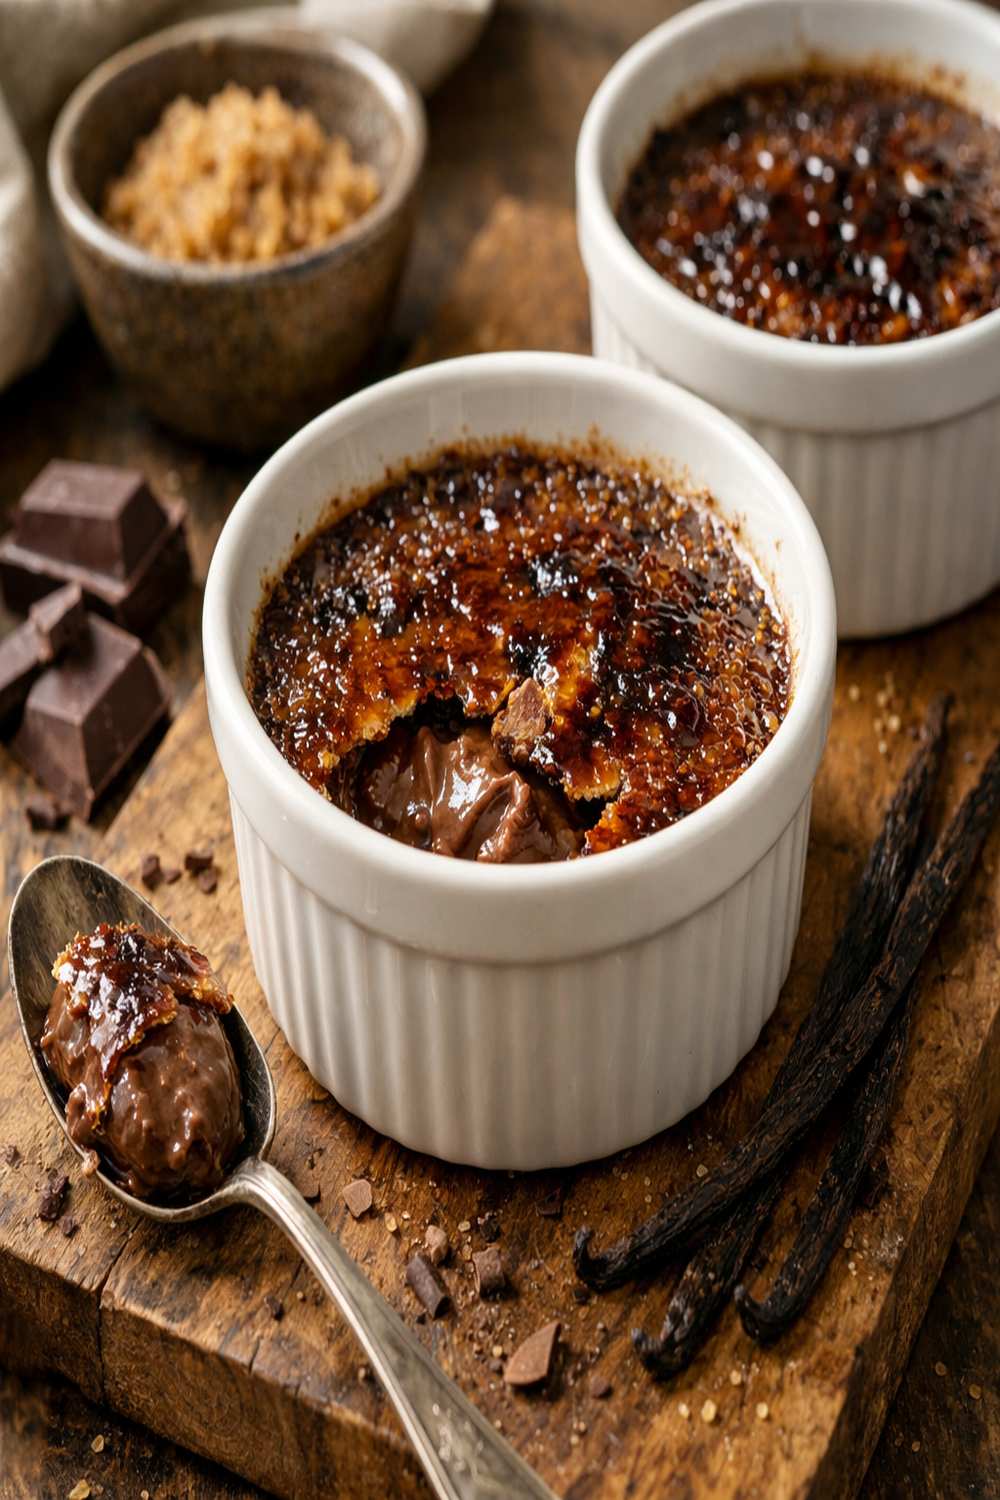
This dish looks and tastes like it costs $40 at a fine dining restaurant. The ingredients cost under $10. I’m serious. When you crack that caramelized sugar shell with your spoon and it shatters into golden shards, your guests won’t believe you made it at home. They definitely won’t believe you spent less on ingredients than you would on a single cocktail. If you’re looking to impress without emptying your wallet, this is the recipe that does it. And if you want to keep exploring elegant desserts that won’t break the bank, check out my these homemade cookies for another show-stopper that costs pennies.
Restaurant-Quality Chocolate Creme Brulee Recipe for Under $10 (No Shortcuts on Flavor)
I grew up watching my grandmother make meals that fed a crowd on almost nothing. She taught me that luxury isn’t about expensive ingredients—it’s about technique, care, and knowing which corners to cut and which to never touch. Chocolate creme brulee is one of those recipes where you can save money smartly without sacrificing a single moment of joy when you eat it.
Years into my practice as a registered dietitian, I started noticing something at family gatherings. People would bring home-baked goods, sure, but the desserts that got everyone talking—the ones people asked for recipes for—were the simple, elegant ones. The ones where the ingredient list was short but the execution was precise. Chocolate creme brulee fit that perfectly. Rich. Sophisticated. Affordable. The kind of food that heals because it makes people feel cared for.
The Real Cost Breakdown
Let me show you exactly what this costs per serving, because transparency matters when you’re cooking on a budget. This recipe makes 2 servings and costs approximately $8.50 total, or $4.25 per serving. At a restaurant, you’d pay $12–$16 per brulee. That’s a savings of 65–75% while eating better food because it’s yours.
- Bittersweet chocolate (1.25 ounces) – approximately $1.50 when buying a good quality bar and using just what you need
- Egg yolks (3 large) – approximately $0.75 (buy a dozen eggs at any grocery store for $2–$3)
- Granulated sugar (4.5 teaspoons total) – approximately $0.20 (you likely already have this)
- Heavy cream (½ cup) – approximately $1.20 (buy the store brand, not the organic premium)
- Pinch of sea salt – approximately $0.15 (brings out chocolate depth without adding cost)
- Optional vanilla extract (¼ teaspoon) – approximately $0.30 (optional, but adds dimension)
Total per batch (2 servings): $4.10–$4.25
Smart Shopping Tips for This Recipe
- Buy chocolate in bulk when on sale. Check your grocery store’s weekly deals section. Lindt and Ghirardelli bittersweet bars often go on sale for $1.50–$2 at Target, Kroger, and Safeway. Buy several when you see them and keep in your pantry. Chocolate stores well for months and you’ll use it constantly once you have good quality on hand.
- Buy eggs by the dozen from whatever store has the best price that week. Don’t pay premium for free-range or organic unless it matters to your values. Regular large eggs work perfectly. Check three stores—the price variance is usually 50 cents to $1 per dozen, which adds up.
- Heavy cream is where you don’t compromise, but you do save. Buy store-brand heavy cream, never the fancy imported kind. The difference in final product is negligible. Aldi, Walmart, and most grocery store brands are excellent and 30% cheaper than name brands.
- Buy sugar in bulk once a year. A 4-pound bag costs $1.50–$2 and lasts months. This single batch uses less than a teaspoon of actual sugar, so the cost per serving is almost nothing.
The Ingredients
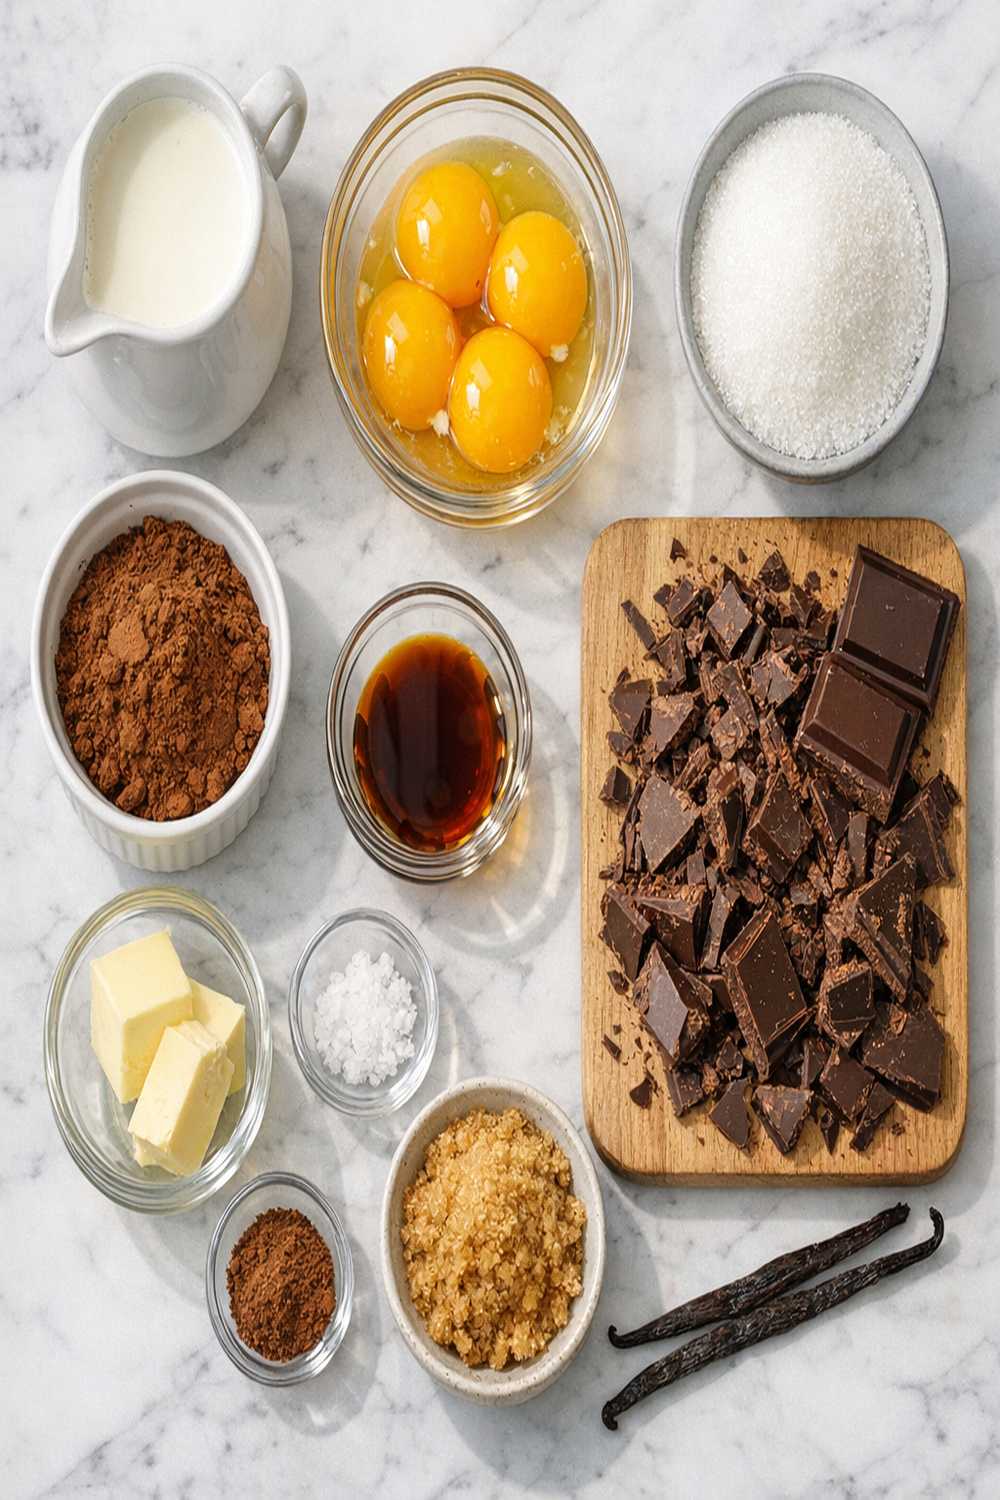
Every ingredient in this recipe earns its place and its cost. There’s no filler here. No vanilla bean, no espresso powder, no optional extras. Just five core ingredients that transform into something elegant through proper technique. When you’re eating well on a budget, this is the approach: buy less, buy better, waste nothing.
- 3 large egg yolks (room temperature creates a smoother custard without lumps)
- ¼ teaspoon pure vanilla extract (optional, but it rounds the flavor beautifully)
- 1.25 ounces bittersweet chocolate (chopped into small pieces so it melts evenly; aim for 60–72% cacao)
- ⅛ teaspoon sea salt (brings out the chocolate’s depth without tasting salty)
- ½ cup heavy cream (full-fat, at room temperature—cold cream can seize the chocolate)
- ¼ cup plus 2 teaspoons granulated sugar (divided: most for the custard, the rest for caramelizing on top)
Yield: 2 servings in 6-ounce ramekins
How to Make Chocolate Creme Brulee Recipe Without Breaking the Bank
Smart cooking isn’t about compromise. It’s about understanding exactly why each step matters so you can execute it properly every time. That’s where the value comes in—technique costs nothing but yields results that look expensive. Let me walk you through this step-by-step.
Step 1: Prepare Your Workspace and Heat Your Oven
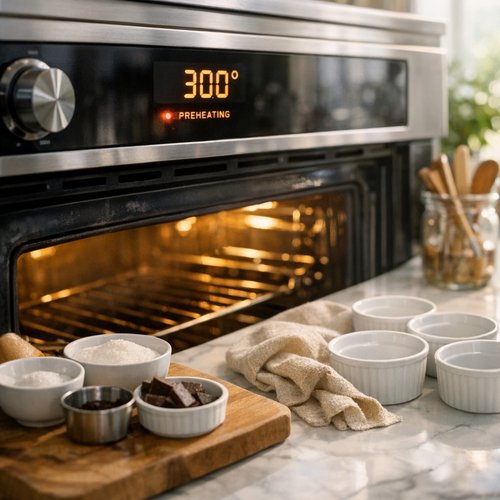
Start by preheating your oven to 300°F. Yes, 300°F, not the 325°F or 350°F you might use for other desserts. Lower heat means the custard cooks gently and stays creamy instead of becoming grainy or overcooked. While the oven heats, fill a large pot with water and bring it to a boil on the stovetop. This water bath is essential—it distributes heat evenly and prevents the edges from cooking faster than the center. This is the professional technique that restaurants use, and it costs you nothing.
Step 2: Melt the Chocolate Properly
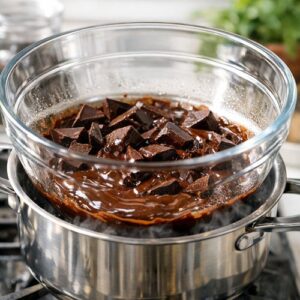
This step separates good creme brulee from grainy, broken custard. You have two options. Option one: Set a heatproof bowl over a pot of simmering water (double boiler method). Make sure the bowl doesn’t touch the water. Add your chopped chocolate and let it sit for about two minutes, then stir gently until fully melted. Option two: Use the microwave in 20-second bursts on 50% power, stirring between each burst. This takes three to four bursts total. Microwave melting is faster and saves dishes, which is a real value when you’re cooking efficiently. Either way, chocolate should melt slowly. Rush it with high heat and you’ll have grainy, separated chocolate that won’t incorporate smoothly into your custard.
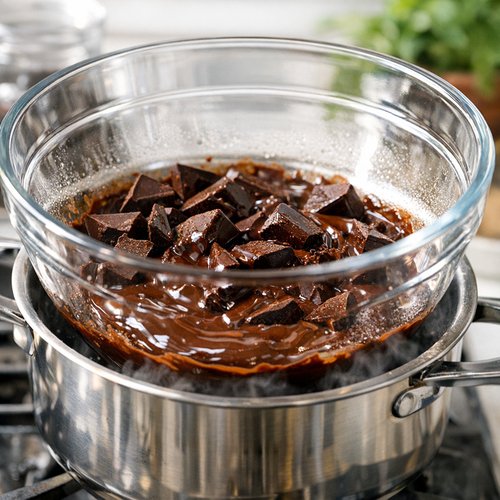
Let the melted chocolate cool for two to three minutes. This is crucial. If you pour hot chocolate into egg yolks, you’ll scramble them. If you wait too long and it cools completely, it won’t blend smoothly. Aim for just-warm chocolate—you should be able to comfortably touch the side of the bowl.
Step 3: Create the Custard Base
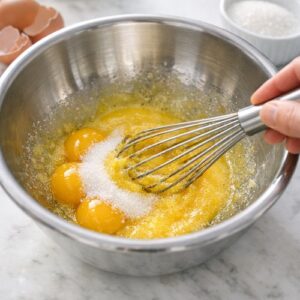
In a medium mixing bowl, combine your 3 egg yolks with ¼ cup of the granulated sugar. Whisk by hand—not with an electric mixer—for about one minute until the mixture lightens slightly and becomes pale yellow. You’re not making whipped eggs; you’re just incorporating the sugar until it dissolves. This takes about 60 seconds of steady whisking. The sugar should feel completely dissolved when you rub a tiny bit between your fingers (no gritty texture).
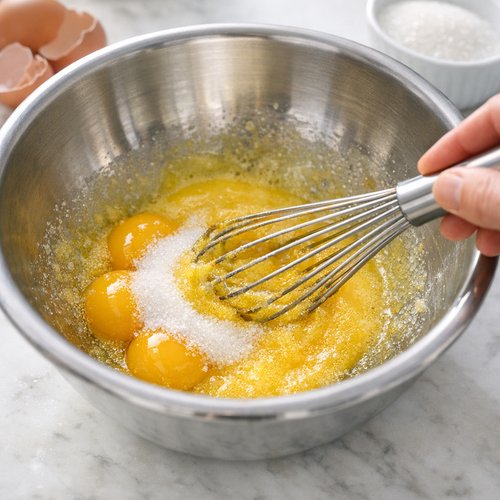
Add the ⅛ teaspoon of sea salt and the vanilla extract if using. Whisk to combine. Now pour in your room-temperature heavy cream slowly while whisking gently. You’re building an emulsion here—the fat in the cream needs to distribute evenly throughout the egg yolks. This happens naturally if you add the cream gradually and whisk constantly. Takes about one minute. The mixture should look smooth and homogeneous, with no visible streaks of cream.
Step 4: Combine Chocolate and Custard
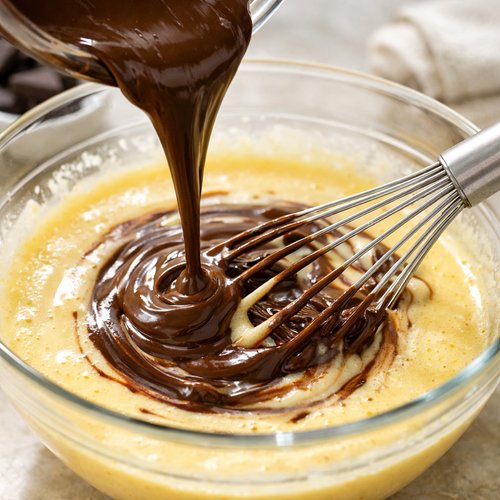
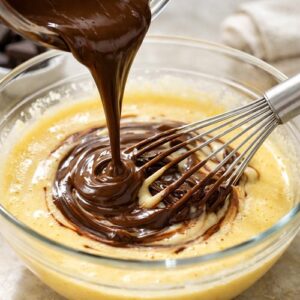
Pour your cooled melted chocolate into the egg mixture slowly while whisking. The egg will temper the chocolate (bring it to safe temperature) while the chocolate enriches the custard. Whisk until completely combined and smooth. This should take about one minute. If you see any streaks of unmixed chocolate or cream, keep whisking. The final mixture should be glossy, dark, and uniform.
Step 5: Pour and Prepare for the Oven
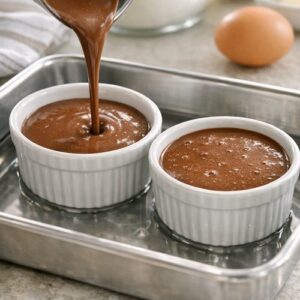
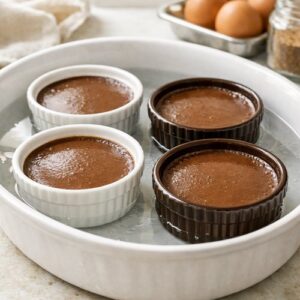
You’ll need two 6-ounce ramekins or custard cups. Pour the chocolate custard mixture evenly between them, filling each about three-quarters full. Set both ramekins into a smaller baking dish (an 8×8-inch square pan works perfectly). Carefully pour the boiling water into the baking dish until it reaches halfway up the sides of the ramekins. This water bath regulates temperature and prevents the bottom of your custard from getting too hot. The water should come to about the middle of the ramekins, not higher.
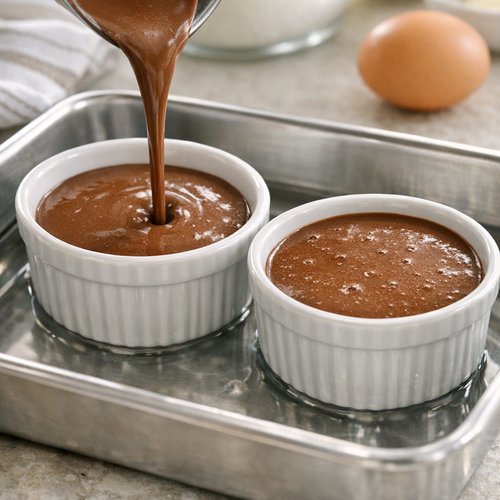
Carefully move the baking dish to your preheated 300°F oven. Bake for 40–44 minutes. The custards are done when the edges are set but the very center still jiggles slightly when you gently shake the ramekin. It should feel like the slight wobble of barely-set gelatin, not like liquid custard. This is the moment to pull them out. They’ll continue cooking slightly from residual heat even after you remove them.
Step 6: Cool Completely in the Water Bath
Let the custards cool in the water bath until the water is room temperature. This takes about 45 minutes. This slow, gentle cooling is what gives you that smooth, silky texture. Don’t skip this step by removing them to cool on the counter—you’ll get a different texture. Once the water is cool, carefully remove the ramekins, pat the bottoms dry, and place them on a clean surface.
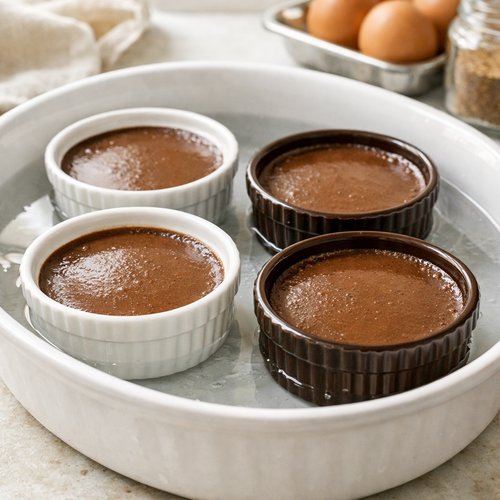
Step 7: Chill and Prepare to Serve
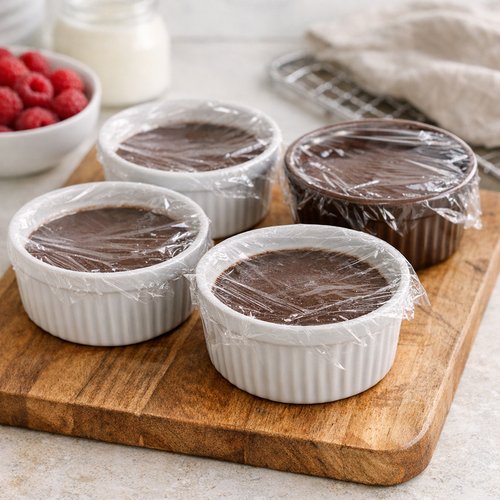
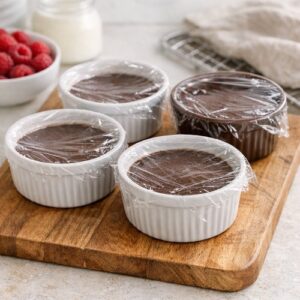
Cover each ramekin with plastic wrap and refrigerate for at least 5 hours, preferably overnight. The custard will set completely and the flavors will deepen. You can make these up to 2 days ahead, which is perfect for meal planning or entertaining. They actually taste better the next day.
When ready to serve, remove the plastic wrap. Sprinkle exactly 1 teaspoon of granulated sugar evenly over the surface of each custard. Use a kitchen torch (you can buy a small one for $15–$20 and it lasts years) to caramelize the sugar. Hold the torch about 2 inches from the surface and move it in a circular motion. The sugar will begin to melt and turn golden brown in about 30–45 seconds. You want a medium amber color, not dark brown. Once caramelized, wait 30 seconds for it to harden into a shell, then serve immediately.
How to Stretch This Recipe Further
- Make four servings instead of two. The recipe uses 3 egg yolks and ½ cup cream—just halve the quantities and pour into four 3-ounce ramekins or espresso cups instead of two larger ones. Baking time stays roughly the same (check at 35 minutes instead of 40). This cuts your per-serving cost to $2.15 and lets you serve more people from the same ingredients. Smaller portions also feel more elegant.
- Use the leftover egg whites for breakfast. This recipe leaves you with 3 egg whites. Make an egg white scramble for one person, or save them in a container for up to three days to make a veggie-forward frittata later. You’ve already bought the eggs—use every part.
- Double the recipe and make four servings instead of two. Scale everything by 1.5: use 1.875 ounces chocolate (round to just under 2), use 4 or 5 egg yolks, use ⅜ cup cream. Bake in four ramekins at the same temperature and time. Now you have four elegant desserts from one baking session. Custard is actually easier to make in larger batches because there’s more volume to work with.
Expert’s Nutritional Tip
Here’s something my clients are often surprised to learn: the egg yolks in this recipe contain choline, a micronutrient essential for brain health that most people don’t get enough of. One serving of creme brulee gives you about 140 mg of choline—that’s meaningful. The chocolate provides polyphenols with antioxidant properties, and the fat from the cream actually helps your body absorb fat-soluble vitamins. This isn’t “guilt-free” indulgence language—this is real nutritional value. You’re eating a dish that tastes like pure luxury and delivers actual nutrients. That’s the definition of food that nourishes.
Budget Substitutions That Don’t Sacrifice Quality
- Premium dark chocolate (70%+ cacao) → Standard bittersweet chocolate (60–65% cacao): You’ll lose some intensity and complexity, but the dish will still taste rich and chocolatey. The custard base and the caramelized sugar top mask most of the difference. Cost savings: $1–$2 per ounce.
- Organic eggs → Regular large eggs: Taste is identical in a cooked custard. The yolk color might be slightly less golden, but once mixed with cream and chocolate, no one notices. The custard’s texture and flavor remain exactly the same. Cost savings: 50 cents to $1 per dozen.
- Imported heavy cream → Store-brand heavy cream: Both contain 36% butterfat. Imported versions cost more but perform identically in custard. You might detect a flavor difference in whipped cream or coffee, but in creme brulee, it’s undetectable. Cost savings: $1–$2 per pint.
- Can’t use a kitchen torch? → Use your broiler instead: Place the sugar-topped ramekins on a baking sheet and slide under a preheated broiler for 1–2 minutes, watching constantly. The sugar will caramelize but the custard stays cool because it’s already chilled. Works equally well, zero additional cost, and many people already have everything they need.
Common Mistakes to Avoid
- Mistake #1: Using cold cream straight from the fridge. Cold cream can cause the melted chocolate to seize and become grainy. Pull your cream out 15 minutes before you start cooking. Room temperature cream incorporates smoothly and creates a silky texture. This single step fixes 80% of texture problems.
- Mistake #2: Skipping the water bath or using water that’s not hot enough. The water bath is not optional—it’s what makes custard creamy instead of rubbery. Use boiling water, not tepid water. The gentle, even heat is essential. If your water isn’t hot enough, the custard edges cook faster than the center.
- Mistake #3: Overbaking by even a few minutes. The difference between a creamy custard and an overcooked one is literally three minutes. Start checking at 38 minutes. The center should jiggle like barely-set gelatin, not look liquid. If you’re unsure, it’s better to underbake slightly—the residual heat will set it further as it cools.
- Mistake #4: Not chilling long enough before torching. A warm or room-temperature custard will deflate when you torch it. You need that 5+ hour chill time for the custard to set firmly and stay intact when you caramelize the top. This is also why overnight resting improves the final product.
Seasonal Variations
Spring/Summer: Add ¼ teaspoon of fresh mint extract (or steep 3–4 fresh mint leaves in the warm cream for 10 minutes, then strain). The brightness cuts the richness perfectly. You could also dust the top with a tiny pinch of freeze-dried strawberry powder before caramelizing for color and tartness.
Fall: Add ⅛ teaspoon of cinnamon to the chocolate mixture. Replace the vanilla extract with ¼ teaspoon of maple extract for a deeper autumn note. Some years I add a tiny pinch of cayenne pepper—just ⅛ teaspoon—which sounds unusual but creates this warmth that makes the chocolate taste more complex.
Winter: Stir in ⅛ teaspoon of peppermint extract for a sophisticated mint-chocolate version. Or add ⅛ teaspoon of ground ginger, which pairs beautifully with dark chocolate and feels festive without being overdone.
Year-Round Option: Keep the base recipe exactly as is. It’s elegant and requires no thinking. Sometimes the best food is the simple version executed perfectly.
Can I Store Chocolate Creme Brulee Recipe?
Yes, and it actually improves with time. Store the covered ramekins in your refrigerator for up to 2 days before torching the sugar top. The custard becomes even smoother and richer overnight. The flavors deepen. This is one of the great secrets of making creme brulee—it’s better the next day.
Once you’ve torched and caramelized the sugar, eat it immediately. The sugar shell will begin to soften and dissolve into the custard within 5–10 minutes. That textural contrast between the hard caramelized top and the creamy custard below is the whole point. If you need to make them ahead, make the custards 1–2 days before, then torch them 15–30 minutes before serving.
Can you freeze them? Technically yes, but I don’t recommend it for the custard itself—freezing and thawing can create a grainy texture. However, you can freeze leftover egg whites for up to 3 months to use in future recipes.
Make-Ahead Guide
The Day Before: Make the custards completely through Step 6. Cover, chill overnight. The custard will set more firmly and flavors will deepen. This is actually ideal timing.
The Morning Of (if serving in the evening): Nothing. The custards are already done and tasting better every hour.
30 Minutes Before Serving: Remove ramekins from refrigerator. Pat the tops dry with a clean cloth (any condensation interferes with caramelizing). Divide the remaining 2 teaspoons of sugar (1 teaspoon per ramekin) and spread evenly over each custard surface using the back of a small spoon. Keep them at room temperature while you finish preparing the rest of your meal.
5 Minutes Before Serving: Torch the sugar on each custard, one at a time, watching the sugar carefully. Move the torch in a slow circle so the sugar caramelizes evenly to golden brown (not dark). The whole process takes 45 seconds per custard. Serve immediately while the sugar shell is hard and crisp.
Nutrition Information
Per serving (based on 2 servings per recipe): approximately 320 calories, 26 grams fat (16 grams saturated), 23 grams carbohydrate (mostly sugar), 5 grams protein, and 140 mg choline. The USDA data shows that the egg yolks provide lutein and zeaxanthin (important for eye health), while the chocolate provides flavonoids with anti-inflammatory properties. The cream provides fat-soluble vitamins A, D, and K2.
This is a dessert, so it’s appropriately indulgent. The per-serving cost ($4.25) means you’re getting sophisticated nutrition and real food—not processed ingredients or additives—at a fraction of restaurant pricing. That’s value that matters.
What Can I Serve With Chocolate Creme Brulee Recipe?
Creme brulee is elegant enough to stand alone, but here are ways to build a complete dessert moment without spending extra money or time:
- Crispy cookies on the side: A single these homemade cookies baked while you’re torching the brulee adds textural contrast and feels like a restaurant plating. Cost: under $0.50 per serving.
- Fresh berries: Raspberries or blackberries cost $2–$3 per pint and add color, tartness, and freshness that balances chocolate’s richness. A small handful per plate looks elegant and costs less than $0.75 per serving. They’re optional but recommended for entertaining.
- Whipped cream: Whip 2 tablespoons of heavy cream with ½ teaspoon sugar and a pinch of vanilla. One tablespoon per serving ($0.15) adds elegance and softness against the hard sugar shell.
- Espresso or strong coffee: Serve a small espresso or demitasse of strong coffee alongside. The bitterness complements chocolate beautifully and aids digestion. Cost: whatever your coffee costs you already.
- No accompaniment: Creme brulee needs nothing else. It’s a complete, satisfying dessert on its own. This is the most budget-conscious approach and often the best one.

Chocolate Creme Brulee Recipe
Ingredients
Method
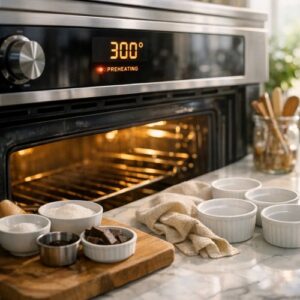
- Start by preheating your oven to 300°F. Yes, 300°F, not the 325°F or 350°F you might use for other desserts. Lower heat means the custard cooks gently and stays creamy instead of becoming grainy or overcooked. While the oven heats, fill a large pot with water and bring it to a boil on the stovetop. This water bath is essential—it distributes heat evenly and prevents the edges from cooking faster than the center. This is the professional technique that restaurants use, and it costs you nothing.
- This step separates good creme brulee from grainy, broken custard. You have two options. Option one: Set a heatproof bowl over a pot of simmering water (double boiler method). Make sure the bowl doesn't touch the water. Add your chopped chocolate and let it sit for about two minutes, then stir gently until fully melted. Option two: Use the microwave in 20-second bursts on 50% power, stirring between each burst. This takes three to four bursts total. Microwave melting is faster and saves dishes, which is a real value when you're cooking efficiently. Either way, chocolate should melt slowly. Rush it with high heat and you'll have grainy, separated chocolate that won't incorporate smoothly into your custard. Let the melted chocolate cool for two to three minutes. This is crucial. If you pour hot chocolate into egg yolks, you'll scramble them. If you wait too long and it cools completely, it won't blend smoothly. Aim for just-warm chocolate—you should be able to comfortably touch the side of the bowl.
- In a medium mixing bowl, combine your 3 egg yolks with ¼ cup of the granulated sugar. Whisk by hand—not with an electric mixer—for about one minute until the mixture lightens slightly and becomes pale yellow. You're not making whipped eggs; you're just incorporating the sugar until it dissolves. This takes about 60 seconds of steady whisking. The sugar should feel completely dissolved when you rub a tiny bit between your fingers (no gritty texture). Add the ⅛ teaspoon of sea salt and the vanilla extract if using. Whisk to combine. Now pour in your room-temperature heavy cream slowly while whisking gently. You're building an emulsion here—the fat in the cream needs to distribute evenly throughout the egg yolks. This happens naturally if you add the cream gradually and whisk constantly. Takes about one minute. The mixture should look smooth and homogeneous, with no visible streaks of cream.
- Pour your cooled melted chocolate into the egg mixture slowly while whisking. The egg will temper the chocolate (bring it to safe temperature) while the chocolate enriches the custard. Whisk until completely combined and smooth. This should take about one minute. If you see any streaks of unmixed chocolate or cream, keep whisking. The final mixture should be glossy, dark, and uniform.
- You'll need two 6-ounce ramekins or custard cups. Pour the chocolate custard mixture evenly between them, filling each about three-quarters full. Set both ramekins into a smaller baking dish (an 8x8-inch square pan works perfectly). Carefully pour the boiling water into the baking dish until it reaches halfway up the sides of the ramekins. This water bath regulates temperature and prevents the bottom of your custard from getting too hot. The water should come to about the middle of the ramekins, not higher. Carefully move the baking dish to your preheated 300°F oven. Bake for 40–44 minutes. The custards are done when the edges are set but the very center still jiggles slightly when you gently shake the ramekin. It should feel like the slight wobble of barely-set gelatin, not like liquid custard. This is the moment to pull them out. They'll continue cooking slightly from residual heat even after you remove them.
- Let the custards cool in the water bath until the water is room temperature. This takes about 45 minutes. This slow, gentle cooling is what gives you that smooth, silky texture. Don't skip this step by removing them to cool on the counter—you'll get a different texture. Once the water is cool, carefully remove the ramekins, pat the bottoms dry, and place them on a clean surface.
- Cover each ramekin with plastic wrap and refrigerate for at least 5 hours, preferably overnight. The custard will set completely and the flavors will deepen. You can make these up to 2 days ahead, which is perfect for meal planning or entertaining. They actually taste better the next day. When ready to serve, remove the plastic wrap. Sprinkle exactly 1 teaspoon of granulated sugar evenly over the surface of each custard. Use a kitchen torch (you can buy a small one for $15–$20 and it lasts years) to caramelize the sugar. Hold the torch about 2 inches from the surface and move it in a circular motion. The sugar will begin to melt and turn golden brown in about 30–45 seconds. You want a medium amber color, not dark brown. Once caramelized, wait 30 seconds for it to harden into a shell, then serve immediately.
Notes
FAQs
Can I make creme brulee without a kitchen torch?
Absolutely. Place the sugar-topped, chilled ramekins on a baking sheet and slide them under a preheated broiler for 1–2 minutes, watching constantly so the sugar caramelizes without burning. The custard stays cold because it’s already chilled. This works equally well and costs you nothing if you already have a broiler. Some people actually prefer this method because it’s more forgiving—you have better control by adjusting how close the ramekin is to the heating element.
What if I only have semi-sweet chocolate instead of bittersweet?
Use it. It will be slightly sweeter but still delicious. Semi-sweet chocolate (typically 50–60% cacao) works fine. You might want to reduce the sugar in the custard by ½ teaspoon to balance, but it’s not necessary. The final dish will taste more like a sweeter chocolate pudding, which isn’t bad—just different.
Can I use whole eggs instead of just yolks?
Technically yes, but the texture changes. Whole eggs make a firmer, less creamy custard because the egg white proteins set more firmly than yolks do. Creme brulee specifically relies on yolks for that silky texture. If you use whole eggs, you’re making a different dessert—more like baked chocolate custard. Stick with yolks for the intended result. That said, those 3 leftover egg whites are valuable—use them for breakfast the next day.
How do I know if my custard is actually done baking?
Give the ramekin a very gentle shake. The custard should jiggle slightly in the center—like barely-set gelatin or soft Jell-O—while the edges look completely set. If it’s completely still, it’s likely overcooked. If it moves like liquid custard, it needs 2–3 more minutes. This takes practice, but after one batch you’ll develop the instinct. When in doubt, underbake by a few minutes. The residual heat in the water bath will set it further as it cools.
Can I halve this recipe to make just one serving?
Yes, technically. Halve all ingredients: use 0.6 ounces chocolate (about half of a 1.25-ounce piece), 1.5 egg yolks (or use 1 full yolk plus a squeeze from another), 2 tablespoons plus 1 teaspoon cream, and proportional sugar. The challenge is that you’re working with very small quantities, which makes precise measuring harder. Most home cooks find that doubling to make four servings instead is easier—just use four 3-ounce ramekins, scale the recipe by 1.5, and bake together.
Why is my creme brulee grainy or broken-looking?
Graininess usually means one of three things: (1) the chocolate was too hot when added to eggs (it cooked the yolks), (2) the cream was too cold (it seized the chocolate), or (3) the mixture was overheated during melting. Always use room-temperature cream, melt chocolate gently, and let it cool slightly before mixing. If you inherit a grainy custard, you can try straining it through a fine mesh before pouring into ramekins—it won’t perfect it, but it helps.
More Budget-Friendly Recipes
- Pecan Caramel Sauce Recipe – drizzle over vanilla ice cream for an impressive dessert that costs under $3
- these homemade cookies – spread on toast, swirl into yogurt, or eat by the spoonful for dessert at a fraction of store-bought cost
- my homemade ice cream – elegant frozen dessert made from pantry staples without an ice cream maker
Chocolate creme brulee is the dessert that proves you don’t need to spend a lot to eat well and feel fancy. You need technique, attention, and good-quality basics. You need to understand why each step matters. That’s it. This is the food that should be on your table regularly—not because it’s cheap, but because it’s nourishing, because it makes people feel cared for, and because you deserve to eat beautifully.
Cook what makes you happy!