This post contains affiliate links. As an Amazon Associate I earn from qualifying purchases.
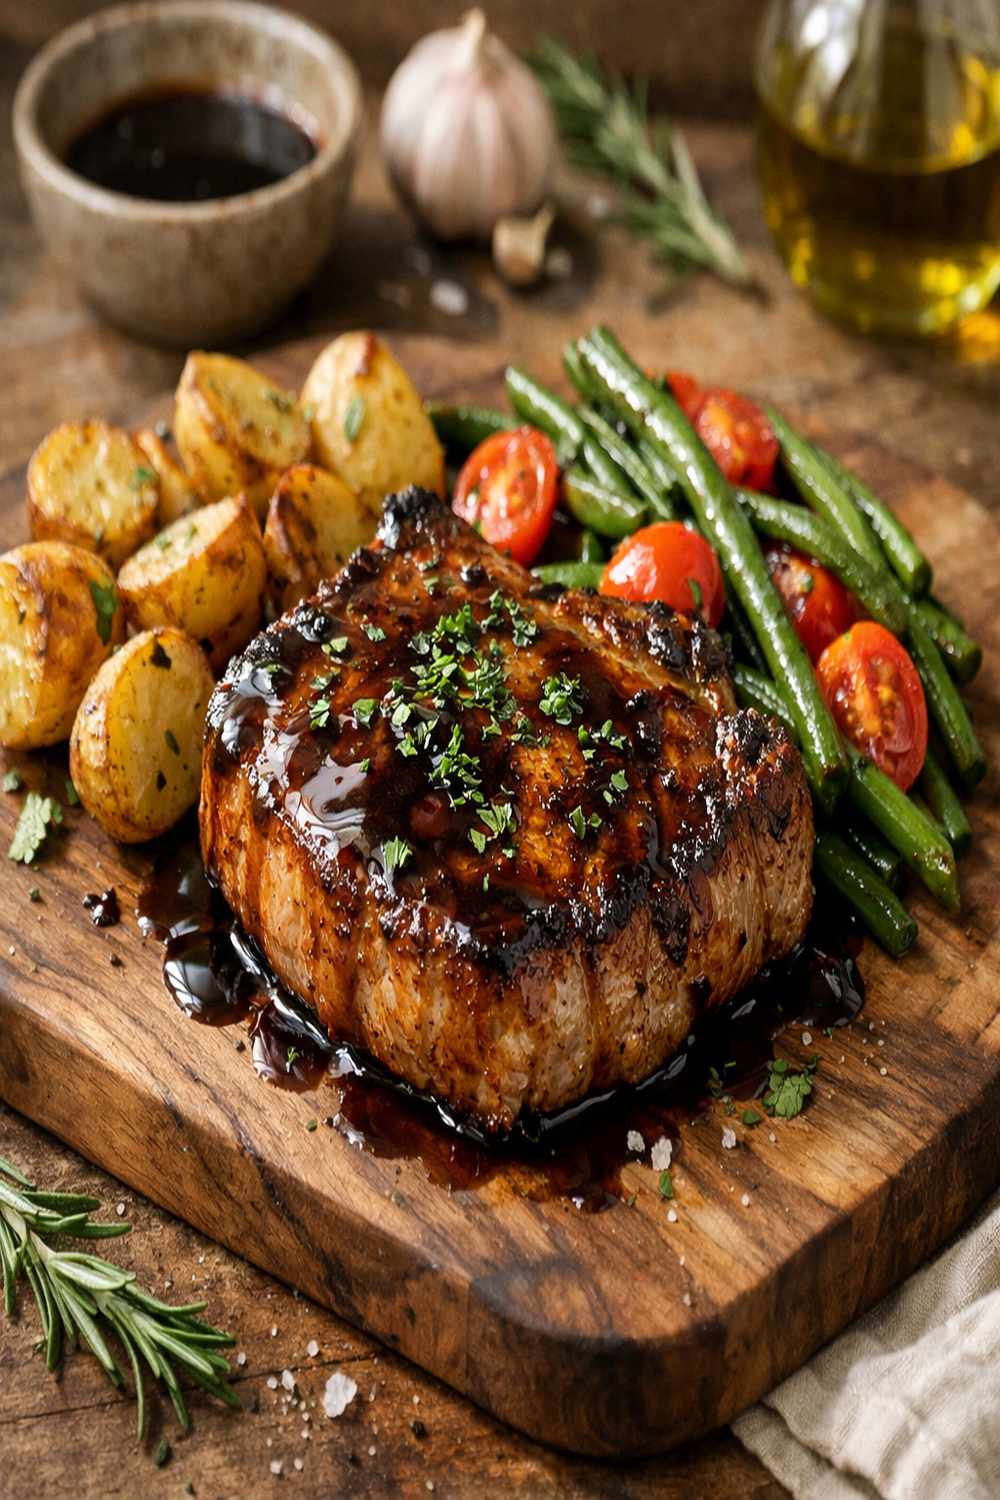
You’ve probably tried the oven method, standing over a hot pan waiting for it to finish. Maybe you’ve attempted the slow cooker version, only to end up with meat that tastes like it took all day to cook. I’ve been there too, testing every approach until I found the one that delivers tender, glazed pork chops with a sauce so good you’ll want to spoon it over everything on your plate.
This stovetop balsamic method is what I make at home on weeknights when I need something that feels restaurant-quality but comes together in 20 minutes. It’s the recipe my family actually requests, and honestly, it’s taught me that pork chops don’t need to be boring or dry.
Balsamic Pork Chop Recipe: Which Method Actually Works Best?
I’ve spent years working with families in Maryland who grew up with their own versions of this dish. Some were made in cast iron, some in the oven, and some seemed to dry out no matter what. After testing multiple approaches side by side, I realized the stovetop sear-and-sauce method wins almost every time—if you do it right.
The key difference isn’t complicated. It comes down to controlling the heat precisely, building a proper glaze, and understanding exactly when to add the pork back into the pan. This isn’t about fancy technique. It’s about understanding what happens when vinegar, sugar, and meat meet in the same skillet.
The Methods Compared: An Honest Breakdown
Let me walk you through three common approaches I’ve tested with real pork chops, measuring everything from cook time to cleanup.
- The Oven Roasting Method – You sear the chops, then finish them in a 400°F oven while the sauce reduces separately. Pro: hands-off cooking time. Con: requires two dirty pans, and the sauce often cooks too fast and turns bitter. The meat stays moist, but you lose the connection between the protein and glaze. Best for: people who need actual oven space and don’t mind extra cleanup.
- The Slow Cooker Version – Dump everything in, cook on low for 6 hours. Pro: incredibly convenient for meal prep. Con: the pork becomes stringy, the balsamic flavor flattens out, and you don’t get any caramelization. The sauce is watery and pale. Best for: people planning far ahead who can tolerate softer meat texture.
- The Stovetop Sear-and-Glaze (This Recipe) – Sear pork in one skillet, set aside. Build your sauce in the same pan, then simmer the pork gently in the glaze. Pro: the chops stay juicy, the sauce clings to the meat perfectly, and everything happens in one pan in under 20 minutes. The flavors marry together instead of staying separate. Con: you need to pay attention to heat level for about 15 minutes. Best for: people who want restaurant results on a weeknight without planning ahead.
Why This Version Beats the Rest
This stovetop method works because of how it treats the pork and sauce separately, then brings them together at exactly the right moment. When you sear the chops first, you’re not cooking them through. You’re creating a golden crust that seals in the juices while adding flavor through browning. That matters.
Then, instead of competing for space in the pan, your sauce gets full attention. The balsamic reduces down to a proper glaze—thick enough to coat the back of a spoon, dark and glossy, with a slight syrupy texture that clings to the meat when you serve it. This takes about 5 to 8 minutes of gentle simmering, which is why heat control matters so much.
When the pork goes back into that sauce for just 2 minutes, it reheats gently while absorbing all those deep vinegar and caramelized sugar flavors. You get meat that’s juicy inside with an exterior kissed by the glaze. No dryness. No separated sauce sitting in a puddle on your plate. Just balanced, nostalgic comfort food that actually tastes better than it sounds.
The Ingredients
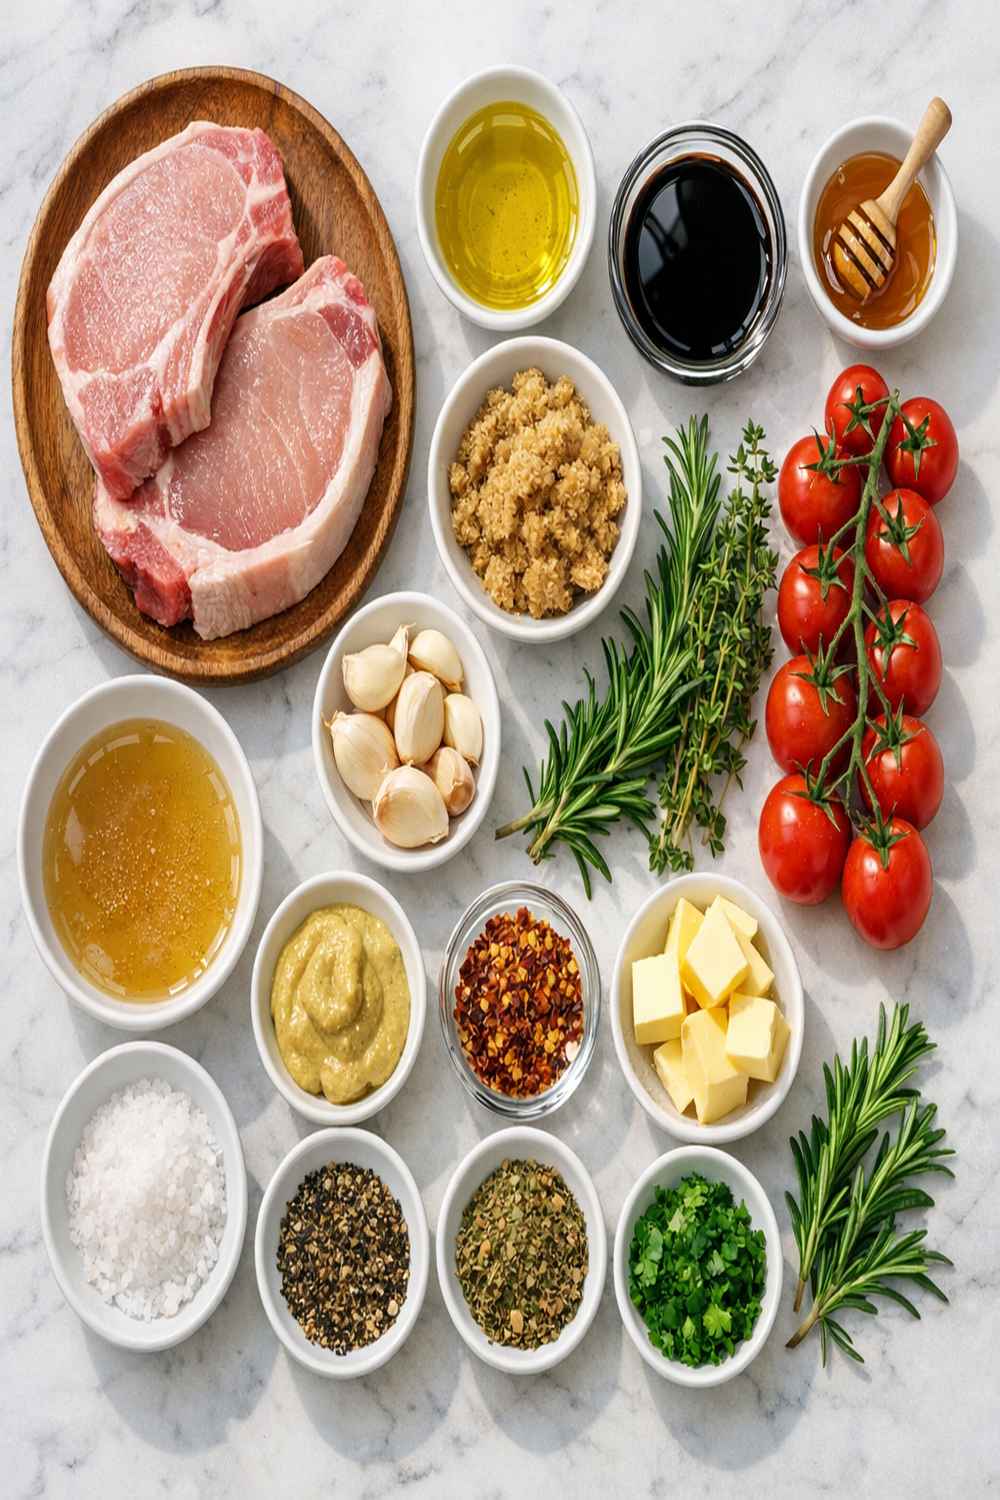
I’ve deliberately chosen ingredients that work together to create balance—a key principle in nutrition-focused cooking. The balsamic vinegar brings acidity and depth, which helps with mineral absorption and digestion. The brown sugar isn’t just sweetness; it helps the sauce stick to the meat through caramelization. Everything here earns its place on the plate.
- 2 tablespoons fresh parsley or thyme (chopped, adds brightness and freshness to finish)
- ¼ cup crumbled goat cheese or feta (optional, adds creaminess and tang)
- 1 cup balsamic vinegar (use good quality—it makes a real difference in taste)
- ⅓ cup brown sugar (packed slightly, for proper sauce consistency)
- 1 garlic clove (minced fine, adds subtle depth without overpowering)
- 2 tablespoons extra virgin olive oil (divided for searing and aromatics)
- 1 teaspoon balsamic glaze or reduction (optional but recommended for extra depth)
- Kosher salt and freshly ground black pepper (to taste)
- 4 pork chops (1 inch thick, about 7 to 8 ounces each, bone-in or boneless work equally well)
- 1 large onion (sliced thin, about 1 cup, yellow or white varieties work best)
How to Make the Best Version of Balsamic Pork Chop Recipe
Each step builds on the previous one. I’m going to explain not just what to do, but why each choice matters for your final result. This isn’t about following orders blindly—it’s about understanding the science so you know what’s happening in your skillet.
Step 1: Season Your Pork Properly
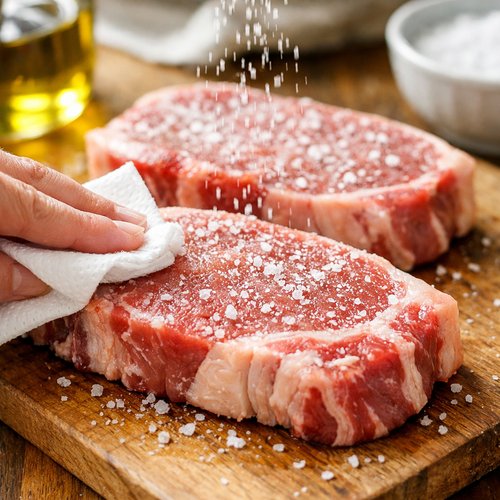
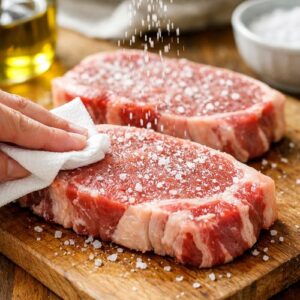
Pat your pork chops dry with paper towels. This is critical. Moisture is the enemy of a good crust. Sprinkle both sides generously with kosher salt and freshly ground black pepper. Don’t use table salt here—the crystals are smaller and you’ll over-salt. I use about ¼ teaspoon of kosher salt per chop, and pepper to your taste. Let the chops sit at room temperature for 5 to 10 minutes while you prepare your other ingredients. This allows the seasoning to penetrate and helps the meat cook more evenly.
Room temperature meat cooks more consistently than cold meat straight from the refrigerator. The interior reaches the target temperature at the same pace as the exterior, which means you’re less likely to end up with a cold center or an overcooked edge.
Step 2: Sear the Pork to Build a Golden Crust
Heat 1 tablespoon of olive oil in a large skillet over medium-high heat until the oil shimmers and moves easily around the pan. This should take about 2 minutes. You want the oil hot enough that it sizzles audibly when the pork hits the pan, but not so hot that it smokes.
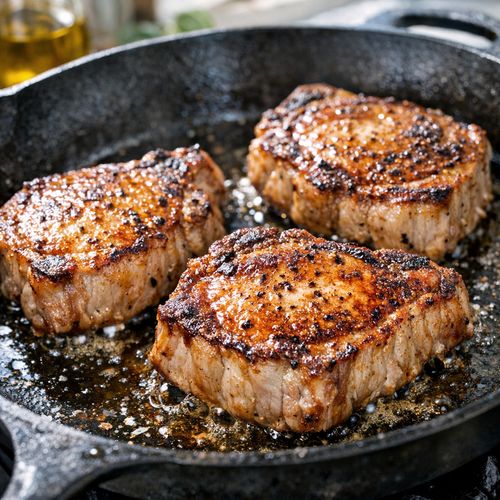
Place your pork chops in the skillet and don’t touch them. This is hard, I know. But moving them around prevents a proper crust from forming. Cook the first side for exactly 4 minutes until you see a deep golden-brown color. Then flip and cook the second side for 3 minutes. The first side gets longer because it’s touching cold metal. The second side needs less time since the skillet is already hot.
The meat doesn’t need to be cooked through at this point. You’re aiming for an internal temperature of about 140°F, which is medium. It will continue cooking when we add it back to the glaze.
Step 3: Rest the Pork While You Build the Sauce
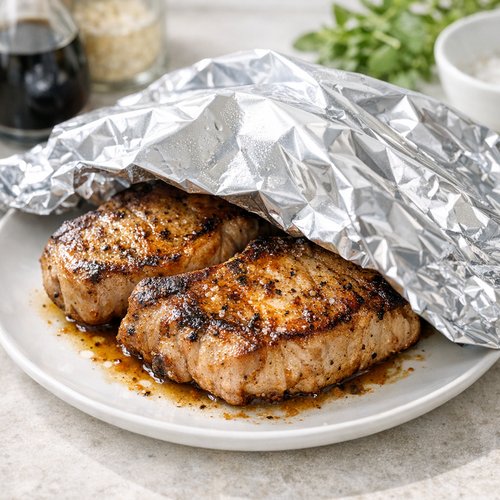
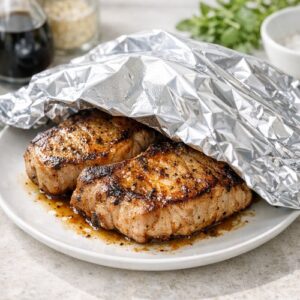
Transfer your seared pork chops to a clean plate and cover loosely with foil. This keeps them warm while trapping some steam, which helps with carryover cooking without drying them out. Don’t cover them tightly—you want some air circulation so condensation doesn’t make the crust soggy.
The resting period gives the meat fibers a chance to relax and reabsorb their juices. If you skip this step and go straight to the glaze, the meat will be tougher and those beautiful juices will end up in your sauce instead of in every bite.
Step 4: Cook Your Aromatics
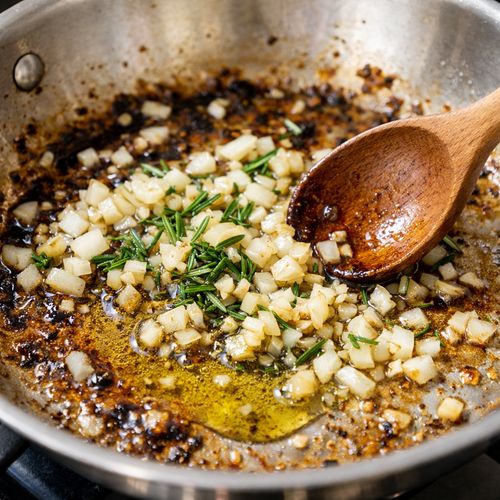
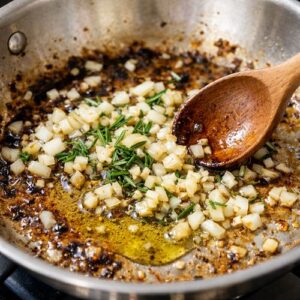
Don’t rinse the skillet. All those browned bits stuck to the bottom are liquid gold—that’s flavor. Add 1 tablespoon of olive oil to the same skillet, still over medium-high heat. Add your minced garlic and sliced onion, stirring occasionally.
Cook until the onion is translucent and starting to soften, about 3 minutes. You’re not trying to caramelize the onion deeply here. You want it tender but still holding some structure so it adds texture to the final dish. The garlic should smell aromatic but not browned—browned garlic tastes bitter.
Step 5: Create the Balsamic Glaze
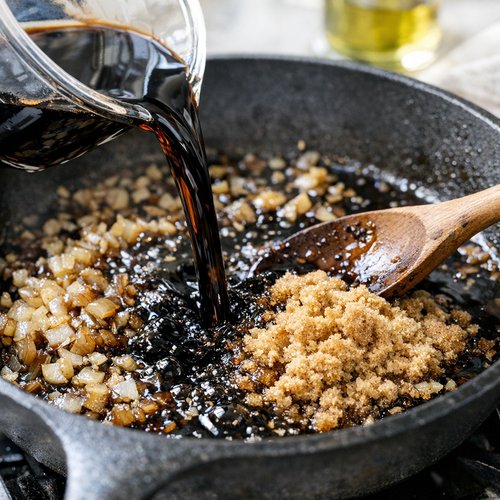
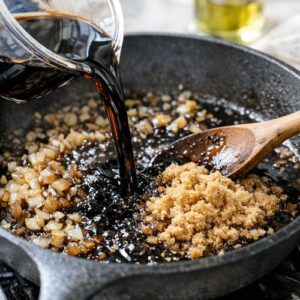
Pour your 1 cup of balsamic vinegar into the skillet with the onions and garlic. Immediately add ⅓ cup of brown sugar. Stir constantly for about 1 minute until the sugar dissolves completely. You should see the mixture go from gritty to smooth.
Increase the heat slightly if needed until the mixture comes to a gentle simmer. You’ll see small bubbles breaking the surface consistently. Reduce the heat to medium so it’s simmering gently, not aggressively boiling. This is important because aggressive boiling burns the vinegar and makes it taste harsh instead of balanced.
Let this simmer for 5 to 8 minutes, watching it carefully. It will go from thin and watery to noticeably thicker. You’re reducing it by almost half—that’s when you know it’s ready. The color will darken to a deep brown-black, and when you tilt the pan, the sauce should coat the sides and slide down slowly instead of running freely.
Step 6: Finish the Pork in the Glaze
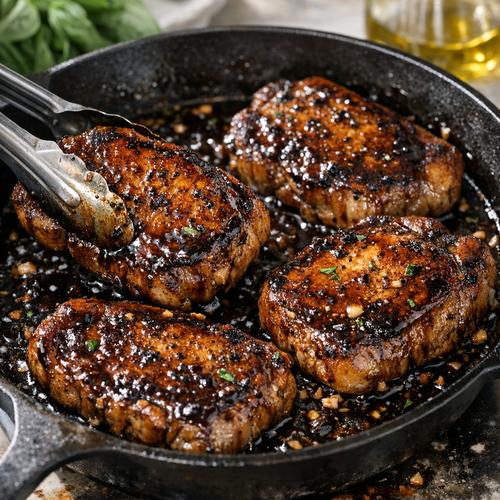
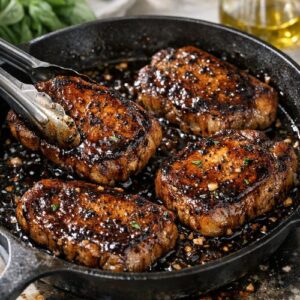
Add your seared pork chops back into the skillet along with any juices that collected on the plate. Gently turn the pork a few times to coat it with the glaze. Simmer for exactly 2 minutes, just long enough for the meat to reheat and the sauce to become syrupy and cling to every surface.
Be careful not to overcook during this final step. The pork is already mostly cooked, and the carryover heat will finish it. Overcooked pork—even by a few minutes—becomes tough and dry.
Step 7: Plate and Garnish
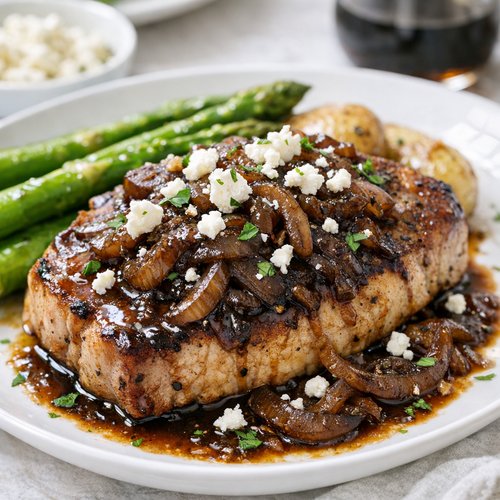
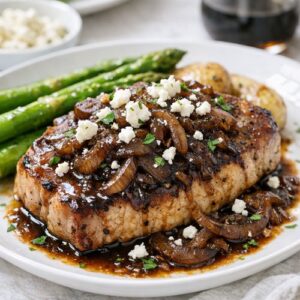
Transfer your pork chops to serving plates and spoon the onions and sauce generously over the top. If you’re using goat cheese or feta, crumble it over each chop while the glaze is still warm so it softens slightly. Finish with fresh chopped parsley or thyme. The herbs add brightness and visual appeal that makes this feel like restaurant food.
Side-by-Side Results: What to Expect
When you follow this method correctly, here’s exactly what you should get: pork chops that are juicy inside with a slight firmness when you cut into them—not rubbery, not mushy. The exterior should have a light golden-brown color from the initial sear, with a dark glossy coating from the balsamic glaze.
The sauce itself will be thick enough to coat the back of a spoon and cling to the meat rather than pooling on the plate. The flavor should be balanced—you’ll taste the sweetness of caramelized brown sugar, the acidity of balsamic vinegar, and the subtle aromatics of garlic and onion. No single flavor should overwhelm the others.
Compare this to oven-roasted pork: the meat might be juicy, but the sauce tastes separate, like something that happened on a different baking sheet. The slow cooker version will be even more tender but also more fibrous, and the sauce will taste washed out and one-dimensional.
When to Use Each Method
- You’re cooking dinner tonight and want it ready in 20 minutes – Use this stovetop method. It’s fast, requires minimal planning, and delivers the best flavor-to-effort ratio.
- You’re meal prepping for the entire week – Consider the slow cooker method. Yes, the texture and sauce are less refined, but you can batch-cook for four people at once and have dinners ready to reheat throughout the week.
- You’re cooking for a crowd and your stovetop is already occupied – The oven method makes sense here. You can bake multiple pork chops at once, and the hands-off time lets you manage other dishes.
- You want absolute juiciness no matter what else happens – This stovetop method wins again. You have complete control over every temperature and timing detail.
Expert’s Nutritional Tip
As a registered dietitian, I want you to know something important about this dish: pork is often unfairly labeled as unhealthy. The truth is, lean pork chops are an excellent source of B vitamins—especially thiamine and niacin—which support energy production and nervous system health. One 7-ounce pork chop provides about 35 grams of protein with only 7 grams of fat.
The balsamic vinegar in this recipe isn’t just for flavor. Acetic acid from vinegar may help improve insulin sensitivity and reduce blood sugar spikes when consumed with protein and carbohydrates. The caramelized brown sugar and onion create complexity that makes your brain feel satisfied with smaller portions, which is powerful for balanced eating without restriction.
Can I Store Balsamic Pork Chop Recipe?
Yes, and it actually improves slightly as the flavors marry together. Store your cooked pork chops and sauce together in an airtight container in the refrigerator for up to 4 days. The meat will firm up as it cools, but it reheats beautifully.
To reheat, place the pork chops and sauce in a skillet over medium heat, stirring occasionally, for about 5 minutes until warmed through. If the sauce has thickened too much, add 1 to 2 tablespoons of water or low-sodium broth to loosen it back to the right consistency.
You can also freeze this dish for up to 3 months. Thaw overnight in the refrigerator before reheating. The texture of the pork stays good, though the sauce may need a tiny bit of water when reheating to reach the right consistency again.
Make-Ahead Guide
Planning ahead? Here’s exactly how I prep this dish on busy days. The night before, prepare your ingredients: wash and thinly slice your onion, mince your garlic, and measure out your balsamic vinegar and brown sugar into separate bowls. Pat your pork chops dry and season them, then store in an airtight container in the refrigerator until you’re ready to cook.
This takes about 10 minutes of prep work but saves you 10 minutes of actual cooking time when you’re tired at 6 PM. Everything sits in the fridge ready to go, and the pork’s seasoning penetrates even deeper as it sits.
You can also make the balsamic reduction ahead of time. Skip the pork entirely and just simmer the balsamic vinegar, brown sugar, onion, and garlic for 8 to 10 minutes until it’s thick and glossy. Store it in a mason jar for up to 2 weeks. Then on cooking day, you just sear your pork chops and warm them in the pre-made sauce for 2 minutes.
Common Mistakes to Avoid
Mistake 1: Cooking the pork all the way through during the initial sear. I see this constantly. People aim for 165°F internal temperature right out of the skillet, which means the pork will be overcooked by the time it finishes in the glaze. Target 140°F on the first sear, then let it finish to 145°F total. Pork is safe at 145°F, and it stays juicy.
Mistake 2: Boiling the balsamic sauce aggressively. High heat turns the vinegar harsh and acrid. A gentle simmer is all you need. The sauce will thicken from reduction, not evaporation. Watch for that glossy, coat-the-back-of-a-spoon texture, then stop.
Mistake 3: Skipping the sear and trying to poach the pork in the balsamic mixture. Without that initial crust, the meat comes out pale and one-dimensional. The browning is essential for flavor development. It takes only 7 minutes total and changes everything.
Mistake 4: Letting the pork sit in the warm glaze longer than 2 minutes. This is overcooking. The residual heat continues cooking the meat even after you remove it from the stove. Two minutes in the glaze is enough to reheat and coat. Any longer and you’re drying it out.
Nutrition Information
Per serving (one 7-ounce pork chop with glaze and onions), this recipe provides approximately 285 calories, 35 grams of protein, 12 grams of carbohydrates, and 8 grams of fat. These numbers are based on USDA standard nutrient databases for lean pork, with adjustments for sauce absorption.
The glycemic index is moderate rather than high because the protein content slows sugar absorption. If you’re managing blood sugar, serving this with non-starchy vegetables helps further. The iron content from the pork is heme iron, which your body absorbs more efficiently than plant-based iron sources.
Compared to oven-roasted pork chops, this version has slightly more sodium from the sauce but also more balanced flavor, so you’re less likely to add more salt at the table. The balsamic vinegar adds negligible calories but meaningful flavor, which supports satiety.
Seasonal Variations
Spring and Summer: Add fresh lemon zest to the finished plate instead of herbs. The brightness cuts through the richness of the glaze. Or incorporate fresh strawberries into your sauce—add ½ cup halved fresh strawberries during the final 2 minutes of simmering. They add natural sweetness and vibrant color.
Fall and Winter: Add ½ teaspoon of fresh thyme to the sauce while it simmers, and finish each plate with a sprinkle of toasted walnuts. The earthiness works beautifully with balsamic. Or stir in 1 tablespoon of Dijon mustard into the reduced sauce for a deeper, more savory note that feels warming.
Year-Round Variation: Substitute ½ cup of the balsamic vinegar with aged red wine vinegar or sherry vinegar for a different flavor profile. Reduce the brown sugar to ¼ cup to compensate for the change in sweetness. This version feels more sophisticated and less dessert-like.
What Can I Serve With Balsamic Pork Chop Recipe?
This dish works beautifully with sides that echo and balance its flavors. The richness and sweetness of the glaze pairs perfectly with fresh, slightly bitter, or starchy sides. Here are my tested combinations:
- Creamy mashed potatoes – The neutral canvas lets the glaze shine. Use butter and whole milk for real comfort food texture, or try Greek yogurt mixed in for tanginess that echoes the vinegar.
- Sautéed bitter greens – Arugula, broccoli rabe, or sautéed kale with garlic cuts through the sweetness beautifully. The slight bitterness creates balance on your palate.
- Roasted root vegetables – Brussels sprouts, carrots, or parsnips caramelize in the oven and echo the sweet-savory notes of the pork. Toss them with olive oil and finish with sea salt.
- Creamed cauliflower or celery root puree – Both add richness without overwhelming the main dish. The subtle vegetal flavors support rather than compete.
- Simple green salad – Mixed greens with a light vinaigrette refresh your palate between bites. The acidity from the dressing complements the balsamic.
- Polenta or soft risotto – If you want something more indulgent, creamy polenta soaks up the glaze beautifully. Finish with Parmesan for umami depth.
- Bacon Wrapped Carrots Recipe – For special occasions, these roasted carrots with smoky bacon flavor complement the pork’s sweetness perfectly.

Balsamic Pork Chop Recipe
Ingredients
Method
- Pat your pork chops dry with paper towels. This is critical. Moisture is the enemy of a good crust. Sprinkle both sides generously with kosher salt and freshly ground black pepper. Don't use table salt here—the crystals are smaller and you'll over-salt. I use about ¼ teaspoon of kosher salt per chop, and pepper to your taste. Let the chops sit at room temperature for 5 to 10 minutes while you prepare your other ingredients. This allows the seasoning to penetrate and helps the meat cook more evenly. Room temperature meat cooks more consistently than cold meat straight from the refrigerator. The interior reaches the target temperature at the same pace as the exterior, which means you're less likely to end up with a cold center or an overcooked edge.
- Heat 1 tablespoon of olive oil in a large skillet over medium-high heat until the oil shimmers and moves easily around the pan. This should take about 2 minutes. You want the oil hot enough that it sizzles audibly when the pork hits the pan, but not so hot that it smokes. Place your pork chops in the skillet and don't touch them. This is hard, I know. But moving them around prevents a proper crust from forming. Cook the first side for exactly 4 minutes until you see a deep golden-brown color. Then flip and cook the second side for 3 minutes. The first side gets longer because it's touching cold metal. The second side needs less time since the skillet is already hot. The meat doesn't need to be cooked through at this point. You're aiming for an internal temperature of about 140°F, which is medium. It will continue cooking when we add it back to the glaze.

- Transfer your seared pork chops to a clean plate and cover loosely with foil. This keeps them warm while trapping some steam, which helps with carryover cooking without drying them out. Don't cover them tightly—you want some air circulation so condensation doesn't make the crust soggy. The resting period gives the meat fibers a chance to relax and reabsorb their juices. If you skip this step and go straight to the glaze, the meat will be tougher and those beautiful juices will end up in your sauce instead of in every bite.
- Don't rinse the skillet. All those browned bits stuck to the bottom are liquid gold—that's flavor. Add 1 tablespoon of olive oil to the same skillet, still over medium-high heat. Add your minced garlic and sliced onion, stirring occasionally. Cook until the onion is translucent and starting to soften, about 3 minutes. You're not trying to caramelize the onion deeply here. You want it tender but still holding some structure so it adds texture to the final dish. The garlic should smell aromatic but not browned—browned garlic tastes bitter.
- Pour your 1 cup of balsamic vinegar into the skillet with the onions and garlic. Immediately add ⅓ cup of brown sugar. Stir constantly for about 1 minute until the sugar dissolves completely. You should see the mixture go from gritty to smooth. Increase the heat slightly if needed until the mixture comes to a gentle simmer. You'll see small bubbles breaking the surface consistently. Reduce the heat to medium so it's simmering gently, not aggressively boiling. This is important because aggressive boiling burns the vinegar and makes it taste harsh instead of balanced. Let this simmer for 5 to 8 minutes, watching it carefully. It will go from thin and watery to noticeably thicker. You're reducing it by almost half—that's when you know it's ready. The color will darken to a deep brown-black, and when you tilt the pan, the sauce should coat the sides and slide down slowly instead of running freely.
- Add your seared pork chops back into the skillet along with any juices that collected on the plate. Gently turn the pork a few times to coat it with the glaze. Simmer for exactly 2 minutes, just long enough for the meat to reheat and the sauce to become syrupy and cling to every surface. Be careful not to overcook during this final step. The pork is already mostly cooked, and the carryover heat will finish it. Overcooked pork—even by a few minutes—becomes tough and dry.
- Transfer your pork chops to serving plates and spoon the onions and sauce generously over the top. If you're using goat cheese or feta, crumble it over each chop while the glaze is still warm so it softens slightly. Finish with fresh chopped parsley or thyme. The herbs add brightness and visual appeal that makes this feel like restaurant food.
FAQs
Can I use boneless pork chops instead of bone-in?
Absolutely. Both work equally well in this recipe. Bone-in chops are slightly juicier because the bone conducts heat differently and shields the surrounding meat from drying out. But boneless chops cook slightly faster—reduce the initial sear to 3 minutes on the first side and 2.5 minutes on the second side. Check your internal temperature instead of relying on time alone.
What if my balsamic sauce won’t thicken?
This usually means your heat was too low or your vinegar has very low acidity. Keep simmering—it might just need another 2 to 3 minutes. If it stays thin after 10 minutes total, mix 1 teaspoon of cornstarch with 1 teaspoon of cold water until smooth, then whisk it into the simmering sauce. It will thicken immediately. Stir constantly for 1 minute to cook out the cornstarch flavor.
My pork came out tough. What went wrong?
Most likely, you cooked it too long. Pork is actually quite lean, and it dries out faster than beef or chicken. Always pull it off heat at 140°F internal temperature during the sear, and don’t let it sit in the glaze longer than 2 minutes. If you overcooked it this time, know that it still reheats okay—the sauce helps with moisture. But next time, use a meat thermometer and trust it over time estimates.
Can I use white balsamic instead of regular?
Yes, but understand that you’ll lose the deep color and some of the complex flavor. White balsamic is milder and slightly sweeter. If you use it, reduce the brown sugar to ¼ cup and add 1 tablespoon of Dijon mustard to the sauce for depth. It will taste lighter and more delicate, which some people prefer.
How do I know if my pork chops are done?
Use a meat thermometer inserted into the thickest part without touching bone. You’re looking for 145°F internal temperature—that’s the USDA-safe minimum for pork. At this temperature, the meat is pale pink inside with no raw texture. If you don’t have a thermometer, cut into the thickest chop and check for pinkness. Pale pink near the bone with no raw color elsewhere means you’re good.
Can I double this recipe?
Yes, scale up proportionally. Use 8 pork chops, 4 tablespoons oil, 2 cups balsamic vinegar, ⅔ cup brown sugar, 2 garlic cloves, and 2 onions. You’ll need a larger skillet or work in two batches. If working in batches, sear all the pork first and set aside, then make the sauce in one batch. The reduction time stays the same since you’re still reducing 2 cups of vinegar to a glaze.
More Recipes You’ll Love
- this simple cake – A nostalgic dessert that pairs beautifully after this savory dinner.
- this simple cake – Another stovetop favorite with a beautiful glaze that uses similar technique.
- Perfect Hard Boiled Eggs – A foundational skill that pairs with any weeknight meal plan.
This balsamic pork chop recipe is what I make when I want to prove to myself that comfort food and balanced nutrition don’t have to be separate things. It’s the dish that brought me into this work—watching my family gather around these juicy, glossy chops and realizing that food has the power to soothe, nourish, and bring people together all at once.
You don’t need fancy equipment or obscure ingredients. You need one good skillet, a meat thermometer, and the willingness to pay attention for 20 minutes. This recipe rewards that attention with results that feel completely different from what you’d make by accident.
Cook what makes you happy!