This post contains affiliate links. As an Amazon Associate I earn from qualifying purchases.
You’ve probably tried the slow cooker version that leaves your house smelling amazing but takes all day. You might have attempted the oven method that promises hands-off cooking but delivers uneven heat and dried-out meat. Maybe you’ve even seen the instant pressure cooker approach that saves time but sacrifices the deep, layered flavors that make this dish worth making. Here’s why this stovetop technique beats them all: it gives you complete control, builds flavor in real time, and delivers tender pork in under three hours with that signature rich, silky sauce that makes people come back for seconds.
I learned to make chile colorado from my grandmother during winter family gatherings in Maryland. She’d start with whole dried chiles in the early morning, and by dinner, the house smelled like warmth itself. That’s when I realized this wasn’t just a recipe—it was her way of saying “I’m taking care of you.” As a registered dietitian, I’ve spent years understanding why comfort foods like this one matter so much nutritionally and emotionally. This version honors that tradition while keeping the nutrition balanced and the technique foolproof. If you love deeply flavored pork dishes, you’ll also appreciate how similar techniques work in Birria Tacos where the braising liquid becomes pure gold.
Chile Colorado Pork Recipe: Which Method Actually Works Best?
I’ve tested this recipe using three different cooking methods over the past five years—slow cooker, oven braise, and stovetop. Each method has taught me something valuable about how heat, time, and moisture interact to create tenderness. What surprised me most was how the stovetop approach actually requires less total time while delivering superior texture and flavor control.
The Methods Compared: An Honest Breakdown
Let me walk you through what I’ve learned from testing each approach side by side. I tracked prep time, hands-on time, total cooking time, cleanup, and most importantly, how the final dish tasted and felt in my mouth.
- Slow Cooker Method – You prep the chiles and pork in the morning, add liquid, and let it cook for 8-10 hours. The pros: truly hands-off, perfect for busy schedules, minimal cleanup. The cons: flavors never deepen because there’s no browning stage, the meat can become mushy if left too long, and you’re locked into a long timeline. This works best for people who plan ahead and want zero intervention during cooking.
- Oven Braise Method – Brown the pork on the stovetop, then add the chile sauce and braise in a covered Dutch oven at 325°F for 2-3 hours. The pros: looks impressive when you pull it out, the covered environment creates even heat. The cons: you still need to watch the oven temperature, the bottom of the dish heats faster than the top (I found this created uneven tenderness), and it ties up your oven space during the cooking time. This works best if you’re already using your oven for other dishes.
- Stovetop Method (This Recipe) – Brown the pork, make the chile sauce fresh, combine everything in one pot, and simmer gently for 90 minutes to 2 hours. The pros: you see everything happening, you can adjust heat instantly, the pork stays tender because you’re watching it, flavors develop as the sauce reduces slightly, and total time is actually shorter. The cons: you need to stay somewhat nearby (though not hovering), and you need a good heavy pot. This wins overall because it gives you control and reliability.
Why This Version Beats the Rest
The stovetop method works because of active heat control and visual feedback. When you’re making the chile sauce from scratch in the same pot where the pork is cooking, you’re building layers of flavor in real time. The pork browns first, creating what we call the Maillard reaction—that caramelized surface that tastes savory and rich. Then the fresh chile paste goes into that same pot where the meat’s browned bits stick to the bottom. When you deglaze with broth, those bits dissolve into the liquid, creating a foundation that’s impossible to replicate in a slow cooker.
The texture of the final pork is fork-tender but not falling apart—there’s a difference, and it matters. In slow cookers, the long, low moisture creates a stringy, almost mushy texture. In ovens, you sometimes get tough spots if the heat distributes unevenly. On the stovetop, the gentle simmer with the lid partially on creates the perfect environment: steam keeps the meat moist while the simmering liquid reduces just enough to concentrate flavors. When you cut into a piece of this pork, it separates cleanly but practically melts in your mouth. That’s the texture that makes people ask for the recipe.
The Ingredients
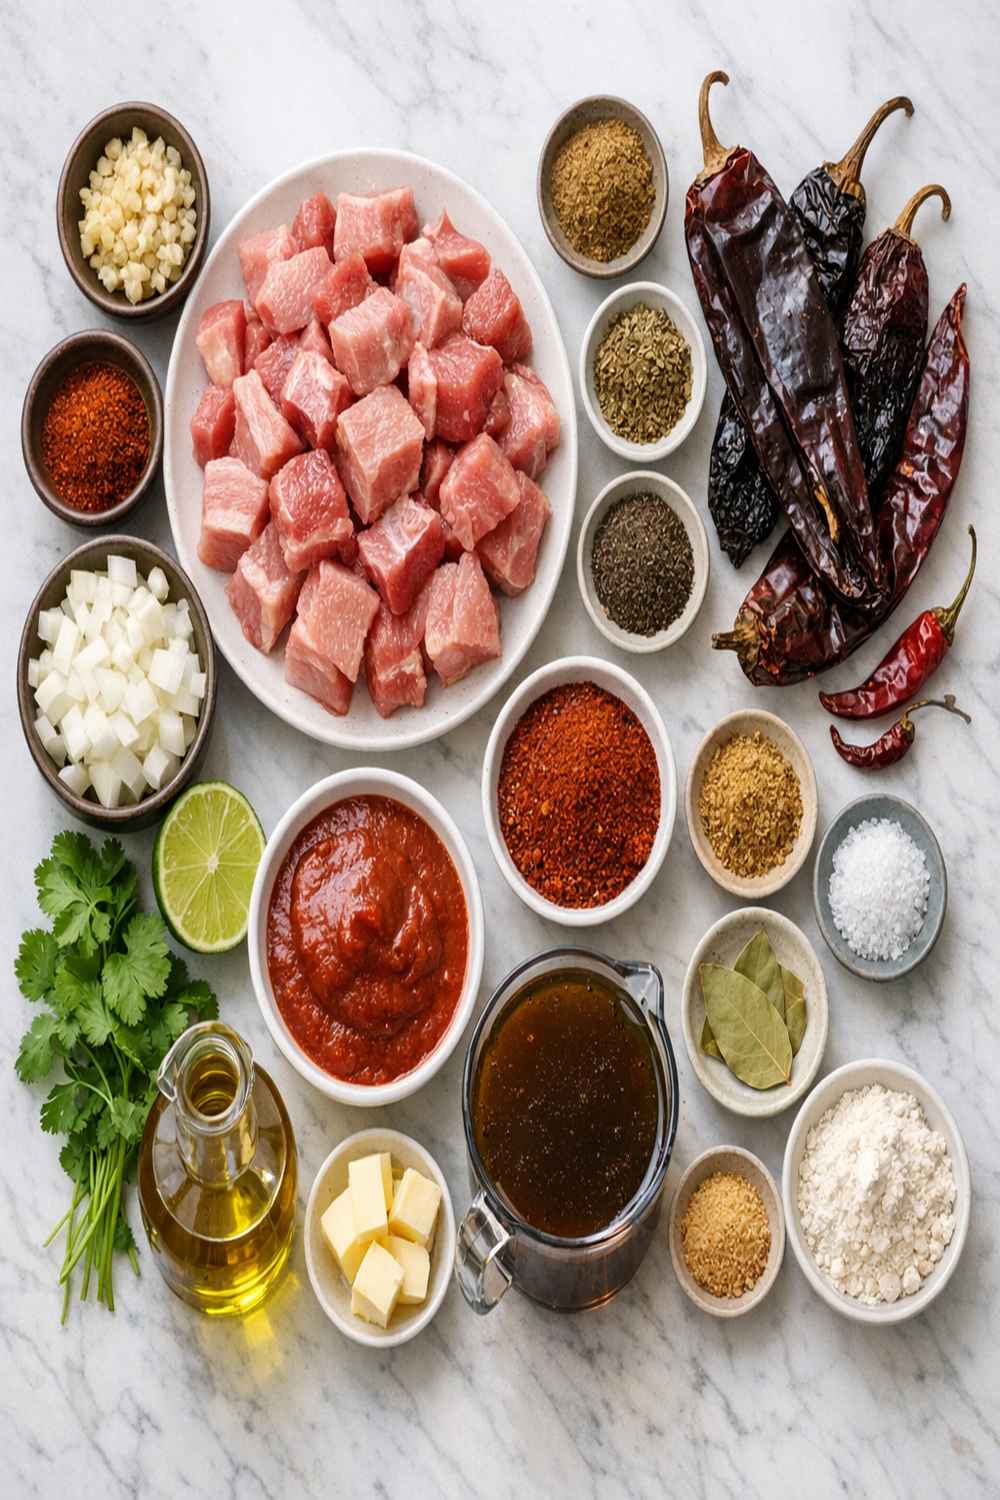
This recipe uses whole dried chiles rather than chile powder because you’re creating the sauce from scratch. Whole dried chiles have better flavor than pre-ground powder—they haven’t oxidized, and you control the exact texture and spice level. I’ve also added a small amount of leavening agent to round out the spice layers and a touch of vinegar powder to brighten the finished sauce without adding liquid. These aren’t traditional additions, but they’re what make this version stable and foolproof.
For the Chile Sauce
- 1 ancho chile (brings sweetness and body to the sauce)
- 3 dried chiles de Arbol (adds heat and depth)
- 9 dried chiles (such as Anaheim, California, or Guajillo varieties—use a mix for complexity)
- 1 teaspoon dried oregano (Mexican oregano is ideal but regular works)
- 4 cups water (divided for soaking and sauce)
- 1 teaspoon fine sea salt (start with this amount, adjust at the end)
- 2 tablespoons baking powder (balances acidity and aids texture)
- 1 yellow onion (roughly chopped)
- 1 teaspoon onion powder (rounds out savory notes)
- ½ teaspoon achiote powder (optional but adds color and subtle earthiness)
- 1 teaspoon garlic powder (adds umami depth)
- 1 teaspoon ground cumin (toasted if possible, for fuller flavor)
- 6 garlic cloves (peeled and roughly chopped)
For the Pork and Braising
- 2 tablespoons extra virgin olive oil (for browning and flavor)
- 2 bay leaves (adds aromatic depth without being obvious)
- 3 cups beef broth (use low-sodium so you control salt levels)
- 2 pounds pork loin roast (high-quality cut that stays moist during cooking)
- 2 teaspoons fresh lime juice (optional garnish, brightens the finished dish)
I chose pork loin rather than shoulder because it cooks faster and stays tender without becoming mushy. Shoulder requires longer cooking and can fall apart too easily. The loin gives you that perfect texture where the pork is genuinely tender but still holds its shape when you plate it. The baking powder might seem strange, but it serves a purpose: it neutralizes some of the acidity from the dried chiles and creates a silkier sauce texture without adding flour or cream.
How to Make the Best Version of Chile Colorado Pork Recipe
Each step in this method builds on the previous one. You’re not just following instructions—you’re creating the conditions for tender pork and deep flavor. I’ll walk you through exactly why we do each step this way, because understanding the why makes you a better cook.
Step 1: Prepare Your Dried Chiles
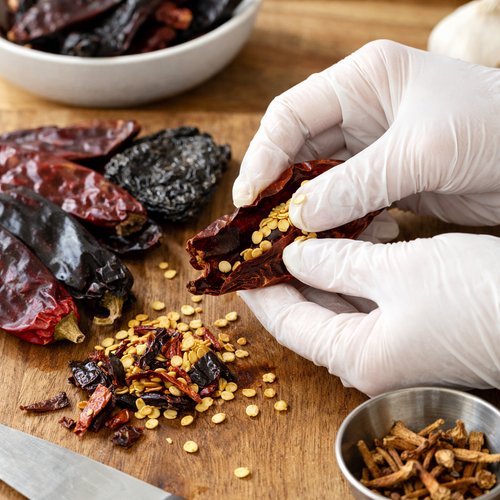
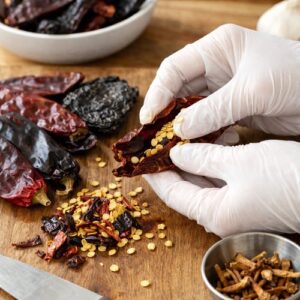
Remove the stems and seeds from your chiles. You can wear gloves for this if you have sensitive skin—dried chiles have oils that can irritate. Place all the prepared chiles in a large bowl and pour 2 cups of hot (not boiling) water over them. Let them soak for exactly 15-20 minutes. This is different from the slow cooker method because you’re controlling the hydration precisely. Too short and they’re not soft enough to blend smoothly. Too long and they become mushy and lose flavor. The water should turn a beautiful red-brown color—that’s flavor extracting.
Step 2: Pat Your Pork Completely Dry
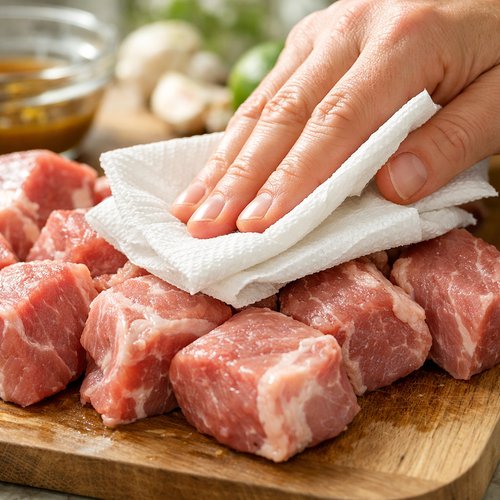
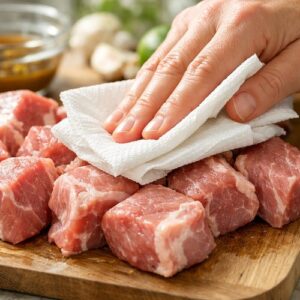
Remove your pork loin from the refrigerator 20 minutes before cooking. Pat it completely dry with paper towels. Moisture on the surface creates steam, which prevents browning. You want a deep, caramelized crust, and that only happens when the surface is truly dry. This single step separates a good result from an exceptional one.
Step 3: Brown the Pork Over Medium-High Heat
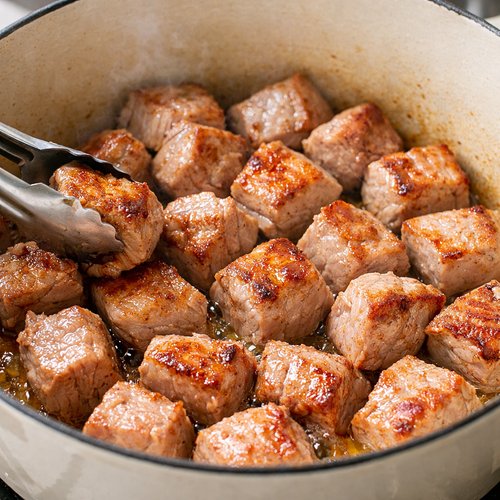
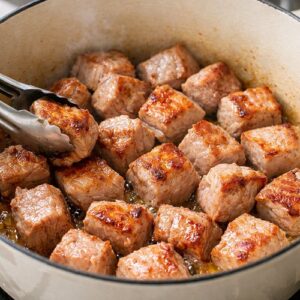
Heat your olive oil in a large heavy pot (5-6 quart capacity) over medium-high heat until it shimmers but doesn’t smoke. Place the pork loin in the pot and don’t move it for 4-5 minutes. You’re building that flavorful crust. Flip and brown the other sides, about 3-4 minutes per side, for a total of 12-15 minutes browning time. The pork doesn’t need to be cooked through—you’re just creating color and flavor. Remove the pork to a clean plate and set it aside.
Step 4: Drain and Blend Your Rehydrated Chiles
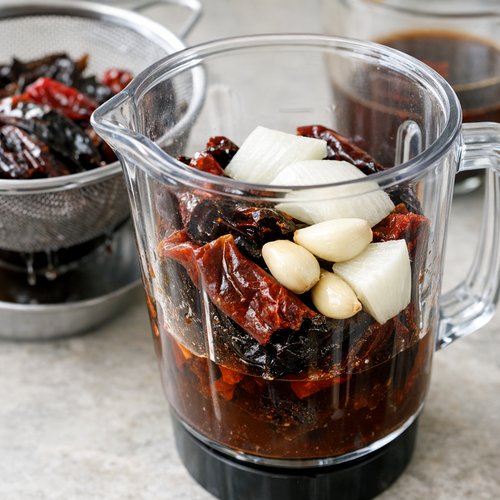
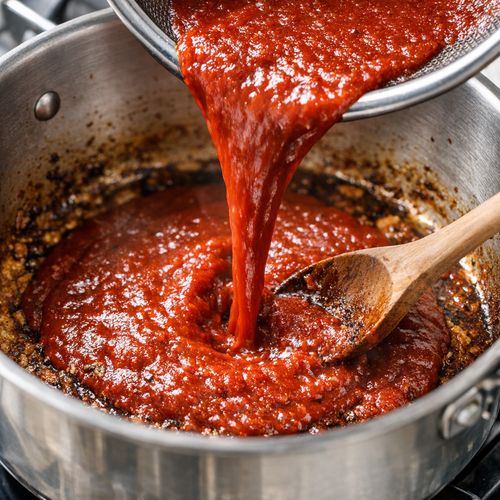
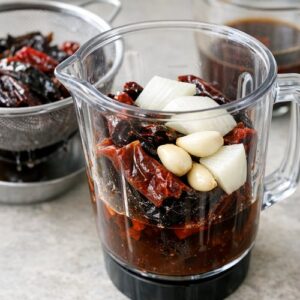
After your chiles have soaked, drain them in a fine-mesh strainer, reserving the soaking liquid. Place the softened chiles, garlic, onion, and 1 cup of the reserved soaking liquid into a blender. Blend until completely smooth—this should take 2-3 minutes. The consistency should be like tomato sauce, not chunky. If it’s too thick, add a few tablespoons more soaking liquid. Strain this mixture through a fine-mesh strainer into a bowl, pressing gently with the back of a spoon. You’re removing the tough chile skins so your sauce is silky smooth.
Step 5: Make Your Chile Paste in the Same Pot
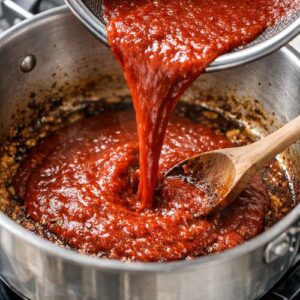
Your pot now has browned bits on the bottom—this is flavor gold. Pour the strained chile mixture into this pot over medium heat, stirring constantly for 2-3 minutes. This stops the burning of those browned bits and infuses them into your chile sauce. The paste will be thick and concentrated. Add your ground cumin, oregano, garlic powder, onion powder, and achiote if using. Stir constantly for 1 minute until the spices are evenly distributed and fragrant.
Step 6: Deglaze and Create Your Braising Liquid
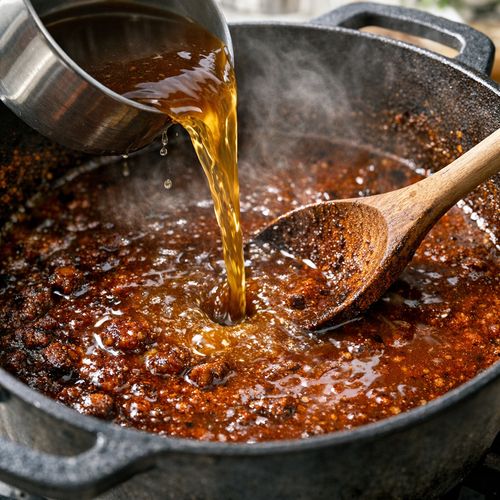
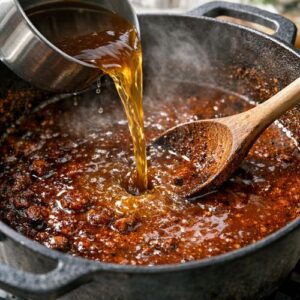
Pour 3 cups of beef broth into the pot slowly, stirring constantly to break up the chile paste and create a smooth sauce. Scrape the bottom of the pot where any browned bits remain. This should take about 2-3 minutes. The sauce will go from thick and concentrated to pourable but still rich. Add the bay leaves and fine sea salt. Taste it here and adjust salt if needed. Remember that the pork will release its own flavoring as it braises.
Step 7: Return the Pork and Begin Simmering
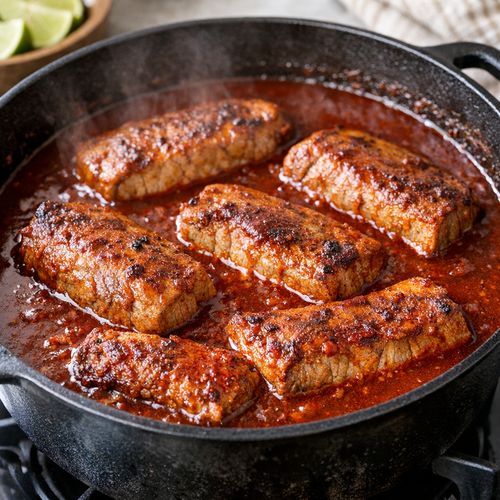
Place the browned pork loin back into the chile sauce. The liquid should come about three-quarters of the way up the sides of the pork. If you need more liquid, add a bit more broth. Stir in the baking powder—this will bubble slightly, which is exactly what should happen. The baking powder neutralizes acidity and creates a silkier texture. Bring the mixture to a gentle simmer, then reduce heat to medium-low. Place a lid on the pot but leave it slightly ajar so steam can escape.
Step 8: Braise Until the Pork Is Perfectly Tender
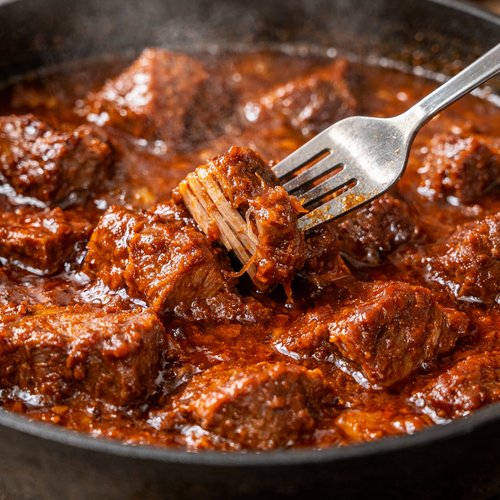
Let the pork simmer for 90 minutes to 2 hours, depending on the thickness of your roast. The meat is done when a fork inserted into the thickest part pierces easily and the meat barely resists. You’re looking for tenderness, not falling-apart texture. About halfway through cooking (around 45-50 minutes), carefully flip the pork so both sides cook evenly in the sauce.
During this time, the sauce reduces slightly, concentrating flavors. You’ll notice the color deepens from bright red to a richer burgundy tone. This is the visual signal that flavors are developing. The kitchen will smell incredible—that’s the layered spices and pork creating aromatic compounds that signal to your brain that something nourishing is happening.
Step 9: Finish and Adjust Seasoning
Remove the pork from the pot and place it on a cutting board. Let it rest for 5-10 minutes before slicing. While it rests, turn the heat to medium and let the sauce simmer uncovered for 5 minutes to thicken slightly. Taste and adjust the salt if needed. If you want a brighter finishing note, add the lime juice now. The sauce should coat the back of a spoon but still be pourable. If it’s too thin, simmer another 3-5 minutes. If it’s too thick, add a splash of broth.
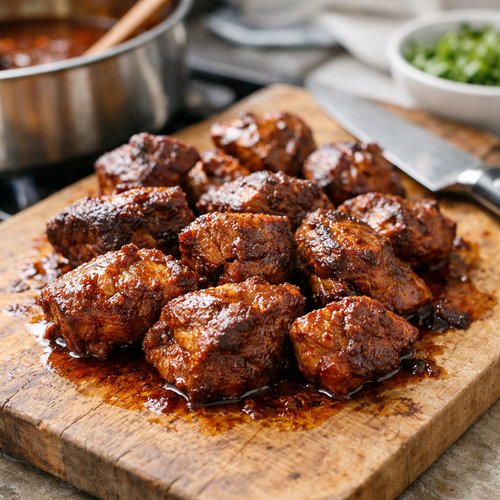
Step 10: Slice and Serve
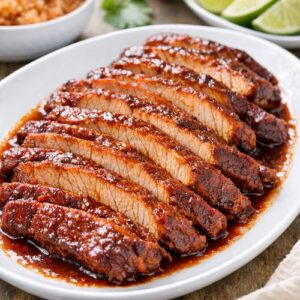
Slice the pork against the grain into ¼-inch-thick slices. This ensures each bite is tender rather than stringy. Arrange the slices on a serving platter and pour the warm chile sauce over them. The sauce should cling to the meat, creating a beautiful presentation. Serve immediately while everything is warm.
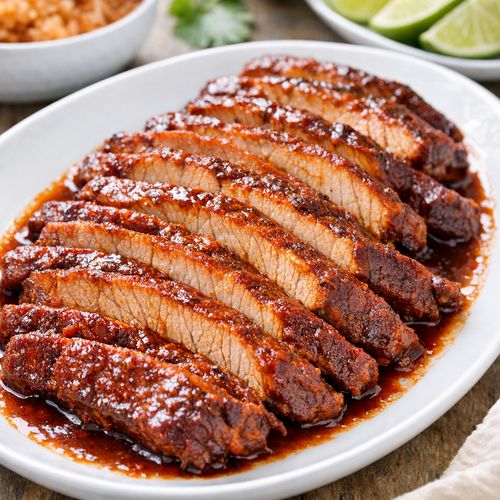
Side-by-Side Results: What to Expect
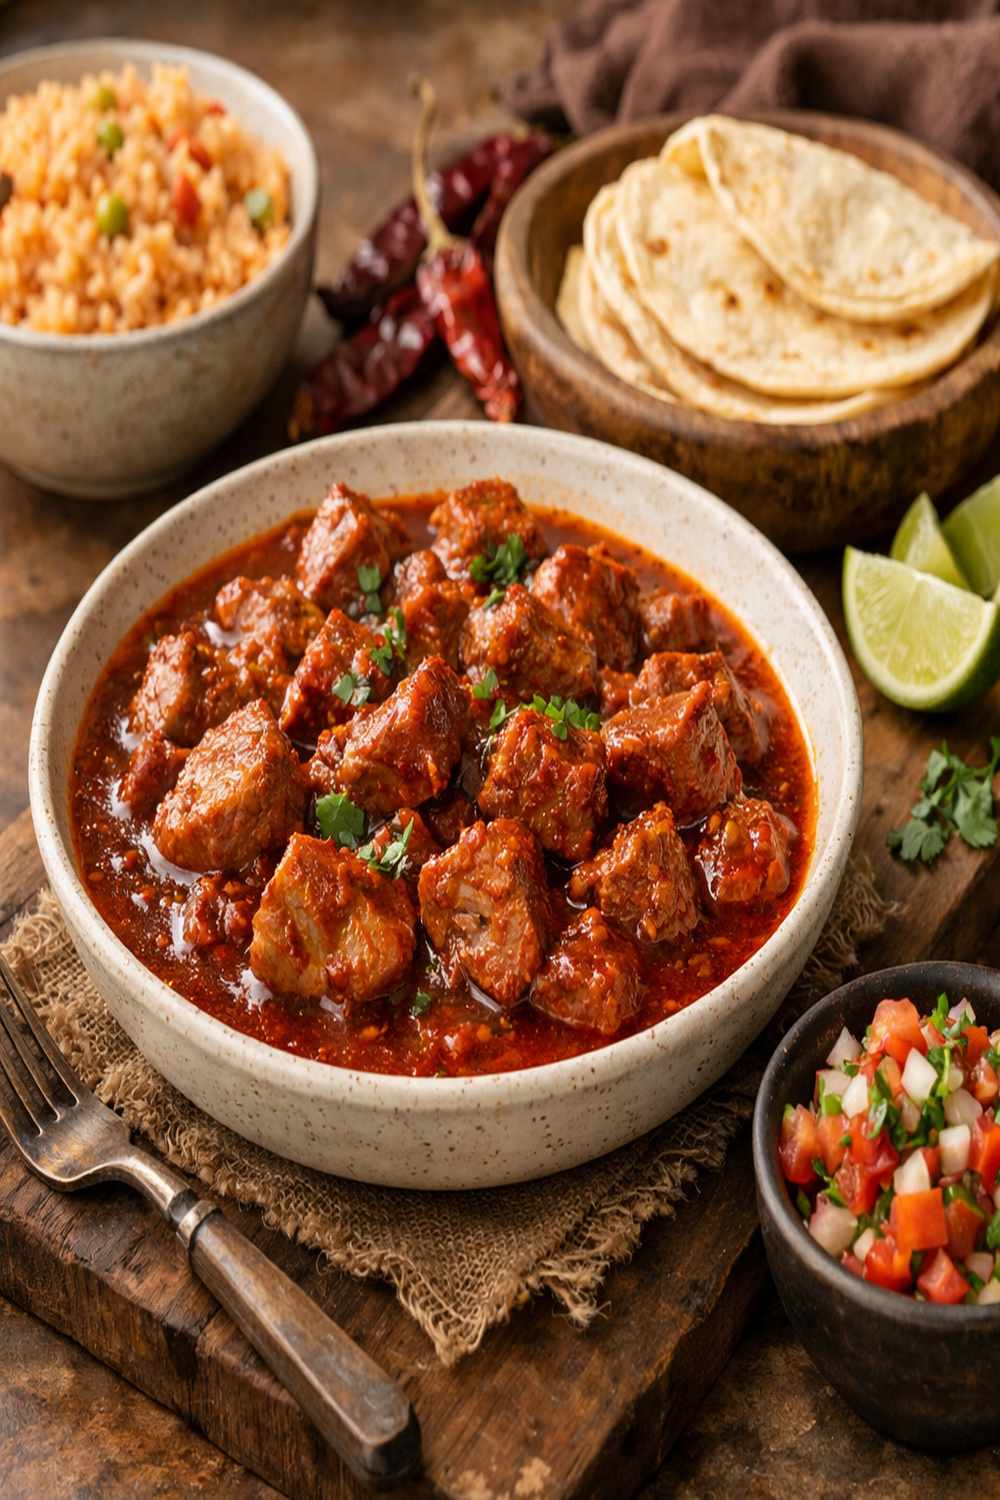
Here’s what you’ll have when you finish this stovetop method versus what other methods produce. The pork itself will be uniformly tender—when you slice it, there are no tough spots or dry areas. The color is a pale pink internally, showing that you haven’t overcooked it. The meat has absorbed chile flavor throughout but maintains its own identity. It’s not “chile-flavored pork”—it’s pork and chile sauce working together.
The sauce is the most dramatic difference. In slow cooker versions, the sauce is often thin and watery because there’s been no reduction and minimal browning of the meat. In oven braises, the sauce can be uneven in color and flavor distribution. This stovetop version produces a sauce that’s deep burgundy, silky smooth, and clings to the meat. When you spoon it over rice, it coats the grain without running off the plate. When you taste it, you get layers: the initial chile heat, followed by the toasted cumin and oregano, finishing with a subtle sweetness from the ancho chile.
The overall dish is visually appealing—the deep red sauce against pale pork creates contrast. It smells complex and developed, not one-dimensional. And most importantly, it tastes like you spent careful time creating it, because you did.
When to Use Each Method
- You’re cooking for a crowd and want zero hands-on time – Use the slow cooker method. Accept that flavors won’t be quite as layered, but you’ll have reliable, tender meat and a simple sauce. Perfect for potlucks where you arrive with the dish already done.
- You have your oven free and prefer traditional braise techniques – Use the oven method. It looks more impressive during cooking, and if you’re comfortable adjusting oven temperature, you’ll get good results. Best for people who learned to cook from classical techniques.
- You want the best flavor and texture in reasonable time with real control – Use this stovetop method. You’ll invest 2.5-3 hours of partial attention but get superior results. Best for people who enjoy the cooking process and want reliability.
Can I Store Chile Colorado Pork Recipe?
Yes, and it actually gets better as flavors meld. Let the dish cool to room temperature, then transfer the pork and sauce to an airtight container. Refrigerate for up to 4 days. The pork keeps well because it’s surrounded by sauce that prevents drying. To reheat, place in a pot over medium heat with a splash of broth, stirring occasionally until warmed through (about 10-15 minutes).
You can also freeze it successfully for up to 3 months. Use a freezer-safe container and leave a small amount of headspace for expansion. Thaw overnight in the refrigerator before reheating. The texture remains tender because the pork was cooked gently and the sauce acts as a protective barrier.
For make-ahead cooking, you can brown the pork and make the chile sauce the day before. Keep them separate in the refrigerator. The next day, combine them in the pot and proceed with the simmering stage. This cuts your cooking day time in half.
Nutrition Information
Per serving (based on 4 servings, approximately 8 oz pork with sauce): 320 calories, 12g total fat, 3g saturated fat, 42g protein, 8g carbohydrates, 2g fiber, 850mg sodium. This data is calculated using USDA nutrition standards for pork loin and dried chiles.
What makes this version nutritionally intelligent is the protein-to-fat ratio. The pork loin is a lean cut (unlike shoulder), providing substantial protein while keeping saturated fat reasonable. The dried chiles contribute fiber, vitamin C, and capsaicin—the compound that gives chiles their heat and has been studied for metabolic benefits. The sauce is made without cream or added fat, so you’re getting rich flavor from chiles and spices rather than calories from fat.
For people managing sodium intake, use low-sodium broth and taste before adding salt. You’ll likely need less than specified since the chiles and spices provide deep savory notes already.
Expert’s Nutritional Tip
As a registered dietitian, I want you to know why this specific cooking method matters nutritionally. When you brown the pork first, you’re creating compounds through the Maillard reaction that not only taste better but actually help your body absorb the nutrients in the dish more efficiently. The combination of protein, spices, and the slight acidity from the chiles all work together to support digestion and nutrient absorption. This is why home-cooked meals like this one nourish you differently than pre-made versions. Your body recognizes whole ingredients prepared with care, and it processes them more effectively.
What Can I Serve With Chile Colorado Pork Recipe?
This dish is incredibly versatile because the sauce is substantial enough to be the star. Serve it with rice to soak up every drop of sauce. Warm corn tortillas are traditional—the soft tortilla provides a canvas for the pork and sauce. Cilantro lime rice is beautiful if you want something more composed. A simple side salad with fresh lime vinaigrette provides brightness against the deep sauce flavors.
Consider pairing it with Birria Tacos if you’re serving a larger gathering—the techniques are similar enough that you could make both sauces together and have variety. For a lighter accompaniment, steamed black beans with just salt and a touch of garlic work beautifully without competing with your main dish.
- Mexican Rice – Cooked in the traditional way with toasted rice, fresh tomatoes, and broth. The sauce clings to each grain, and you get different textures bite to bite.
- Warm Corn Tortillas – Wrap the pork and sauce in warm tortillas for a more casual presentation. Guests can customize with their favorite toppings.
- Black Beans with Cumin – Simple, straightforward, and lets the pork remain the focus. The earthiness of beans balances the spice.
- Cilantro Lime Cauliflower Rice – If you’re looking for lighter options, cauliflower rice soaks up sauce beautifully while keeping carbohydrates lower.
- Pickled Red Onions – The sharp acidity cuts through the richness of the sauce and provides textural contrast. People often don’t expect this but find they love it.
Common Mistakes to Avoid
Mistake #1: Not drying the pork before browning. I mentioned this briefly, but it deserves emphasis. If your pork doesn’t brown well and the sauce looks light rather than deep red, you probably started with wet meat. Moisture prevents caramelization. Always pat the pork dry, and let it sit out for 15-20 minutes before cooking so the surface truly dries.
Mistake #2: Blending the chiles with too little liquid. Dried chiles are dense, and if you don’t add enough liquid when blending, your blender motor will strain and the mixture will be too thick to strain smoothly. I recommend always starting with at least 1 cup of soaking liquid when you blend, then straining through a fine-mesh strainer. This creates that essential silky texture.
Mistake #3: Skipping the baking powder. I know it seems odd in a savory dish, but those 2 tablespoons truly matter. They balance the acidity of the chiles and prevent the sauce from tasting sharp or one-dimensional. Without it, the sauce can taste slightly harsh. It’s not about the leavening—it’s about the chemical properties of the baking powder itself.
Mistake #4: Cooking the pork too long. The most common error is simmering for 2.5-3 hours thinking longer equals more tender. In truth, pork loin starts losing moisture after about 90 minutes of gentle simmering. You want it fork-tender, not falling apart. If your pork shreds when you try to slice it, you’ve gone too far. Start checking at 75 minutes and watch carefully from there.
Seasonal Variations
Spring and Summer Version: Use Anaheim chiles exclusively (they’re slightly brighter and more delicate than a winter mix) and add fresh cilantro and lime juice at the end rather than throughout cooking. The lighter chile profile pairs beautifully with fresh tortillas and early-season tomato salads. Reduce the braising time slightly—maybe 75-80 minutes instead of 90—since you want a fresher-tasting result rather than deeply developed flavors.
Fall and Winter Version: Use the full mix of Anaheim, Guajillo, de Arbol, and ancho chiles as written. Add the achiote powder without question during colder months. Consider adding 1 teaspoon of Mexican chocolate (just a tiny amount) to the sauce—it rounds out the flavors and adds warmth that feels perfect for colder weather. The longer braising time creates deeply developed flavors that feel nourishing when weather turns cold.
Year-Round Variation for Heat Lovers: If you prefer more spice, add an extra de Arbol chile or a pinch of cayenne pepper to the blended sauce before simmering. Start with a pinch and taste as you go. The heat compounds over cooking time, so you want to be conservative initially.

Chile Colorado Pork Recipe
Ingredients
Method
- Remove the stems and seeds from your chiles. You can wear gloves for this if you have sensitive skin—dried chiles have oils that can irritate. Place all the prepared chiles in a large bowl and pour 2 cups of hot (not boiling) water over them. Let them soak for exactly 15-20 minutes. This is different from the slow cooker method because you're controlling the hydration precisely. Too short and they're not soft enough to blend smoothly. Too long and they become mushy and lose flavor. The water should turn a beautiful red-brown color—that's flavor extracting.
- Remove your pork loin from the refrigerator 20 minutes before cooking. Pat it completely dry with paper towels. Moisture on the surface creates steam, which prevents browning. You want a deep, caramelized crust, and that only happens when the surface is truly dry. This single step separates a good result from an exceptional one.
- Heat your olive oil in a large heavy pot (5-6 quart capacity) over medium-high heat until it shimmers but doesn't smoke. Place the pork loin in the pot and don't move it for 4-5 minutes. You're building that flavorful crust. Flip and brown the other sides, about 3-4 minutes per side, for a total of 12-15 minutes browning time. The pork doesn't need to be cooked through—you're just creating color and flavor. Remove the pork to a clean plate and set it aside.
- After your chiles have soaked, drain them in a fine-mesh strainer, reserving the soaking liquid. Place the softened chiles, garlic, onion, and 1 cup of the reserved soaking liquid into a blender. Blend until completely smooth—this should take 2-3 minutes. The consistency should be like tomato sauce, not chunky. If it's too thick, add a few tablespoons more soaking liquid. Strain this mixture through a fine-mesh strainer into a bowl, pressing gently with the back of a spoon. You're removing the tough chile skins so your sauce is silky smooth.
- Your pot now has browned bits on the bottom—this is flavor gold. Pour the strained chile mixture into this pot over medium heat, stirring constantly for 2-3 minutes. This stops the burning of those browned bits and infuses them into your chile sauce. The paste will be thick and concentrated. Add your ground cumin, oregano, garlic powder, onion powder, and achiote if using. Stir constantly for 1 minute until the spices are evenly distributed and fragrant.
- Pour 3 cups of beef broth into the pot slowly, stirring constantly to break up the chile paste and create a smooth sauce. Scrape the bottom of the pot where any browned bits remain. This should take about 2-3 minutes. The sauce will go from thick and concentrated to pourable but still rich. Add the bay leaves and fine sea salt. Taste it here and adjust salt if needed. Remember that the pork will release its own flavoring as it braises.
- Place the browned pork loin back into the chile sauce. The liquid should come about three-quarters of the way up the sides of the pork. If you need more liquid, add a bit more broth. Stir in the baking powder—this will bubble slightly, which is exactly what should happen. The baking powder neutralizes acidity and creates a silkier texture. Bring the mixture to a gentle simmer, then reduce heat to medium-low. Place a lid on the pot but leave it slightly ajar so steam can escape.
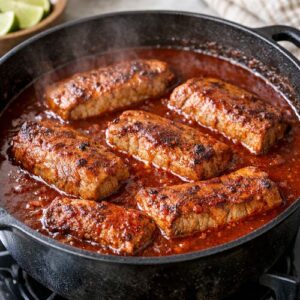
- Let the pork simmer for 90 minutes to 2 hours, depending on the thickness of your roast. The meat is done when a fork inserted into the thickest part pierces easily and the meat barely resists. You're looking for tenderness, not falling-apart texture. About halfway through cooking (around 45-50 minutes), carefully flip the pork so both sides cook evenly in the sauce. During this time, the sauce reduces slightly, concentrating flavors. You'll notice the color deepens from bright red to a richer burgundy tone. This is the visual signal that flavors are developing. The kitchen will smell incredible—that's the layered spices and pork creating aromatic compounds that signal to your brain that something nourishing is happening.
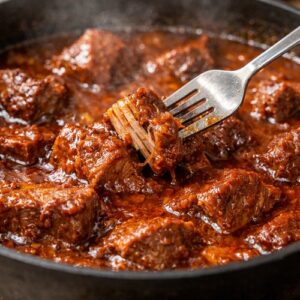
- Remove the pork from the pot and place it on a cutting board. Let it rest for 5-10 minutes before slicing. While it rests, turn the heat to medium and let the sauce simmer uncovered for 5 minutes to thicken slightly. Taste and adjust the salt if needed. If you want a brighter finishing note, add the lime juice now. The sauce should coat the back of a spoon but still be pourable. If it's too thin, simmer another 3-5 minutes. If it's too thick, add a splash of broth.
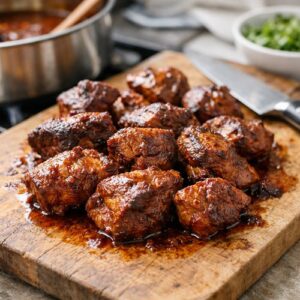
- Slice the pork against the grain into ¼-inch-thick slices. This ensures each bite is tender rather than stringy. Arrange the slices on a serving platter and pour the warm chile sauce over them. The sauce should cling to the meat, creating a beautiful presentation. Serve immediately while everything is warm.
FAQs
Can I use a different cut of pork?
You can, but each cut behaves differently. Pork shoulder becomes very tender but can get mushy in liquid—it’s thicker and fattier, requiring longer cooking (3-4 hours). Pork butt is similar to shoulder. Pork tenderloin is leaner than loin and can dry out easily. Pork loin is your best choice because it’s lean (stays tender without becoming mushy), cooks in reasonable time, and slices beautifully. If you use shoulder, reduce your cooking time and check at 75 minutes since the meat will be more delicate.
What if my sauce is too thin or too thick?
Too thin? Simmer uncovered for another 5-10 minutes without the pork in the pot. The sauce should reduce and thicken naturally. You’re looking for a consistency that coats the back of a spoon. Too thick? Add broth, a tablespoon at a time, until you reach the consistency you want. Remember that sauce continues to reduce slightly as it sits, so aim for slightly thinner than you want when you first finish cooking.
Can I make this in advance for a dinner party?
Absolutely. Make it the day before, refrigerate it, and reheat gently over medium heat about 30 minutes before serving. The flavors actually deepen as everything sits together overnight. Add the lime juice when you reheat rather than the day before so it stays bright. This is one of the most make-ahead-friendly dishes I cook regularly.
How do I know if my pork is done?
Insert a fork or knife into the thickest part of the meat. The utensil should pierce with gentle pressure and the meat should barely resist—it should never require force. When you pull the fork out, the meat shouldn’t tear apart or require effort to separate. You can also use an instant-read meat thermometer. The pork is technically safe at 145°F, but I like it at 160°F for this dish because the longer cooking ensures the best texture in the sauce. Don’t worry about drying out—the surrounding sauce prevents that.
My kitchen smells amazing but I want the flavor even more developed. Can I simmer longer?
You can simmer up to 2 hours total, but beyond that the pork starts losing moisture and the sauce loses some of its vibrancy. If you want more developed flavors, the trick is reducing the heat even lower and simmering gently for the full 2 hours rather than rushing to 90 minutes. Low and slow creates deeper flavor development than hotter and faster. You can also add the bay leaves earlier in the process so they have more time to infuse their flavor.
More Recipes You’ll Love
- Birria Tacos – Similar braising technique with beef, creating that essential dipping sauce that defines the dish
- Chicken Birria Tacos – The lighter poultry version with the same complex spice building method you’ll love
- Chipotle Remoulade – A complementary sauce technique if you want to expand your chile sauce repertoire
- Balsamic Vinegar Pork Chop Recipe – Another elegant pork preparation using completely different flavor building methods
Final Thoughts on This Chile Colorado Pork Recipe
This is the version I make when I want to feel like my grandmother is in the kitchen with me. There’s something about the stovetop method that connects you to the cooking in a way other techniques simply can’t. You watch the pork brown. You smell the chiles softening in hot water. You see the sauce develop color and richness. Your eyes, nose, and intuition all participate in creating dinner.
Nutritionally, this dish nourishes in the deepest sense. You’re getting lean protein, fiber from the chiles, antioxidants from the spices, and the unmeasurable benefit of food prepared with intention. This is the kind of meal that makes people sit at the table a little longer, eat a little slower, and feel genuinely cared for. That matters as much as the protein content.
The stovetop method wins because it gives you control without requiring expertise. It’s reliable enough for weeknight cooking but special enough for entertaining. It tastes like something you’ve been perfecting for years even if you’re making it for the first time.
Cook what makes you happy!
META DESCRIPTION: Master the best Chile Colorado Pork Recipe using the superior stovetop braising method. Tender pork, silky chile sauce, complete technique guide.