This post contains affiliate links. As an Amazon Associate I earn from qualifying purchases.
You know that perfectly tender, juicy brisket from your favorite barbecue joint? The one that melts on your tongue and keeps you coming back? I spent years ordering it before I realized the secret wasn’t some mysterious rub or fancy equipment—it was the brine. A simple overnight soak that transforms tough muscle fibers into something genuinely unforgettable. Today, I’m sharing exactly how to recreate that magic in your own backyard, and I promise it’ll be better than anything you’ve paid for. This recipe pulls together everything I’ve learned from family cookouts, barbecue research, and years of experimenting with how to make comfort food sing. Just like brining transforms poultry with a proper turkey brine, this method unlocks brisket’s true potential.
The Copycat Brisket Brine That Outperforms Restaurant Versions
I became obsessed with recreating the brisket from my favorite local barbecue spot after my dad mentioned how much we’d save if I could nail it at home. He wasn’t wrong—we were dropping $60 a month on takeout brisket sandwiches. So I started researching. I read everything about salt penetration, sugar’s role in browning, and how professional pitmasters use overnight brining to guarantee tenderness. The mission wasn’t just about saving money; it was about understanding the science behind why that restaurant version tasted so good, then making it even better with fresh ingredients and total control over the process.
What Makes Restaurant Brisket So Addictive
Restaurant brisket succeeds because of three key factors working together. First, the brine—a saltwater solution that breaks down muscle proteins and allows them to retain moisture during the long smoke. Second, the extended cook time at low temperatures, which gives you that smoky bark outside and tender, pink smoke ring inside. Third, the resting period, which redistributes those juices back through the meat so every slice stays moist rather than drying out the second you cut it. Most home cooks skip the brine step entirely, which is why their brisket never achieves that restaurant tenderness.
- The salt penetration technique — A proper brine dissolves salt crystals into water, creating osmotic pressure that forces the solution deep into muscle fibers, not just surface seasoning
- The sugar-and-spice balance — Sugar caramelizes during smoking to create that mahogany bark, while complementary spices develop complexity as they interact with the smoke
- The overnight timing — Restaurants don’t rush this. Twelve to sixteen hours allows complete salt diffusion and protein restructuring
How This Homemade Version Compares
Here’s the honest truth: your homemade brined brisket will beat the restaurant version in three ways. First, you control freshness—you’re brining and cooking the same day you buy the meat, not three days after it arrived at the restaurant. Second, you customize everything—want more smoke? Less sugar? You decide. Third, the cost per serving drops dramatically when you’re feeding your family instead of paying restaurant markup.
Where restaurants win is consistency (they’ve done this ten thousand times) and specialized equipment (commercial smokers maintain perfect temperature control). But with this recipe and a decent home smoker set to the right temperature, you’ll close that gap completely. The actual taste? Your version will be fresher, more tender, and honestly superior.
The Ingredients—Reverse-Engineered for Maximum Impact
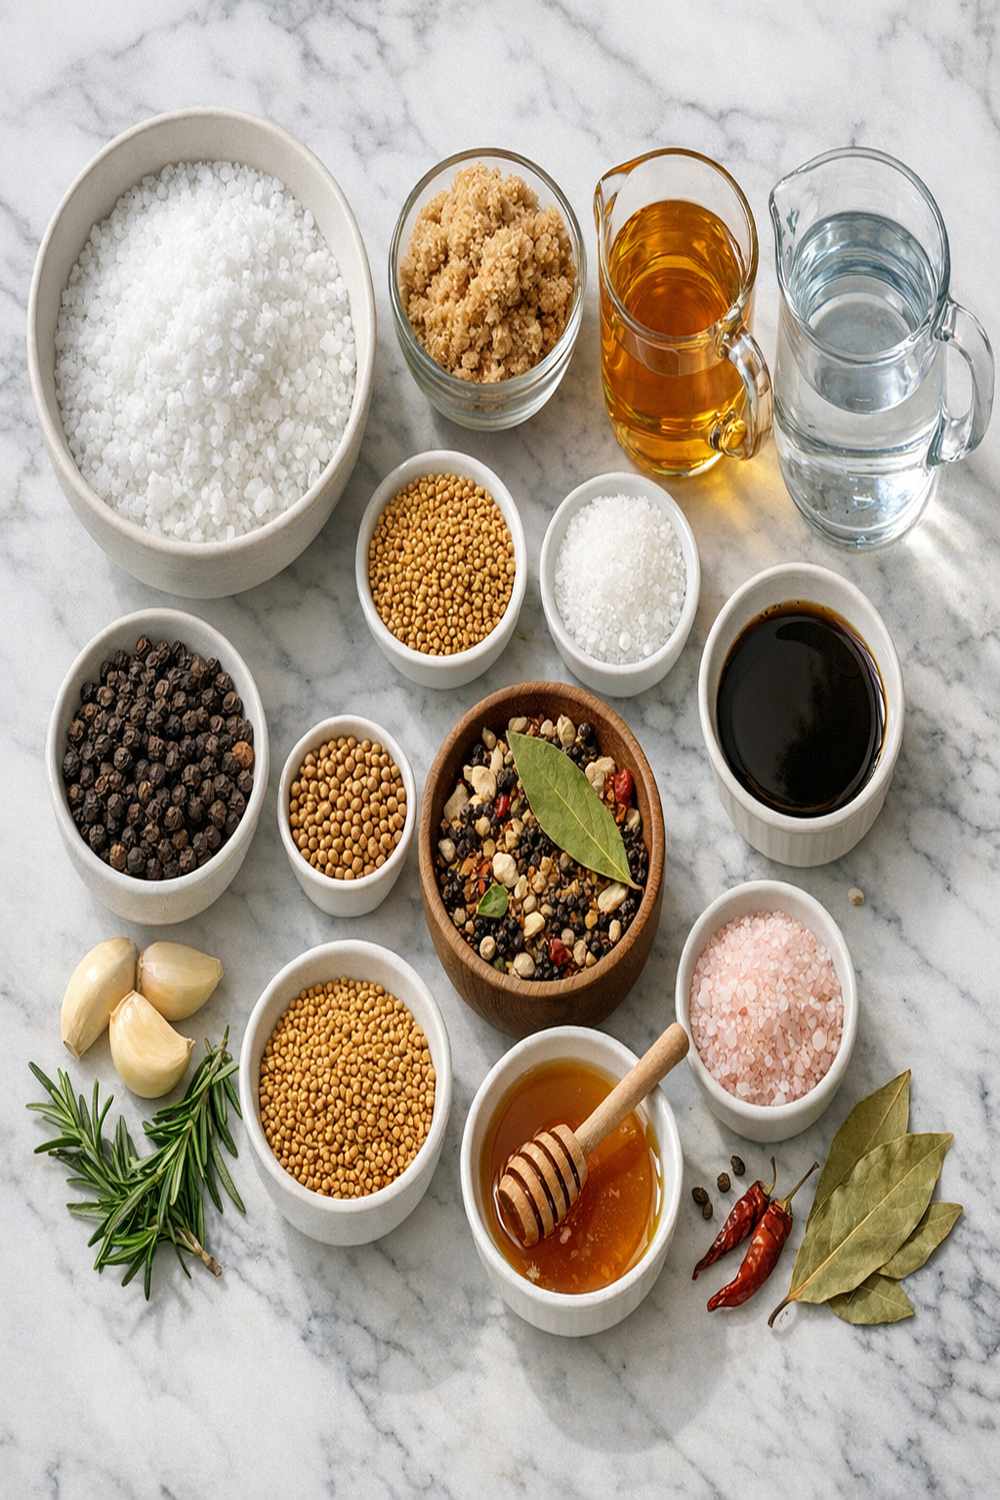
I built this ingredient list by testing countless variations, starting with basic salt-and-sugar ratios used by professional pitmasters, then adding elements that enhance the final smoke flavor. The ice is non-negotiable—it cools your hot brine fast without diluting it with tap water. The beef rub creates the flavorful crust, and the flat cut brisket is the workhorse that responds beautifully to long, slow cooking.
- 6 cups ice (rapid cooling prevents bacterial growth between boiling and refrigeration)
- ¼ cup beef rub blend (paprika, garlic powder, black pepper, and brown sugar create the signature bark)
- 6 quarts filtered water (for boiling; tap water works but filtered prevents off-flavors)
- 2 tablespoons Worcestershire sauce (optional but recommended; adds umami depth to the brine)
- 1 tablespoon whole peppercorns (toasted briefly for more developed flavor than pre-ground)
- ½ cup kosher salt (the larger crystals dissolve evenly without over-salting)
- 1 five- to seven-pound flat cut brisket (the leaner, more uniform cut that slices beautifully)
- 1 cup light brown sugar (dissolves more easily than granulated and adds slight molasses depth)
The Copycat Method: How to Recreate Restaurant-Quality Brisket at Home
What follows isn’t just instructions—it’s the exact method professional pitmasters use, adapted for your home kitchen and smoker. Each step builds on the last, creating conditions that transform a tough cut of meat into something people will talk about for months.
Step 1: Create Your Base Brine Solution
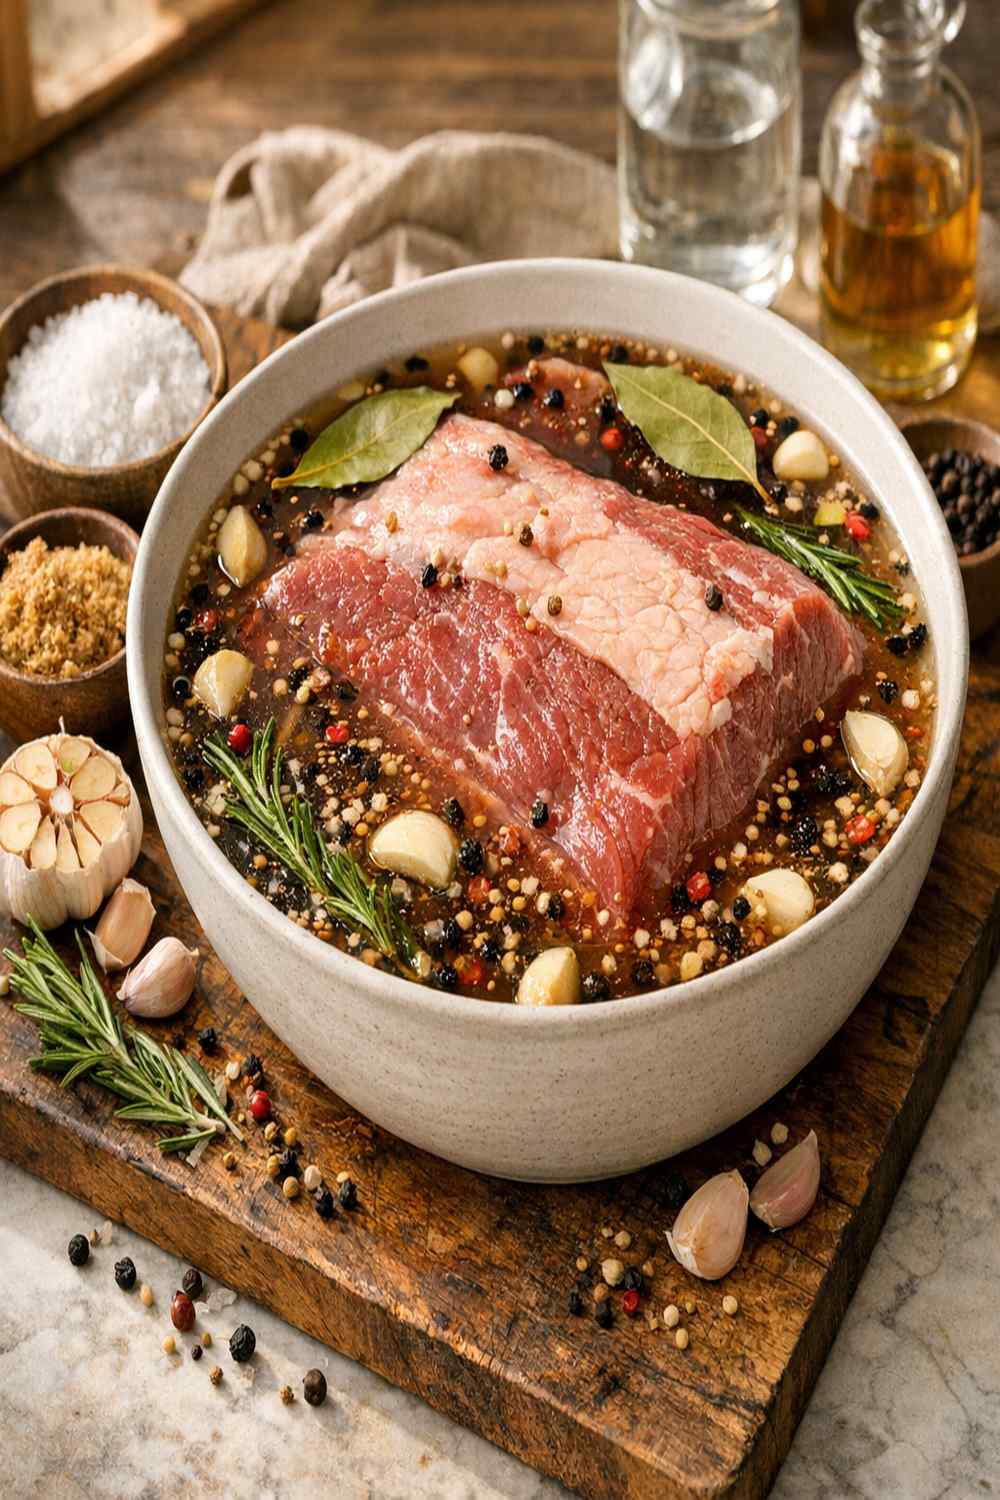
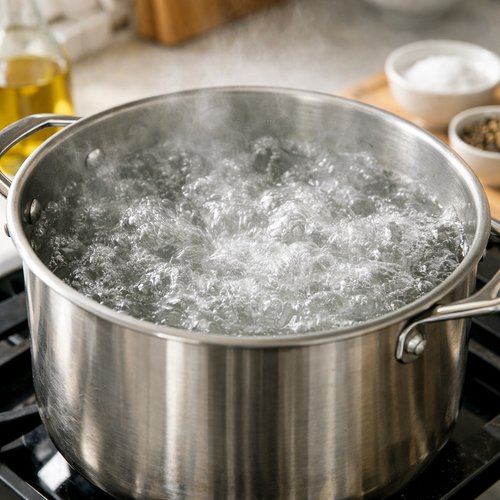
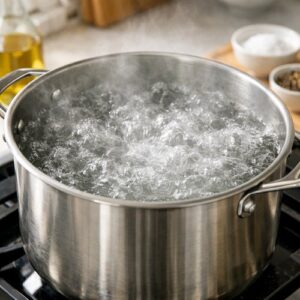
Bring your six quarts of filtered water to a rolling boil in a large pot. You need the water truly hot so the salt crystals dissolve completely—this is critical for even flavor distribution. Add your half cup of kosher salt and one cup of light brown sugar to the boiling water, stirring constantly until both ingredients disappear into the liquid completely. This should take about two to three minutes. You’ll know you’re finished when the water looks clear and tastes distinctly salty-sweet. Now add the two tablespoons of whole peppercorns—they’ll bloom and release their oils into the hot liquid, creating aromatics that infuse the meat overnight.
Step 2: Cool the Brine Rapidly
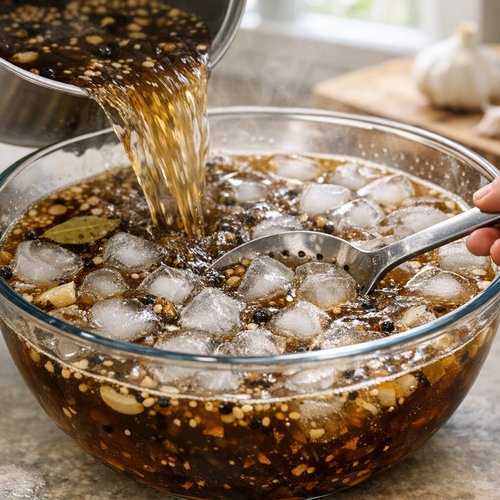
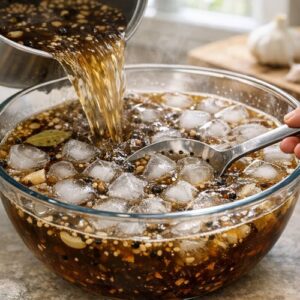
Pour the entire pot of hot brine into a very large bowl or container. Add all six cups of ice immediately. Stir frequently so the ice cools the brine evenly rather than creating pockets of cold and warm liquid. The ice melts as it cools—this is exactly what you want. The brine needs to reach room temperature before the brisket goes in; if the meat hits hot brine, it’ll begin cooking on the surface and won’t absorb the salt evenly. This step takes about fifteen to twenty minutes. Test the temperature with your finger—it should feel cool, not cold, when you’re ready for the next step.
Step 3: Submerge and Refrigerate Overnight
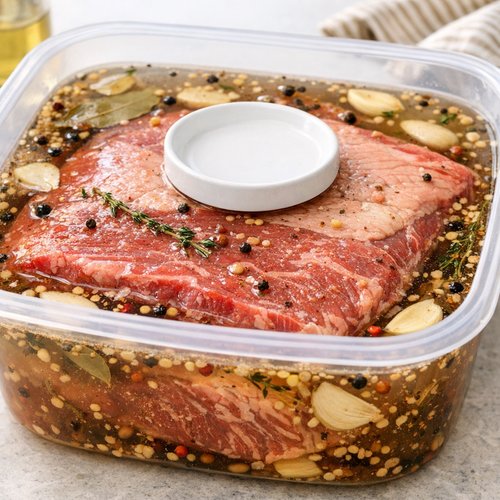
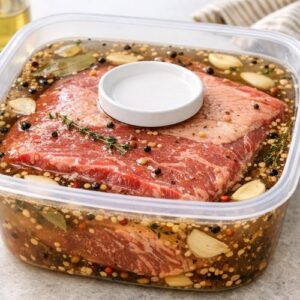
Place your five- to seven-pound flat cut brisket into the cooled brine. The meat should be completely submerged—if it tries to float, place a small plate on top to keep it under the liquid. This is when the magic begins. Cover the container loosely (a towel works fine), transfer it to your refrigerator, and walk away. Twelve to sixteen hours is the ideal range. Most people brine overnight and cook the next day, which is exactly what I recommend. The salt solution penetrates the muscle fibers, breaking down proteins and allowing them to retain moisture during the long smoke ahead.
Step 4: Remove, Dry, and Season the Meat
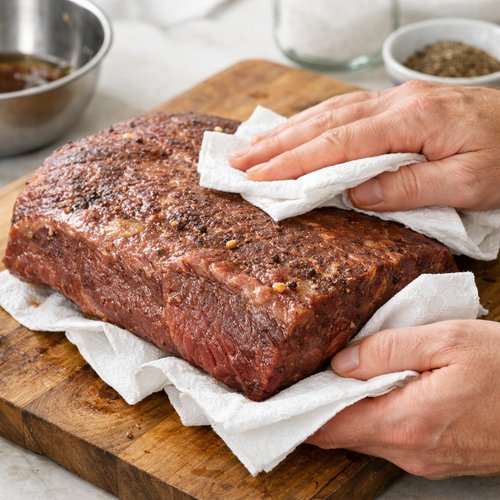
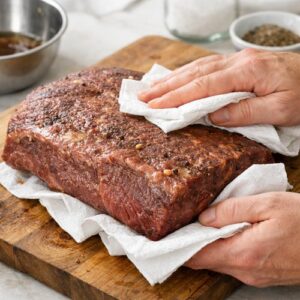
The next morning, remove the brisket from the brine and discard the liquid—you won’t need it again. Pat the brisket completely dry with paper towels. I can’t stress this enough: wetness prevents proper bark formation. Spend two full minutes drying the entire surface, getting into any crevices or folds. Now sprinkle your quarter cup of beef rub evenly across all surfaces of the meat. I like to rub it gently into the meat with my fingers rather than just sprinkling, which helps the spices adhere and creates a more cohesive crust once the smoke hits.
Step 5: Fire Up Your Smoker and Begin the First Cook Phase
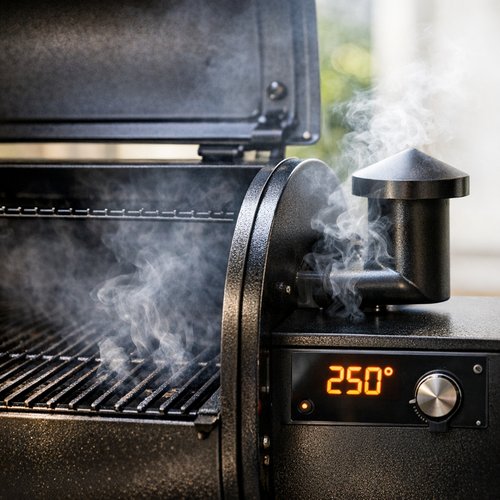
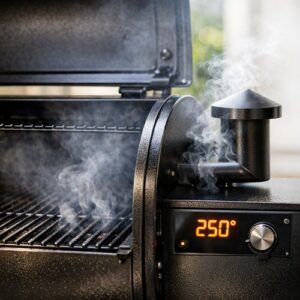
Set your smoker to 250 degrees Fahrenheit and preheat with the lid closed for fifteen minutes. This ensures even heat and allows any residual moisture inside the chamber to evaporate. While the smoker preheats, insert your meat thermometer probe into the thickest part of the brisket—you’ll be monitoring internal temperature continuously from now on. Place the brisket directly on the grill grates, fat-side down. Fat-side down allows the rendered fat to baste the meat as it drips. Close the lid and smoke for three hours without opening it. Resist the urge to peek—every time you lift the lid, you lose heat and extend the cook time.
Step 6: Wrap and Transition to Phase Two
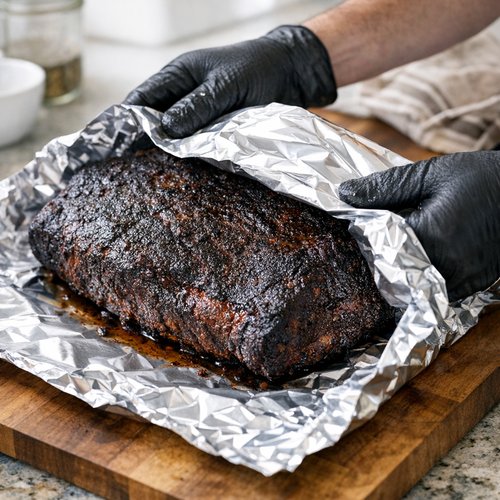
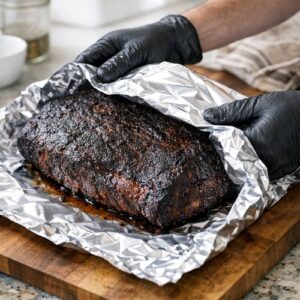
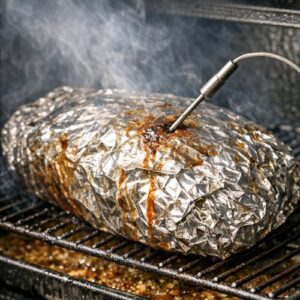
After three hours, carefully remove the brisket from the smoker. It’ll be dark and smoky on the surface—that’s exactly right. Wrapping at this stage is called the Texas Crutch, and restaurants use it because it speeds cooking and locks in moisture. Tear off a double layer of heavy-duty aluminum foil and wrap the brisket tightly, tucking the foil under the meat so it’s sealed completely. Increase your smoker temperature to 275 degrees Fahrenheit. The higher heat moves you through the stall—that stubborn plateau around 150 degrees where the brisket seems to stop cooking as evaporative cooling battles your heat.
Step 7: Low-and-Slow Until Tenderness
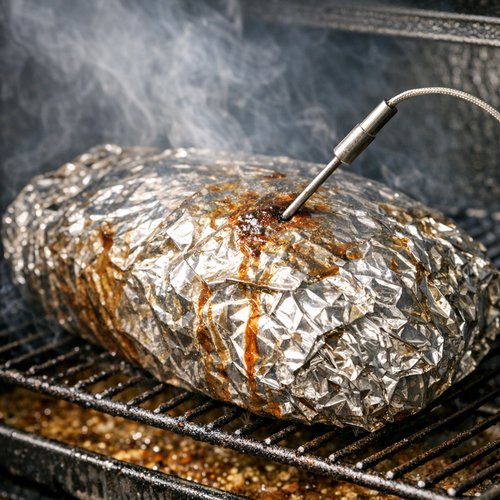
Return the wrapped brisket to the 275-degree smoker and re-insert your probe. From this point, you’re watching internal temperature, not time. Cook until the thickest part of the meat reaches 204 degrees Fahrenheit internally. This usually takes three to four hours, but I’ve seen it take as little as two hours fifty minutes or as long as five hours—variables like exact meat thickness, smoker calibration, and ambient temperature all matter. Don’t rush this stage by pushing the temperature higher. Lower heat gives connective tissue (collagen) time to break down into gelatin, creating that melt-in-your-mouth texture.
Step 8: Unwrap and Develop Final Bark
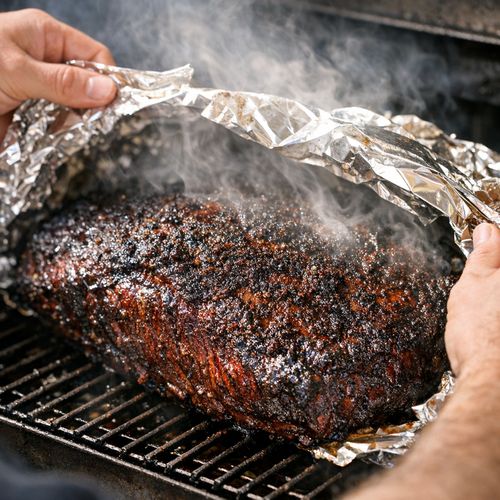
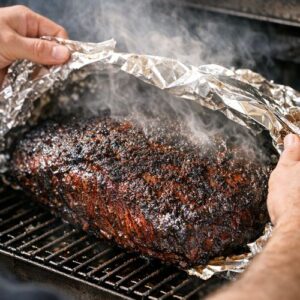
Once you hit 204 degrees, carefully unwrap the foil—watch out for the steam burst. Return the unwrapped brisket to the 275-degree smoker, close the lid, and cook for exactly thirty minutes more. This allows the surface to dry slightly and the bark to firm up. You’re looking for a dark mahogany color with a slight flexibility when you press it.
Step 9: Rest, Slice, and Serve
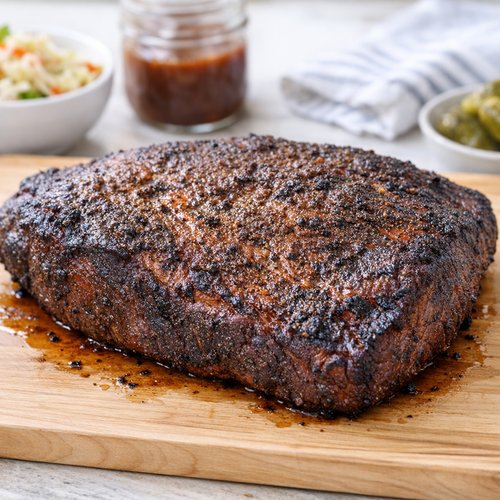
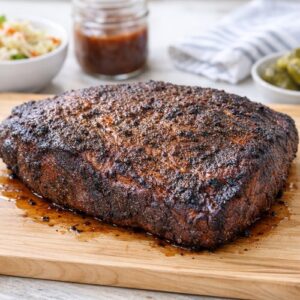
Remove the brisket from the smoker and place it on a clean cutting board. Let it rest for fifteen minutes without touching it. This is when carryover cooking finishes (internal temperature rises another two to three degrees) and muscle fibers relax, redistributing juices throughout the meat instead of letting them run out the moment you cut. After resting, slice against the grain—that means perpendicular to the muscle fibers—using a sharp knife. Thin slices (about a quarter-inch thick) showcase the tender interior and create the most satisfying eating experience.
The Secret Sauce: Understanding Your Beef Rub
The quarter cup of beef rub might seem simple, but it’s the final layer of flavor that separates good brisket from the kind people dream about. Most commercial beef rubs contain paprika (for color and slight sweetness), garlic powder (for savory depth), black pepper (for bite and complexity), brown sugar (for caramelization), and often kosher salt, though your brine already provided salt. I recommend buying a quality premade blend rather than mixing your own because good rubs are designed by people who’ve tested hundreds of batches to hit the right balance.
That said, if you want to customize, here’s what I recommend: start with two tablespoons smoked paprika, one tablespoon garlic powder, one tablespoon freshly ground black pepper, and a half tablespoon of brown sugar. Mix and taste—it should be savory with a slight sweetness and black pepper heat. The beauty of seasoning after the brine is that the salt from the brine has already penetrated the meat, so this rub sits mostly on the surface, creating bark, not over-salting the interior.
How to Make It Even Better Than the Original
- Add whole spices to the brine — Instead of just peppercorns, toast a cinnamon stick, two bay leaves, and four whole cloves in a dry pan for two minutes before adding them to your hot brine. The toasting releases oils that infuse the meat with subtle warmth and complexity restaurants can’t achieve at scale
- Customize your rub with fresh garlic — Mix your commercial beef rub with two minced garlic cloves and a tablespoon of fresh thyme right before applying it to the brisket. Fresh herbs add brightness that powdered versions can’t match, elevating the final dish from “restaurant-good” to “wow, this is incredible”
- Inject during the wrap phase — After unwrapping at 204 degrees, inject the brisket with a mixture of beef broth and a tablespoon of butter using a meat injector. This adds moisture and richness that creates an even more luxurious texture
Cost Comparison: Home vs. Restaurant
Let’s talk money because it matters. A quality five- to seven-pound flat cut brisket runs about twelve to sixteen dollars per pound at most grocery stores, totaling roughly sixty to eighty dollars for the meat itself. Add five dollars for your brining ingredients (salt, sugar, ice) and another five dollars for your rub, and you’re at seventy to ninety dollars total for a complete brisket that feeds eight to ten people. That’s seven to nine dollars per person.
Compare this to a restaurant brisket sandwich at fifteen to eighteen dollars per sandwich, or a full brisket plate at twenty-five to thirty dollars. If your family eats brisket once a month, you’ll save roughly one hundred fifty to two hundred dollars per year by making it at home. Over a decade, that’s real money—enough to justify buying a decent smoker if you don’t have one already.
Can I Store Leftover Brined Brisket?
Cooked brisket keeps in an airtight container in your refrigerator for up to four days. Slice it, store it in a shallow container, and reheat gently in a 300-degree oven with a little beef broth to restore moisture. Frozen brisket lasts up to three months—wrap it tightly in plastic wrap and foil to prevent freezer burn. I recommend slicing before freezing so you can reheat just the amount you need. Thaw in the refrigerator overnight before reheating.
The brine itself shouldn’t be stored—discard it after brining. Fresh brine is always better, and leftover brine can harbor bacteria if it’s been sitting with raw meat.
Nutrition Information
A four-ounce serving of brined brisket (roughly the size of a deck of cards) contains approximately 280 calories, 22 grams of protein, 22 grams of fat, and zero grams of carbohydrates. The sodium content is higher than plain brisket—roughly 480 milligrams per serving—due to the brine, which is important to note if you’re monitoring sodium intake. According to USDA data, beef brisket is also rich in B vitamins (especially B12 and niacin), selenium, and iron, making it genuinely nutritious despite its richness.
The brining process doesn’t significantly change the overall nutrient profile; it simply helps retain moisture and improves texture. If you’re concerned about sodium, you can reduce the salt in your brine to three-eighths cup instead of half cup, though this will result in slightly less tender meat. The trade-off between tenderness and salt content is always a personal choice.
Expert’s Nutritional Insight: Why Brining Creates Healthier Meat
As a registered dietitian, I want to highlight something most people overlook: proper brining actually improves the nutritional profile of meat. When salt penetrates muscle fibers and allows them to retain moisture, you end up with a more nutrient-dense bite—the same weight of meat contains more protein and minerals because less moisture is lost during cooking. Overcooked, dry brisket loses not just texture but actual nutrients. A properly brined, correctly cooked brisket retains more of its B vitamins and mineral content than rushed, improperly prepared versions. This is one reason I’m passionate about techniques that prioritize both flavor and nutrition.
Make-Ahead Guide: Maximize Your Time
Up to three days ahead: Prepare your brine completely and refrigerate it. On the day you’re cooking, you simply submerge the brisket and refrigerate overnight. This spreads the work across multiple days so cooking day feels manageable.
The morning of cooking: Remove the brisket from the brine, dry it, and apply your rub. You can do this up to four hours before your smoker reaches temperature. Cover the seasoned meat loosely with plastic wrap and refrigerate until you’re ready to begin smoking.
Day before the event: Smoke the entire brisket, cool it completely (about two hours after resting), wrap it tightly in foil, and refrigerate overnight. The next day, reheat it gently in a 300-degree oven wrapped in foil with a half cup of beef broth, approximately forty-five minutes for a whole brisket, until it reaches 165 degrees internally. This method actually improves flavor—the spices have time to meld overnight.
Common Mistakes to Avoid
- Skipping the drying step after brining — Wet meat won’t develop proper bark. After you remove the brisket from the brine, dry it thoroughly with paper towels. Moisture is the enemy of crust formation, and you want that mahogany bark.
- Cooking at too high a temperature — I know it’s tempting to speed things up by raising your smoker to 300 or 325 degrees. Don’t. Connective tissue needs time below 250 degrees to break down properly. Higher heat toughens the exterior before the interior becomes tender.
- Not accounting for temperature variables — Ambient temperature, smoker calibration, and wind all affect cook time. Stop checking the clock at three or four hours and start checking the thermometer. Cook to internal temperature, not time.
- Skipping the rest period — That fifteen-minute rest after smoking isn’t optional. Without it, you’ll lose all your hard-earned moisture the moment you slice. Wrap the finished brisket in foil to keep it warm while resting.
Seasonal Variations: Adapt Your Recipe Year-Round
Summer version: Add a half teaspoon of cayenne pepper to your beef rub for subtle heat that pairs beautifully with cold, refreshing sides like coleslaw. Summer brisket also benefits from shorter brining times (ten hours instead of sixteen) if you’re cooking the same day in hot weather—the higher ambient temperature speeds up the curing process.
Fall version: Toast a cinnamon stick, two star anise, and four whole cloves in a dry pan for two minutes, then crush them slightly and add to your hot brine. This creates warm spice notes that complement fall appetites perfectly. Your beef rub can also incorporate a half teaspoon of smoked paprika instead of regular paprika for deeper, more autumnal flavors.
Winter version: Add a half cup of apple juice or bourbon to your brine for richness and slight sweetness that stands up to heavier winter sides. Winter entertaining often means cooking a day ahead, which this recipe handles beautifully—the reheating process allows flavors to develop further.
Spring version: Keep it simple with fresh thyme and lemon zest added to your rub right before applying it. Spring appetites appreciate brightness, and fresh herbs provide that without overwhelming the smoke flavor you’ve worked to develop.
What to Serve Alongside for the Full Restaurant Experience
Brisket by itself is magnificent, but completing the experience with thoughtful sides elevates everything. I always serve classic barbecue sides: buttery corn bread, tangy coleslaw (vinegar-based, not creamy—it cuts the richness perfectly), and baked beans slow-cooked with brown sugar and bacon. These are the traditional pairings for a reason—they balance the deep, smoky brisket flavors.
For something different, consider ranch burgers as a second protein option if you’re feeding a crowd, or try creating a complete smoked dinner by preparing BBQ spatchcock chicken on the same smoker alongside your brisket. The flavors complement each other beautifully, and you’ll look like a true pitmaster.
- Jalapeño cornbread — adds sweetness and slight heat that bridges the gap between rich brisket and lighter sides
- Creamed corn with smoked bacon — luxurious without being heavy, and the smoke flavor echoes your brisket preparation
- Grilled vegetables (corn, zucchini, bell peppers) — fresh and lighter, perfect if you’re serving heavy sides elsewhere
- Potato salad or smashed potatoes — a carb base that soaks up the beautiful brisket juices

Brisket Brine Recipe
Ingredients
Method
- Bring your six quarts of filtered water to a rolling boil in a large pot. You need the water truly hot so the salt crystals dissolve completely—this is critical for even flavor distribution. Add your half cup of kosher salt and one cup of light brown sugar to the boiling water, stirring constantly until both ingredients disappear into the liquid completely. This should take about two to three minutes. You'll know you're finished when the water looks clear and tastes distinctly salty-sweet. Now add the two tablespoons of whole peppercorns—they'll bloom and release their oils into the hot liquid, creating aromatics that infuse the meat overnight.
- Pour the entire pot of hot brine into a very large bowl or container. Add all six cups of ice immediately. Stir frequently so the ice cools the brine evenly rather than creating pockets of cold and warm liquid. The ice melts as it cools—this is exactly what you want. The brine needs to reach room temperature before the brisket goes in; if the meat hits hot brine, it'll begin cooking on the surface and won't absorb the salt evenly. This step takes about fifteen to twenty minutes. Test the temperature with your finger—it should feel cool, not cold, when you're ready for the next step.
- Place your five- to seven-pound flat cut brisket into the cooled brine. The meat should be completely submerged—if it tries to float, place a small plate on top to keep it under the liquid. This is when the magic begins. Cover the container loosely (a towel works fine), transfer it to your refrigerator, and walk away. Twelve to sixteen hours is the ideal range. Most people brine overnight and cook the next day, which is exactly what I recommend. The salt solution penetrates the muscle fibers, breaking down proteins and allowing them to retain moisture during the long smoke ahead.
- The next morning, remove the brisket from the brine and discard the liquid—you won't need it again. Pat the brisket completely dry with paper towels. I can't stress this enough: wetness prevents proper bark formation. Spend two full minutes drying the entire surface, getting into any crevices or folds. Now sprinkle your quarter cup of beef rub evenly across all surfaces of the meat. I like to rub it gently into the meat with my fingers rather than just sprinkling, which helps the spices adhere and creates a more cohesive crust once the smoke hits.
- Set your smoker to 250 degrees Fahrenheit and preheat with the lid closed for fifteen minutes. This ensures even heat and allows any residual moisture inside the chamber to evaporate. While the smoker preheats, insert your meat thermometer probe into the thickest part of the brisket—you'll be monitoring internal temperature continuously from now on. Place the brisket directly on the grill grates, fat-side down. Fat-side down allows the rendered fat to baste the meat as it drips. Close the lid and smoke for three hours without opening it. Resist the urge to peek—every time you lift the lid, you lose heat and extend the cook time.
- After three hours, carefully remove the brisket from the smoker. It'll be dark and smoky on the surface—that's exactly right. Wrapping at this stage is called the Texas Crutch, and restaurants use it because it speeds cooking and locks in moisture. Tear off a double layer of heavy-duty aluminum foil and wrap the brisket tightly, tucking the foil under the meat so it's sealed completely. Increase your smoker temperature to 275 degrees Fahrenheit. The higher heat moves you through the stall—that stubborn plateau around 150 degrees where the brisket seems to stop cooking as evaporative cooling battles your heat.
- Return the wrapped brisket to the 275-degree smoker and re-insert your probe. From this point, you're watching internal temperature, not time. Cook until the thickest part of the meat reaches 204 degrees Fahrenheit internally. This usually takes three to four hours, but I've seen it take as little as two hours fifty minutes or as long as five hours—variables like exact meat thickness, smoker calibration, and ambient temperature all matter. Don't rush this stage by pushing the temperature higher. Lower heat gives connective tissue (collagen) time to break down into gelatin, creating that melt-in-your-mouth texture.
- Once you hit 204 degrees, carefully unwrap the foil—watch out for the steam burst. Return the unwrapped brisket to the 275-degree smoker, close the lid, and cook for exactly thirty minutes more. This allows the surface to dry slightly and the bark to firm up. You're looking for a dark mahogany color with a slight flexibility when you press it.
- Remove the brisket from the smoker and place it on a clean cutting board. Let it rest for fifteen minutes without touching it. This is when carryover cooking finishes (internal temperature rises another two to three degrees) and muscle fibers relax, redistributing juices throughout the meat instead of letting them run out the moment you cut. After resting, slice against the grain—that means perpendicular to the muscle fibers—using a sharp knife. Thin slices (about a quarter-inch thick) showcase the tender interior and create the most satisfying eating experience.
Notes
FAQs
Can I Use a Different Cut of Brisket?
The flat cut I recommend is ideal because it’s relatively uniform in thickness, which means it cooks evenly and slices beautifully. The point cut (also called the deckle) is fattier and more forgiving—if you prefer more marbling and richer flavor, it works perfectly fine, though it takes slightly longer to cook and renders more fat. Point cuts are also better for shredding if you want to make brisket sandwiches or tacos. Either cut benefits from brining, though I’d add an extra two hours to the total cook time for a point cut due to its thickness. Never use a brisket smaller than five pounds for this recipe—smaller cuts won’t give you the full benefit of the long, slow cook.
What if My Brisket Stalls and Won’t Move Past 160 Degrees?
The stall is real and normal—it’s evaporative cooling fighting your heat. Most people wrap at this point (which I recommend), but if you’re not wrapping, you have two options. First, simply accept it and be patient; the stall usually breaks on its own after an hour or so. Second, bump your smoker temperature up to 275 degrees to push through the stall faster. This is why the wrapped method exists—it breaks the stall consistently and speeds the final cooking phase. Some pitmasters intentionally wrap at 150 degrees instead of 160 to avoid the stall entirely.
How Do I Know if My Brisket Is Truly Done?
Use a meat thermometer and trust it completely. 204 degrees Fahrenheit is the target because at this temperature, collagen has converted to gelatin, creating that tender texture. You can also use the probe test—insert a thin metal skewer or toothpick into the thickest part and it should slide through with minimal resistance, like inserting a thermometer into soft butter. Don’t rely on color or appearance—I’ve seen briskets look done at 190 degrees and still be tough, and others look underdone at 205 degrees but taste perfect. Temperature is your only reliable guide.
Can I Brine a Brisket for Longer Than 16 Hours?
Yes, you can brine for up to twenty-four hours without negative effects. However, beyond sixteen hours you’re seeing diminishing returns—the salt has already penetrated completely, and additional time doesn’t improve tenderness further. I recommend sixteen hours as the sweet spot: long enough for complete salt diffusion, short enough that you can brine overnight and cook the next day without adjusting your schedule.
What’s the Difference Between Dry Brining and Wet Brining?
Wet brining (what this recipe uses) involves submerging meat in saltwater solution. Dry brining involves rubbing meat with salt and letting it sit, uncovered, in the refrigerator. Both work, but they produce different results. Wet brining is faster (sixteen hours versus twenty-four to forty-eight hours) and creates more tender results because the salt dissolves and penetrates more efficiently. Dry brining creates slightly more intense flavor and better bark formation because the dry rub sits on the surface. I prefer wet brining for brisket because the long cook time and size of the meat benefit from the deep, even salt penetration only wet brining achieves. If you have more time and prefer ultra-crispy bark, dry brine instead—reduce salt to three tablespoons and rub it evenly across the meat.
More Restaurant Copycat Recipes
- Authentic Carnitas Recipe Lard — slow-cooked pork that rivals your favorite Mexican restaurant
- BBQ Ribeye Recipe — steakhouse-quality beef cooked on your smoker
- Ahi Tuna Grilled Recipe — restaurant-worthy seafood without the price tag
There’s genuine magic in cracking the code of a restaurant recipe and discovering that what seemed like mysterious professional technique is actually just patience, attention to detail, and understanding why each step matters. This brined brisket represents that magic perfectly. You’re not using anything exotic or impossible to find—just salt, sugar, ice, and time. But those simple elements, combined thoughtfully, transform an inexpensive cut of meat into something people will remember and request again and again.
I encourage you to make this brisket not because it’ll save you money (though it will) but because the experience of smoking it, resting it, and slicing it for your family or friends creates memories. Gather people around food you made with your own hands, and you’ve done something restaurants can never do—you’ve created comfort and connection. That’s what this is really about.
Cook what makes you happy!
META DESCRIPTION: Master our brined brisket recipe with professional smoking technique. Tender, juicy, restaurant-quality results at home with detailed step-by-step instructions.