This post contains affiliate links. As an Amazon Associate I earn from qualifying purchases.
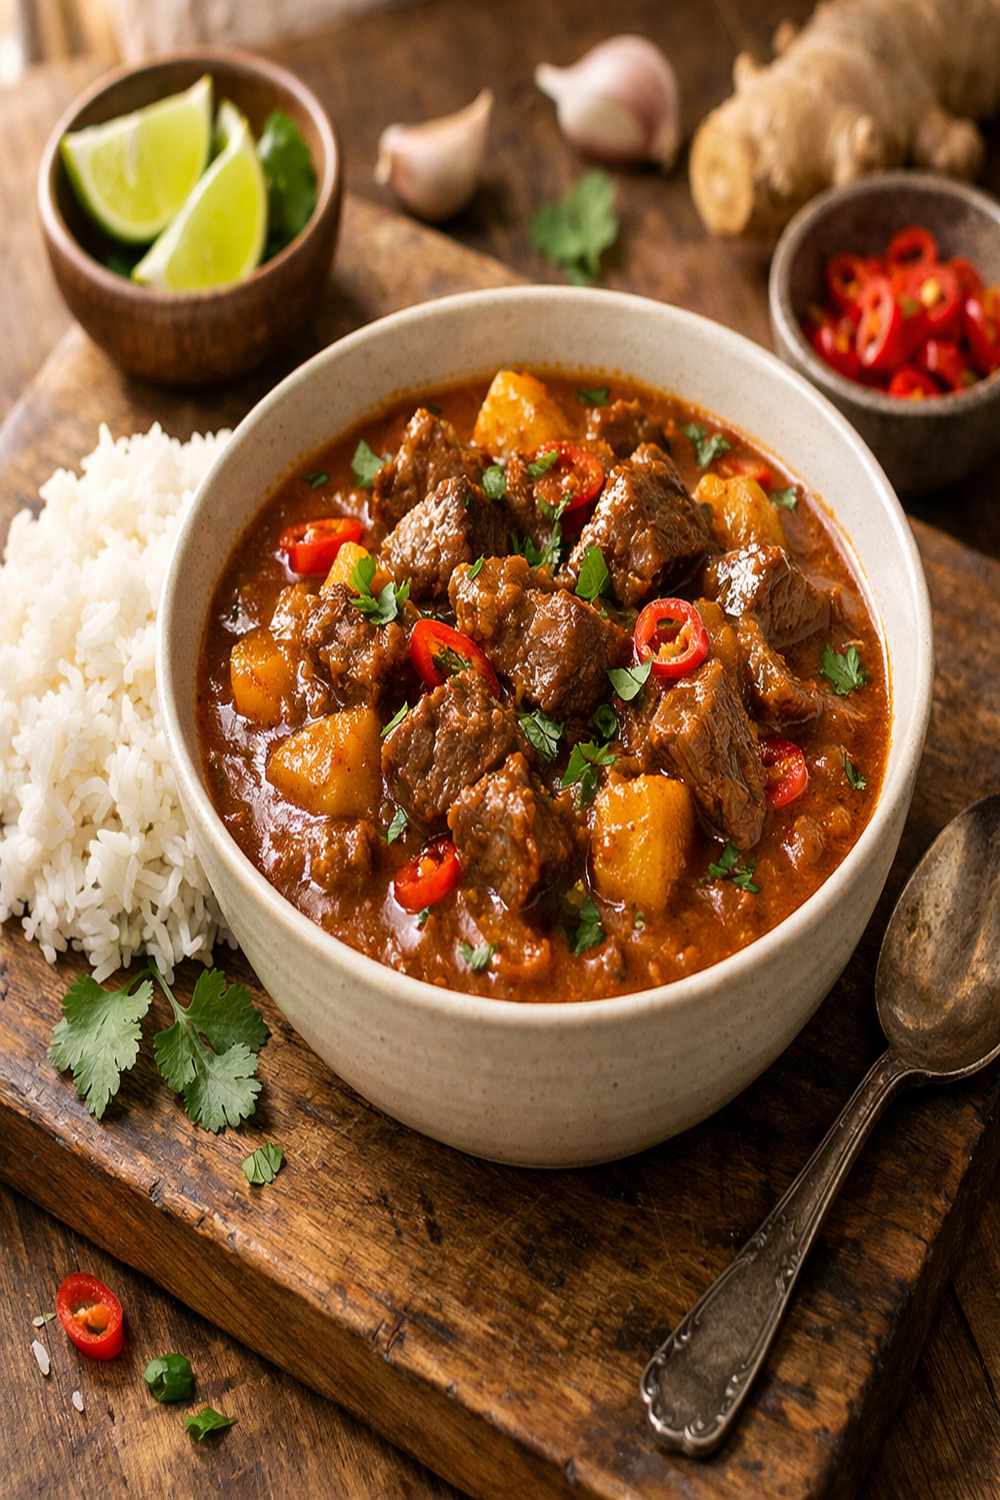
If you’ve always wanted to make beef curry but felt intimidated by the spice list and unfamiliar techniques, this is your starting point. I’m going to walk you through every single step, and I promise you’ll end up with a dish that tastes like it took all day—but actually fits into a normal weeknight. Beef curry was one of the first dishes that taught me how food can wrap around you like a warm blanket, and I want you to feel that same comfort when you cook it.
This recipe proves that nostalgic, deeply satisfying meals don’t require fancy equipment or years of experience. You just need courage, a good pot, and ingredients that are probably closer to your kitchen than you think. If you can chop an onion and follow a timeline, you can make this.
How to Make Beef Curry for the First Time (You’ve Got This)
My first attempt at beef curry happened at my parents’ kitchen table on a cold Maryland evening. My mom had made it dozens of times, but I’d never paid attention to the process—I just showed up and ate. When I finally asked her to teach me, I was shocked at how straightforward it was. The hardest part wasn’t the cooking; it was giving myself permission to trust the process instead of second-guessing every decision.
I burned the first batch of spices. The second batch, I added too much water and ended up with soup. But by the third time, something clicked. The kitchen smelled like home. The meat was tender enough to break with a spoon. My family sat down and didn’t talk much—they just ate, and that’s when I knew I’d gotten it right.
That’s what I want for you today. Not perfection on your first try, but the confidence that you can do this, and the understanding that even small mistakes teach you something valuable for next time.
What to Expect Before You Start
Let’s be honest about what you’re getting into. This recipe takes about 2 to 2.5 hours from start to finish, but most of that time is the meat becoming impossibly tender while you do something else. The actual hands-on cooking time? Maybe 20 minutes total.
The difficulty level is beginner-friendly. You’re not doing anything complicated—no special knife skills required, no timing challenges, and no ingredients that are hard to source. What this recipe does teach you is how spices work together and how patience transforms tough cuts of meat into comfort.
- The simmer time is long but necessary – The beef needs time to break down and absorb all those warm spices. This isn’t something you can rush, and that’s okay. Use this time to do other things: prep side dishes, tidy your kitchen, or just sit with your thoughts.
- You won’t mess this up by being cautious – First-timers worry they’ll overcook the meat or oversalt the curry. The truth? Low and slow makes almost everything better here. Undercooking is the only real risk, and it’s an easy fix: just keep simmering.
Equipment You’ll Need (And What You Can Skip)
I’m not going to tell you that you need a special curry pot or imported spice grinder. You don’t. Here’s what actually matters:
- One large, heavy-bottomed pot with a lid – This is the workhorse. A Dutch oven is ideal because it distributes heat evenly and holds temperature well, but any pot with decent thickness works. Thin pots can scorch your spices and make the curry taste bitter.
- A sharp cutting board and knife – You’re chopping onions, garlic, and ginger. A dull knife makes this miserable and actually more dangerous. Spend $15 on a decent chef’s knife if you don’t have one.
- Measuring spoons and cups – Spices need to be measured accurately, especially when you’re learning. Too much turmeric or chili powder will overpower everything else.
- A wooden spoon for stirring – It won’t scratch your pot and it gives you better control than a metal spoon.
- Optional: a spice grinder or coffee grinder – Nice to have if you want to grind whole spices, but ground spices from your grocery store work perfectly fine. Don’t let this stop you from cooking.
The Ingredients: A Beginner’s Shopping Guide
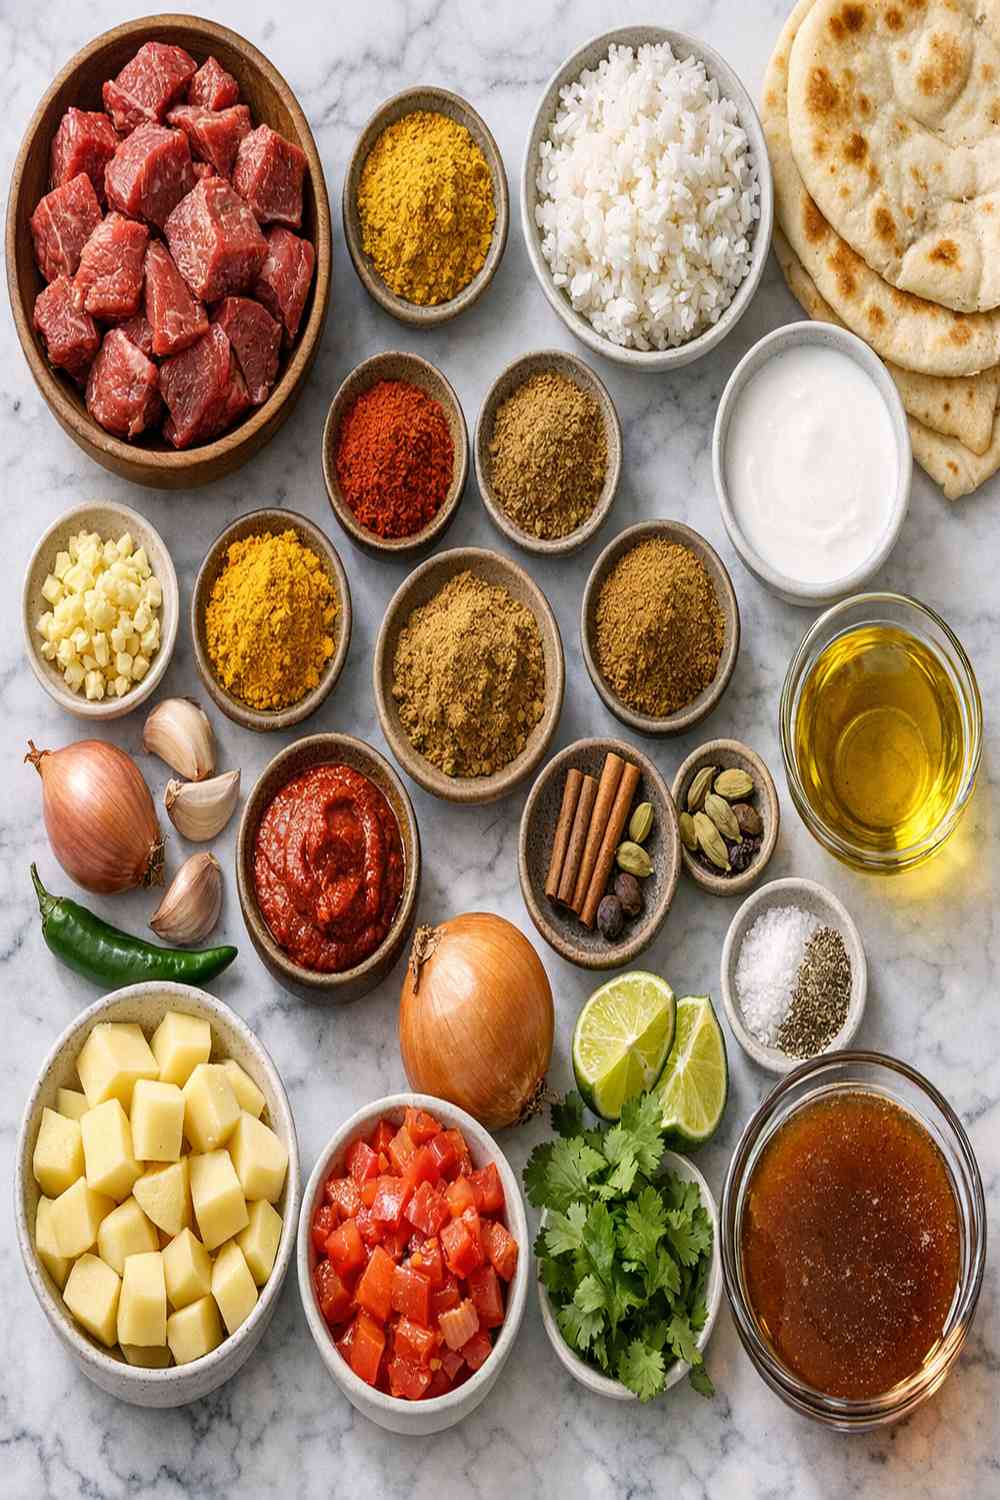
Before you head to the store, let me tell you something: most of these ingredients live in the regular grocery store, not some specialty aisle. The ones that might trip you up, I’m going to explain exactly where to find them and what to look for. Don’t let unfamiliar names intimidate you. You’ve probably walked past these things a hundred times.
For the Spice Paste
- ½ teaspoon ground turmeric (the bright yellow spice, find it in the spice aisle)
- 1 tablespoon ground coriander (looks like tan powder, also in the spice aisle)
- 1 piece fresh ginger about 1 inch long (looks like a knobby root in the produce section, not ginger powder)
- 3 garlic cloves (fresh, not pre-minced in a jar, because fresh tastes so much better)
- ½ cup yellow onion thinly sliced (any yellow onion works, they’re all the same)
For the Beef and Main Cooking
- 1 cinnamon stick (a curled piece of bark about 3 inches long)
- 2 dried bay leaves (crinkly brown leaves that add subtle depth)
- 2 pounds beef chuck or braising steak (ask the butcher to cut it into 1-inch cubes, or buy a chuck roast and cut it yourself)
- 1 cup yellow onion chopped into rough chunks (separate from the sliced onion above)
- 1 teaspoon brown mustard seeds (tiny dark seeds in the spice aisle; they look like poppy seeds but taste peppery)
- 2 tablespoons neutral oil (vegetable or canola, not olive oil—it burns at high heat)
For Flavor and Finish
- 1 teaspoon more ground coriander (you’re using this twice because it’s that good)
- ¼ cup unsweetened coconut flakes (optional but adds richness; find it near baking supplies)
- ¼ cup fresh cilantro chopped (the leafy herb with flat leaves, not the round parsley)
- 1½ to 2 cups water (tap water is fine)
- Salt to taste (use kosher salt or sea salt, it dissolves better)
- ½ teaspoon red chili powder (this is optional if you’re sensitive to heat—start with ¼ teaspoon)
- 2 teaspoons garam masala (a warm spice blend; find it with the other Indian spices or in the regular spice aisle)
Where to find everything: Your regular grocery store. Check the international foods aisle for anything you can’t find in the spice section. If your store has a South Asian section, great—but it’s not necessary. Every single ingredient here is available in standard American supermarkets.
Step-by-Step: Your First Beef Curry
Alright, here we go. I’m going to break this into digestible steps so you know exactly what should happen at each point. Read through the entire recipe once before you start—it takes 90 seconds and prevents surprises. Then come back and cook with me step by step.
Step 1: Prep Your Ingredients While Your Pot Heats
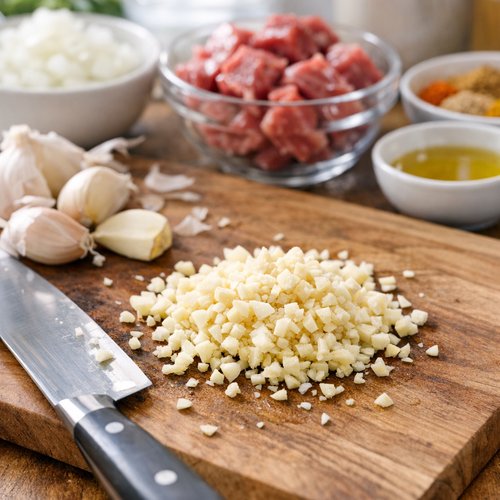
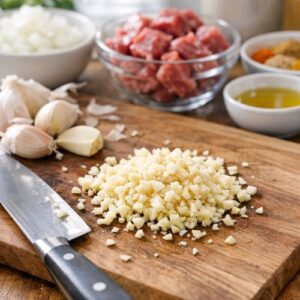
Before any heat happens, everything needs to be ready. This is called mise en place, and it’s the secret to cooking without stress. Chop your garlic into small pieces—you want pieces about the size of a lentil. Ginger can be a little tougher to chop because it’s fibrous, so slice it thinly first, then chop it small. Don’t worry about perfection here; rough chopping is fine.
Slice your half cup of onion into thin strips for the spice paste. Chop your other cup of onion into larger chunks—these will cook down and add body to the curry, so size doesn’t matter as much. Get your beef cubes ready, pat them dry with paper towels (this helps them brown better), and move everything to the counter near your stove.
Now place your pot on the stove and turn the heat to medium. Let it warm for about 2 minutes while you take a breath. This isn’t a race.
Step 2: Brown the Beef in Batches
Add 2 tablespoons of oil to your hot pot. You’ll know it’s ready when it shimmers and moves freely around the bottom—this takes about 30 seconds. Don’t skip this step by adding cold oil to a cold pot; the beef won’t brown properly.
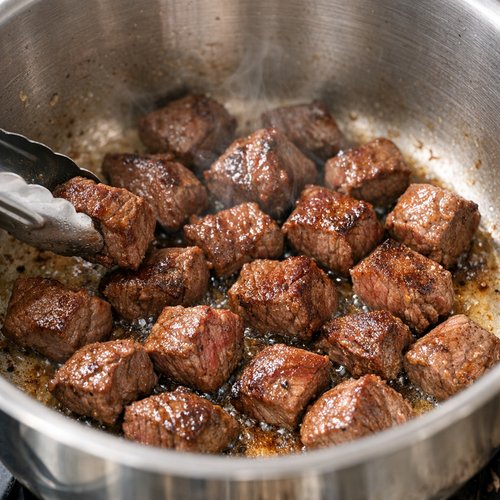
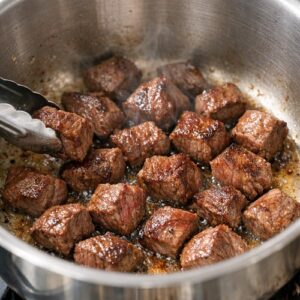
Working in batches is important here. Add about one-third of your beef cubes at a time. If you crowd the pan, the meat steams instead of browning, and you’ll miss out on that delicious caramelized exterior. Let each batch sit undisturbed for 2-3 minutes on each side. You’re looking for a dark golden-brown crust on all sides.
When the first batch is browned, transfer it to a clean plate. Repeat with the remaining beef in two more batches. This whole step takes about 15 minutes, and it’s the most important part. Don’t rush it.
Step 3: Build Your Spice Paste
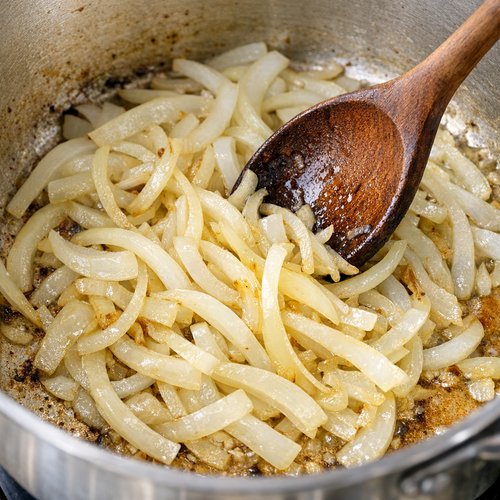
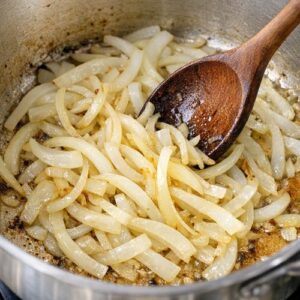
Once all the beef is browned and set aside, leave about 1 tablespoon of oil in the pot. Add your sliced onion and stir constantly for about 3 minutes. You want the onion to soften and turn slightly translucent at the edges—this is when it’s ready for the spices.
Reduce your heat to medium-low. This is crucial. Spices are delicate and burn easily on high heat, which makes them taste bitter instead of warm and inviting. Add your minced garlic and ginger, stir well, and cook for exactly 1 minute. Your kitchen should start to smell amazing—that’s your sign it’s working.
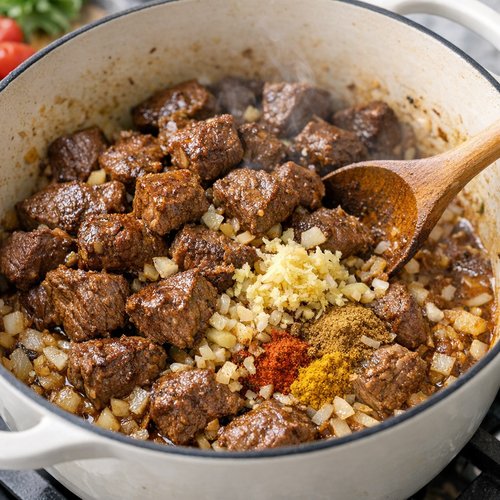
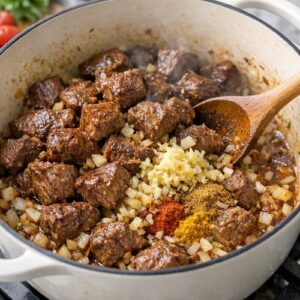
Now add your turmeric, coriander, and garam masala all at once. Stir constantly for 2 minutes. The spices will coat everything and create a fragrant paste. This paste is the foundation of your entire curry, so don’t skip the stirring. You’re preventing the spices from burning and making sure they’re evenly distributed.
Step 4: Return the Beef and Add Aromatics
Add all your browned beef back to the pot, including any juices that have collected on the plate. Stir everything together for about 2 minutes so the meat gets coated in that spice paste. Add your chopped onion chunks, bay leaves, and cinnamon stick.
Stir once more to combine. This is when the curry starts to look like an actual dish instead of scattered ingredients. Take a moment to appreciate that.
Step 5: Add Water and Establish Your Simmer
Pour in 1.5 cups of water. If you’re sensitive to heat and used less chili powder, start with this amount. Add a generous pinch of salt—about ½ teaspoon. Bring everything to a simmer over medium heat, which should take about 5 minutes.
Once you see small bubbles breaking the surface consistently, reduce heat to low and partially cover the pot with the lid slightly ajar. You want steam to escape so the curry doesn’t become watery, but you don’t want the liquid to evaporate too quickly. Let this simmer gently for 1.5 to 2 hours.
Check it once or twice. Stir gently. Add a splash more water if it looks too thick before the meat is tender. The beef should be so soft it breaks apart with a wooden spoon when you’re done.
Step 6: Adjust Seasoning and Add Final Touches
When the beef is beautifully tender and the liquid has reduced slightly, taste your curry. Does it need salt? Add a little. Does it taste a bit flat? Add another ½ teaspoon of garam masala or ¼ teaspoon more coriander. Trust your palate here—you’re the expert on your own taste preferences.
If you’re using coconut flakes, stir them in now and let them soak for 2-3 minutes. They’ll add richness without making the curry taste like dessert. Finish with your fresh cilantro, stirring it in right before serving. It adds brightness and makes everything feel fresh despite the long cooking time.
How to Tell If You Did It Right
Success in curry-making has very clear signs. You’ll know because your senses will tell you.
- The beef is falling-apart tender – When you stir, chunks of meat break apart with gentle pressure from your wooden spoon. This shouldn’t require any effort. If the meat is still chewy, it needs more time.
- The liquid is reduced and clings to the meat – You should see a glossy, coated-looking sauce rather than a thin, soupy one. The spices have had time to fully develop, and the flavors are concentrated.
- The aroma is warm, layered, and inviting – You should smell cinnamon and turmeric primarily, with undertones of ginger and garlic. If it smells sharp or acrid, something burned, but this is rare if you followed the heat guidelines.
- The color is a rich, deep golden-brown – Not pale yellow and definitely not orange. The depth of color tells you the spices have really developed.
- One taste makes you close your eyes – Sounds dramatic, but when the flavors are balanced, comfort curry does this. The spices are warm without being overwhelming. The meat is so tender it’s almost creamy.
What Went Wrong? Beginner Fixes
You followed every step and something still seems off? Here’s what probably happened and how to fix it:
- The curry tastes bland or flat – You likely need more salt or more spices. Add ¼ teaspoon of salt at a time and taste between additions. If it still feels flat after salt, add ½ teaspoon more garam masala. Spices are forgiving; you can always add more, but you can’t take it back.
- The beef is still tough after 2 hours – This usually means you didn’t use a low enough simmer, or your pot doesn’t distribute heat evenly. Increase heat to medium and let it simmer more vigorously for another 30-45 minutes. Chuck beef needs time; some pieces take longer than others.
- The curry is too soupy – You added too much water or didn’t simmer long enough for evaporation. Increase heat to medium and simmer uncovered for 20-30 minutes. The liquid will reduce and concentrate. You’ll know it’s right when it coats the meat instead of pooling at the bottom.
- The spices taste burned or bitter – This happens when spices hit high heat without enough moisture. Unfortunately, you can’t undo this, but next time keep heat on medium-low when blooming spices, and don’t skip the onion-cooking step—it adds moisture that protects the spices.
- The curry tastes too hot or spicy – Add a squeeze of lemon juice, a dollop of yogurt, or a sprinkle of coconut flakes. Acid and richness both soften heat. If you make it again, reduce the chili powder to ¼ teaspoon.
Expert’s Nutritional Insight
As a registered dietitian, I want you to understand why this curry is actually nourishing on a deeper level than just “it tastes good.” The beef provides high-quality protein and iron, especially important if you’re not eating iron-rich foods regularly. But here’s what most people miss: the spices aren’t just flavor.
Turmeric contains curcumin, a compound that may support joint health and reduce inflammation in the body. Ginger has similar anti-inflammatory properties and can support digestion. Cinnamon has been studied for its potential to support stable blood sugar. These aren’t miracle ingredients, but they’re also not empty calories. You’re building nutrition into every bite.
The long, slow cooking also breaks down the connective tissue in the beef, making the nutrients more bioavailable—meaning your body can actually use them. This is why slow-cooked comfort food can be genuinely healing, not just emotionally but physically.
Make-Ahead Guide: Cooking Smart
Here’s what I love about curry: it tastes even better the next day once flavors have fully melded. Make this on Sunday for Monday dinner, and I promise it’s better than fresh.
You can prepare everything up to Step 2 in the morning: Brown your beef, store it covered in the refrigerator, and chop all your vegetables. When you get home, everything comes together in about 90 minutes of hands-off simmering. You can also freeze finished curry for up to 3 months. Thaw it in the refrigerator overnight and reheat gently on the stove with a splash of water if needed.
Don’t freeze the cilantro or coconut flakes if you add them before freezing—add those fresh when you reheat. Everything else freezes beautifully.
Seasonal Variations
Spring/Summer: Add ½ cup of fresh peas or diced zucchini in the last 15 minutes of cooking. They stay bright green and add freshness that balances the warm spices.
Fall/Winter: Add diced carrots or potatoes along with the beef in Step 4. They soften into the curry and add hearty substance. Use 1 cup of vegetables and increase water to 2 cups.
Year-round option: If you have access to fresh curry leaves, add 6-8 leaves when you add the cinnamon stick. They add incredible depth that’s hard to describe until you taste it.
Your Next Steps After Mastering This
Once you’ve made this curry successfully, you’ve actually learned something transferable: how to layer spices, how to brown meat properly, and how to coax tenderness through time and temperature. Those skills open doors to so many other dishes.
Try a beef goulash next—it uses similar beef cuts and cooking methods but with different spice profiles. Or attempt a carnitas, which teaches you how long, slow cooking transforms tough cuts into silk. You’ve already proven you can handle patience and technique. Everything else is just different seasonings.
Can I Store Beef Curry?
Refrigerator: Up to 4 days in an airtight container. Reheat gently on the stove over medium-low heat, stirring occasionally, until warmed through. Add a splash of water if it’s thicker than you like.
Freezer: Up to 3 months in a freezer-safe container or bag (leave some headroom because it expands slightly). Thaw overnight in the refrigerator before reheating. The curry actually develops deeper flavor after freezing, so don’t worry about quality.
Portion tip: I freeze curry in 2-person portions in plastic containers. That way, when I’m too tired to cook, dinner is ready in 15 minutes. This is meal prep that actually works because you’re not eating the same thing four nights in a row.
Nutrition Information
Per serving (based on 4 servings with 2 cups water): Calories: 385 | Protein: 42g | Fat: 16g | Carbohydrates: 12g | Fiber: 2g | Iron: 4.2mg (23% of daily value) | Sodium: 340mg
This data aligns with USDA nutritional guidelines for braised beef dishes. The protein-to-calorie ratio is excellent, making this a genuinely filling meal that doesn’t require massive portions. The iron content from the beef is heme iron, meaning your body absorbs it more efficiently than plant-based iron sources. Serving this with cilantro and a squeeze of lime juice doesn’t change the calorie count but increases the nutrient absorption through the vitamin C in citrus.
What Can I Serve With Beef Curry?
Curry is flexible about what it pairs with. You’re not limited to Indian sides—though those are delicious. Here are my go-to combinations:
- Basmati or jasmine rice – The most traditional choice. The mild, slightly floral rice lets the curry shine without competing for attention.
- Naan bread – Soft, pillowy, and perfect for scooping up sauce. If you don’t have time to make it, store-bought frozen naan works beautifully.
- Cauliflower rice or regular rice pilaf – Lower-carb options if that matters to you. The cauliflower absorbs the curry’s flavors without adding much on its own.
- Roasted vegetables – Roasted carrots or Brussels sprouts on the side add textural contrast and a little smokiness that complements spiced beef perfectly.
- A simple green salad with lime vinaigrette – Bright acidity cuts through the richness and balances the warm spices. This is especially nice if you’re serving it to people who might find the curry heavy.
- Yogurt on the side – A dollop of plain yogurt cools the heat and adds creaminess. Some people mix it into their curry; others use it as a palate cleanser between bites.
If you’re looking for something special to serve alongside, try making arroz amarillo, which brings its own subtle spice and beautiful color to the plate. The combination of two intentional sides turns a simple curry night into something that feels restaurant-quality.

Beef Curry Recipe
Ingredients
Method
- Before any heat happens, everything needs to be ready. This is called mise en place, and it's the secret to cooking without stress. Chop your garlic into small pieces—you want pieces about the size of a lentil. Ginger can be a little tougher to chop because it's fibrous, so slice it thinly first, then chop it small. Don't worry about perfection here; rough chopping is fine. Slice your half cup of onion into thin strips for the spice paste. Chop your other cup of onion into larger chunks—these will cook down and add body to the curry, so size doesn't matter as much. Get your beef cubes ready, pat them dry with paper towels (this helps them brown better), and move everything to the counter near your stove. Now place your pot on the stove and turn the heat to medium. Let it warm for about 2 minutes while you take a breath. This isn't a race.
- Add 2 tablespoons of oil to your hot pot. You'll know it's ready when it shimmers and moves freely around the bottom—this takes about 30 seconds. Don't skip this step by adding cold oil to a cold pot; the beef won't brown properly. Working in batches is important here. Add about one-third of your beef cubes at a time. If you crowd the pan, the meat steams instead of browning, and you'll miss out on that delicious caramelized exterior. Let each batch sit undisturbed for 2-3 minutes on each side. You're looking for a dark golden-brown crust on all sides. When the first batch is browned, transfer it to a clean plate. Repeat with the remaining beef in two more batches. This whole step takes about 15 minutes, and it's the most important part. Don't rush it.
- Once all the beef is browned and set aside, leave about 1 tablespoon of oil in the pot. Add your sliced onion and stir constantly for about 3 minutes. You want the onion to soften and turn slightly translucent at the edges—this is when it's ready for the spices. Reduce your heat to medium-low. This is crucial. Spices are delicate and burn easily on high heat, which makes them taste bitter instead of warm and inviting. Add your minced garlic and ginger, stir well, and cook for exactly 1 minute. Your kitchen should start to smell amazing—that's your sign it's working. Now add your turmeric, coriander, and garam masala all at once. Stir constantly for 2 minutes. The spices will coat everything and create a fragrant paste. This paste is the foundation of your entire curry, so don't skip the stirring. You're preventing the spices from burning and making sure they're evenly distributed.
- Add all your browned beef back to the pot, including any juices that have collected on the plate. Stir everything together for about 2 minutes so the meat gets coated in that spice paste. Add your chopped onion chunks, bay leaves, and cinnamon stick. Stir once more to combine. This is when the curry starts to look like an actual dish instead of scattered ingredients. Take a moment to appreciate that.
- Pour in 1.5 cups of water. If you're sensitive to heat and used less chili powder, start with this amount. Add a generous pinch of salt—about ½ teaspoon. Bring everything to a simmer over medium heat, which should take about 5 minutes. Once you see small bubbles breaking the surface consistently, reduce heat to low and partially cover the pot with the lid slightly ajar. You want steam to escape so the curry doesn't become watery, but you don't want the liquid to evaporate too quickly. Let this simmer gently for 1.5 to 2 hours. Check it once or twice. Stir gently. Add a splash more water if it looks too thick before the meat is tender. The beef should be so soft it breaks apart with a wooden spoon when you're done.
- When the beef is beautifully tender and the liquid has reduced slightly, taste your curry. Does it need salt? Add a little. Does it taste a bit flat? Add another ½ teaspoon of garam masala or ¼ teaspoon more coriander. Trust your palate here—you're the expert on your own taste preferences. If you're using coconut flakes, stir them in now and let them soak for 2-3 minutes. They'll add richness without making the curry taste like dessert. Finish with your fresh cilantro, stirring it in right before serving. It adds brightness and makes everything feel fresh despite the long cooking time.
Notes
FAQs
Can I use a different cut of beef?
You need a cut designed for braising—meaning something with enough fat and connective tissue to become tender through long cooking. Chuck, brisket, and beef shank all work beautifully. Avoid expensive cuts like filet or sirloin because they don’t benefit from long cooking, and you’ll be wasting money. The cheap cuts are actually the best for curry.
What if I don’t have fresh ginger? Can I use powdered?
Fresh ginger is really worth finding—it tastes completely different from powdered. But if you absolutely can’t find it, use ¼ teaspoon of ground ginger instead of 1 inch of fresh. Start with that amount and taste before adding more. Powdered ginger is more concentrated, so you need far less.
Is this curry spicy? How much heat will it have?
The heat level is very mild with ½ teaspoon of chili powder. It’s warm and inviting, not mouth-burning. If you’re cooking for people who don’t like any spice at all, reduce chili powder to ¼ teaspoon or omit it entirely. If you love heat, add another ½ teaspoon. Chili powder is forgiving because you can adjust it to your taste.
Can I make this in a slow cooker?
Absolutely, though you’ll miss the browning step, which adds flavor. Brown your beef in a regular pot first, then transfer everything to your slow cooker with the spice paste and water. Cook on low for 6-8 hours or high for 3-4 hours. Add fresh cilantro right before serving.
My curry separated and looks greasy. Did I do something wrong?
This sometimes happens if your simmer was too vigorous and broke down the meat too much, or if your kitchen is very warm and the fat separated as it cooled. It’s not wrong, just textural. Stir it back together gently, or add a splash of water and reheat on low heat. The flavors are still completely intact.
More Beginner-Friendly Recipes
- BBQ Spatchcock Chicken Recipe – Another dish that teaches you how to build layers of flavor with simple techniques
- BBQ Ribeye Recipe – Learn to respect quality beef and let its natural flavor shine
- Easy Fried Rice Restaurant Style Recipe – Master the technique of cooking rice properly, which pairs beautifully with your curry
- Baked Mac and Cheese with Cream Cheese – Another slow-cooked comfort classic that rewards patience
Final Thoughts: You’ve Got This
You came here uncertain if you could make beef curry. By the time your first batch is simmering on the stove, you’ll wonder why you ever doubted yourself. This recipe doesn’t ask for perfection. It asks for presence—for you to show up, follow the steps, taste as you go, and trust that time and gentle heat will do most of the work.
When your family sits down to a bowlful of tender beef swimming in spices that somehow taste both complex and comforting, you’ll understand what I’ve always known: Food doesn’t need to be complicated to be nourishing. It just needs to be made with attention and served with love.
More Recipes You Will Love
- This Easy Chicken Dinner – Worth adding to your recipe collection.
You’re going to make this. And when you do, you’re going to realize you can make almost anything. Cook what makes you happy!