This post contains affiliate links. As an Amazon Associate I earn from qualifying purchases.
Every time I tried making stuffed peppers, they turned out soggy and bland. The filling would slide out, the peppers stayed too firm, and nobody at my table got excited about dinner. I remember my grandmother making something similar in the 1980s—hers were golden, cheesy, and people asked for seconds. I couldn’t figure out what I was missing until I understood one simple thing: you have to soften the peppers first, and the filling needs real flavor, not just meat and tomato sauce.
That’s when everything changed. Now I make these regularly for my family, and my kids actually request them. If you’ve struggled with this dish like I did, this recipe will fix that. I’ve also found that pairing comfort meals like this with lighter sides keeps everyone feeling good, not overstuffed. Speaking of balancing comfort with nutrition, my Bacon Jalapeno Recipe shares similar flavor techniques.
Why Your Stuffed Peppers Never Turn Out Right (And How to Fix It)
I hear the same complaints from friends and family: the peppers are rubber-hard, the filling is bland, the cheese doesn’t melt evenly, or the whole thing falls apart when you try to serve it. The real culprit? Most recipes skip the blanching step or use underseasoned filling. That’s where everything falls apart.
Here’s what I learned working with families in Maryland for years: peppers need a head start in hot water before they meet the oven. This softens them just enough so they cook through during roasting instead of turning into little leather pouches. Plus, your filling needs enough seasoning that it stands on its own—not just a supporting role for the cheese.
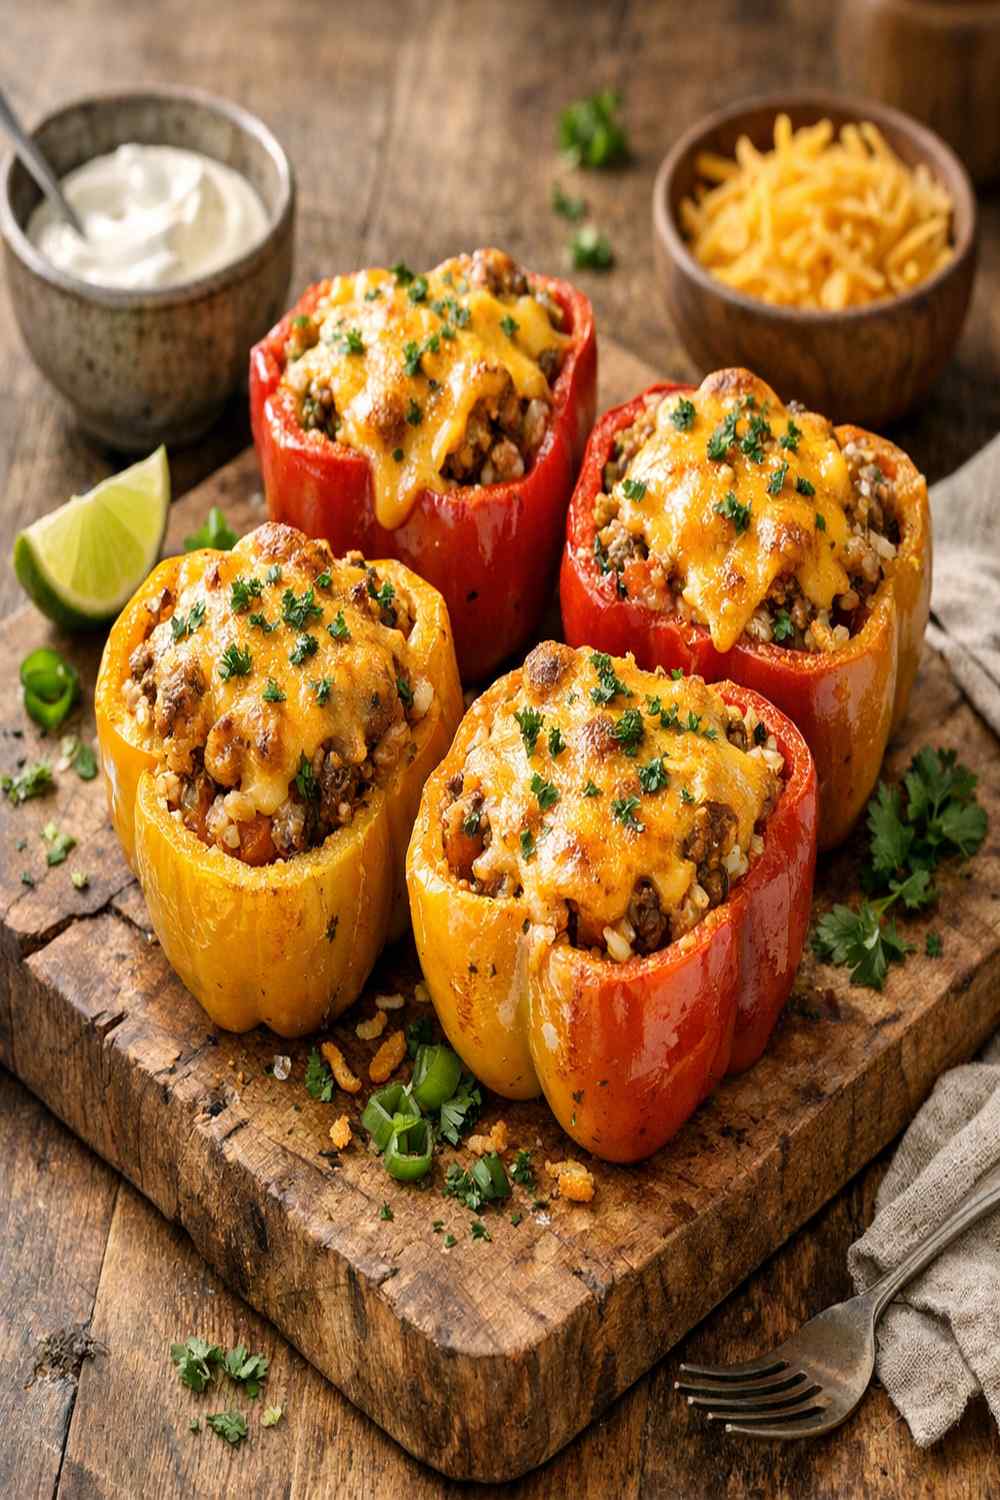
What Makes This Cheddar Stuffed Pepper Recipe Different?
This recipe works because of three specific things I built in based on my experience. First, we blanch the peppers for exactly 5 minutes before roasting—not longer, not shorter. This gives them a tender-firm texture that cooks perfectly without becoming mushy. Second, the filling gets a full flavor build with garlic, herbs, and fire-roasted tomatoes, so it tastes complete even before the cheese goes on. Third, we use the chopped pepper tops in the filling itself, which adds texture and prevents waste.
The blanching approach is clinical nutrition meeting real life: you’re pre-cooking the pepper skin and flesh just enough to break down the cell walls. This means faster final cooking, more even heat distribution, and peppers that stay structurally sound instead of collapsing. I’ve tested this dozens of times, and the difference is night and day.
Before You Start: What You Need to Know
Two things will make or break this dish, and most recipes don’t mention either one.
- Your peppers need to stand upright in the baking dish. If the bottom is rounded, they’ll tip sideways during roasting and the filling spills everywhere. Slice a thin piece off the bottom of each pepper if needed so it sits flat. This takes 30 seconds and saves your entire dish.
- Let the filling cool slightly before stuffing. Hot filling will make the cheese start melting before the peppers even hit the oven, and it’ll run down the sides. Cool it for just 3-5 minutes, and the cheese stays put where you put it. This prevents dry, deflated results.
The Ingredients
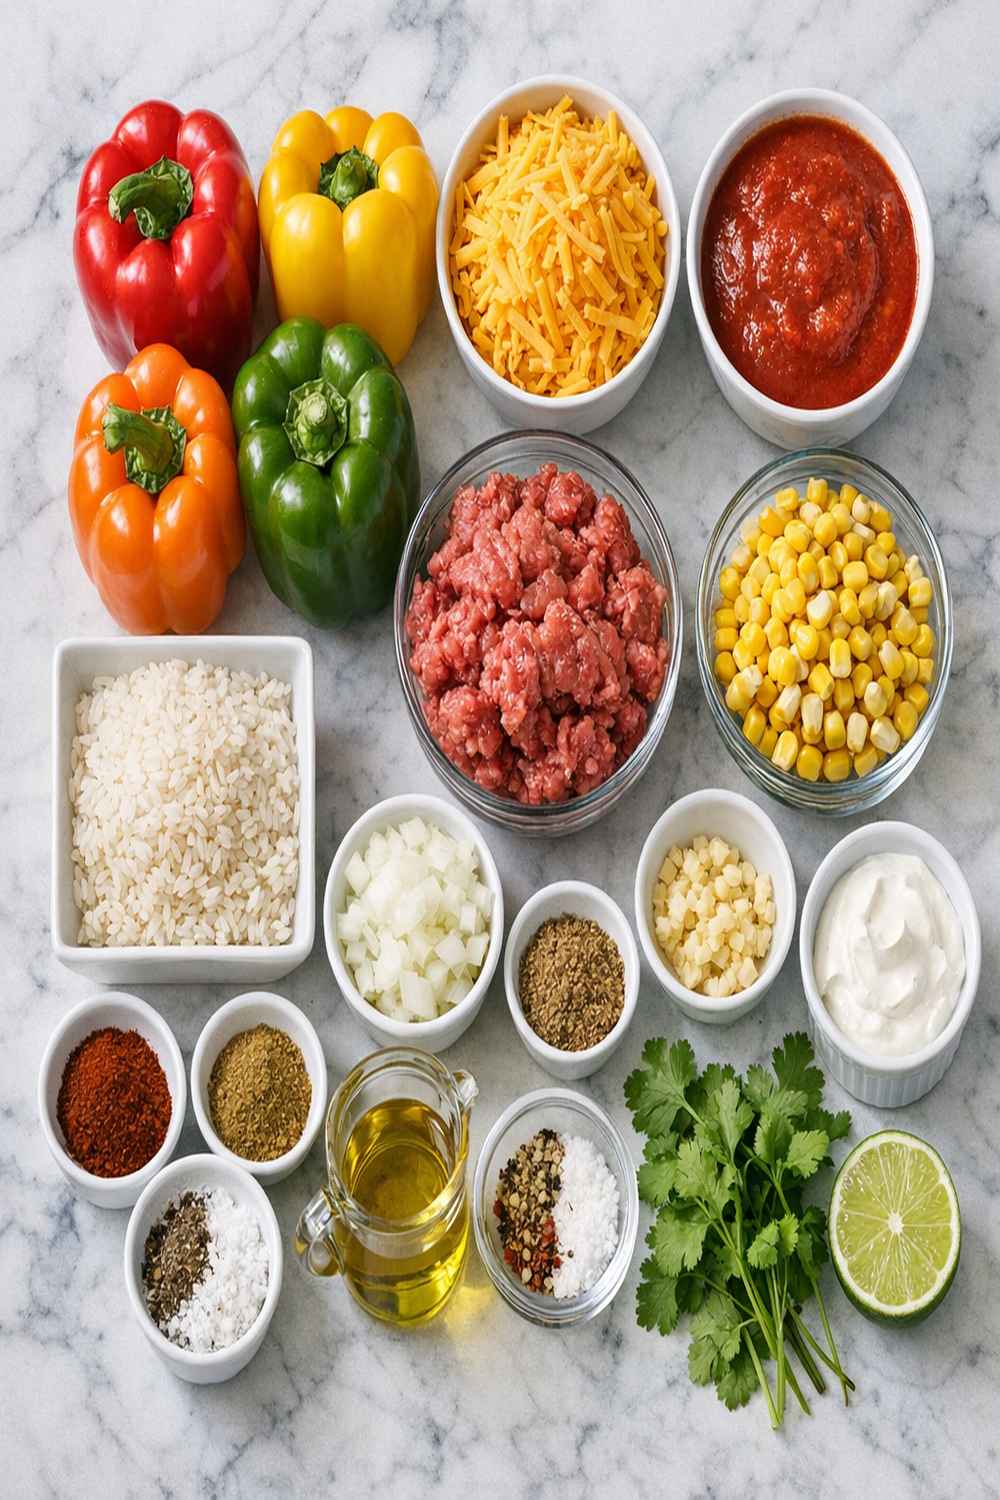
I chose each ingredient here because it serves a purpose. The fire-roasted tomatoes bring acidity and depth that plain diced tomatoes can’t match. The rice stretches the filling so it’s not heavy, and it soaks up all that savory sauce. The fresh garlic (never powder—it tastes flat) builds the flavor foundation that makes people eat these without realizing they’re eating something that’s actually balanced and nourishing.
- 1 teaspoon dried basil (rounds out the herbs without overpowering)
- Salt and black pepper to taste (season as you go, not just at the end)
- Red pepper flakes for garnish (optional, for those who like extra kick)
- 1 can fire-roasted tomatoes, 14.5 ounces (crushed by hand to release the juices—this matters more than you think)
- ½ jalapeño pepper, minced (optional, only if you want heat—this is family preference)
- 1 tablespoon olive oil (for sautéing the filling—use whatever you have)
- 1 pound ground beef (or ground turkey, chicken, or crumbled tofu if you prefer—choose what feels right for your table)
- Fresh parsley for garnish (fresh herbs at the end brighten everything)
- 1 medium yellow onion, chopped (yellow onions become sweet when cooked, unlike white onions)
- 1 cup shredded cheddar cheese (or mozzarella, or a blend—pepperjack adds a subtle heat I love)
- 1 teaspoon dried oregano (the backbone of the savory profile)
- 4 to 6 bell peppers in assorted colors (green, yellow, red, or orange—red and yellow are sweeter if you want less sharp pepper flavor)
- 5 cloves fresh garlic, minced (never use jarred or powdered—the flavor difference is enormous)
- 1 tablespoon paprika (adds color and a gentle pepper note without heat)
- 1 cup cooked rice, any variety (white, brown, or wild—all work equally well)
Expert’s Nutritional Tip: The combination of ground beef, rice, and tomatoes creates a complete protein with fiber and lycopene—the antioxidant in tomatoes that your body actually absorbs better when cooked. This isn’t a “diet” meal, but it’s designed so your body gets real nutrition alongside the comfort.
Step-by-Step: How to Make Cheddar Stuffed Pepper Recipe Without Fail
This is where your confidence starts building. Once you know the exact moves, this comes together in about 45 minutes start to finish. You’re going to make this work.
Step 1: Get Your Oven and Water Ready
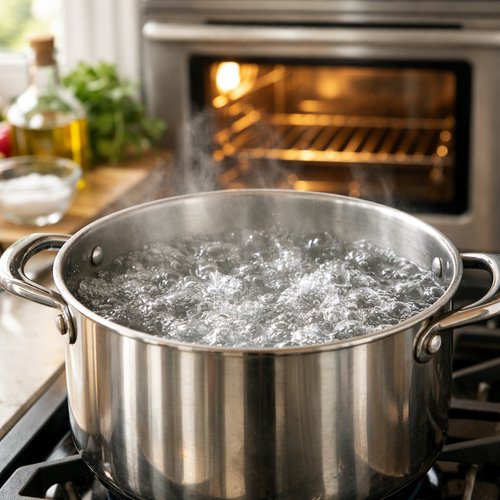
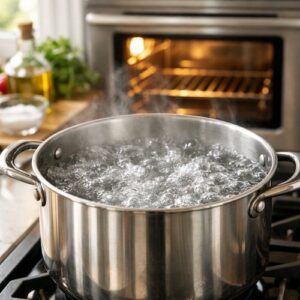
Preheat your oven to 425°F (220°C) and bring a large pot of water to a rolling boil—enough water to submerge your peppers completely. This is not optional. The boiling water softens the pepper skin and flesh, which prevents them from staying tough and chewy in the final roast. If you skip this step, you’ll end up with peppers that are tender inside but tough on the outside. I’ve been there.
Step 2: Prepare Your Peppers for Blanching
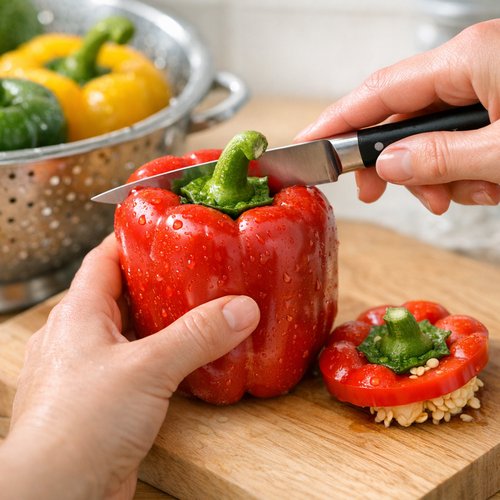
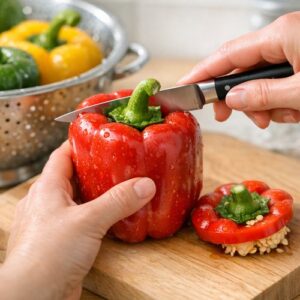
Rinse each bell pepper under cool water. Hold it upright and carefully slice off the top (where the stem is) using a sharp knife. Set this top aside—we’re going to chop it and use it in the filling. Now reach inside and pull out all the seeds and the white membrane. These taste bitter, so remove them completely. If your peppers have rounded bottoms, slice a thin piece off the bottom so they sit flat in your baking dish. This is crucial for them staying upright during roasting.
Step 3: Blanch the Peppers Until They Start to Soften
Once your water is boiling, carefully place each pepper (standing upright) into the water. Set a timer for exactly 5 minutes. Don’t go longer than this—you want them softened, not cooked through. After 5 minutes, use a slotted spoon to remove them and set them on paper towels to drain. The skins will look slightly wrinkled. This is perfect.
Alternative method: If you’d rather roast them instead, place them in a lightly oiled baking dish, cut-side down, and roast at 400°F for 20 minutes until they’re soft but still hold their shape. Both methods work. I use blanching because it’s faster and gives me more control.
Step 4: Set Up Your Baking Dish
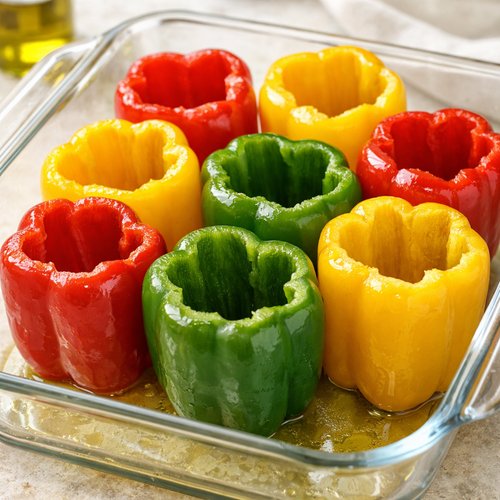
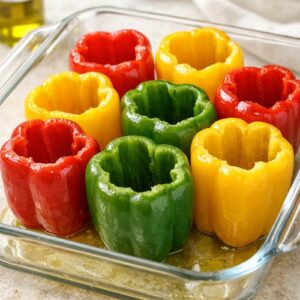
Lightly coat a 9×13-inch baking dish (or similar) with a thin layer of olive oil. Arrange your blanched peppers standing upright in the dish. They should fit snugly enough that they don’t tip over, but with a little space between each one. If you have 6 peppers and only fit 5 perfectly, you’ll stuff the 6th one separately—that’s fine. Leave this dish ready to go while you make the filling.
Step 5: Build Your Filling Base
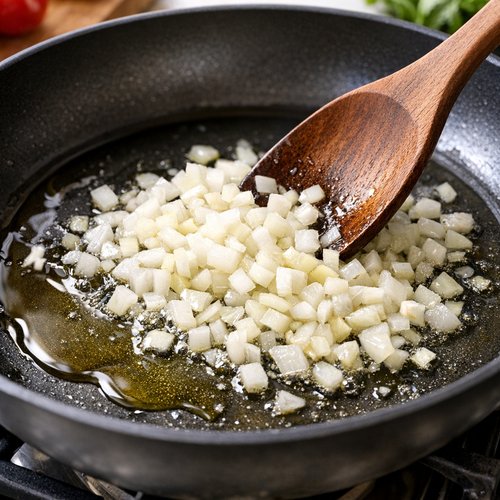
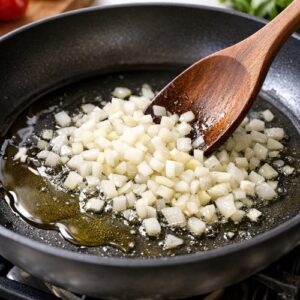
Heat 1 tablespoon of olive oil in a large skillet over medium heat. Once it shimmers (you’ll see it move easily in the pan), add your chopped onion and the chopped pepper tops from Step 2. Cook these for 5 minutes, stirring occasionally. You’re looking for the onion to become translucent and soft—this releases the natural sugars and sweetness. If you’re using the jalapeño, add it now too.
Step 6: Wake Up the Filling With Garlic
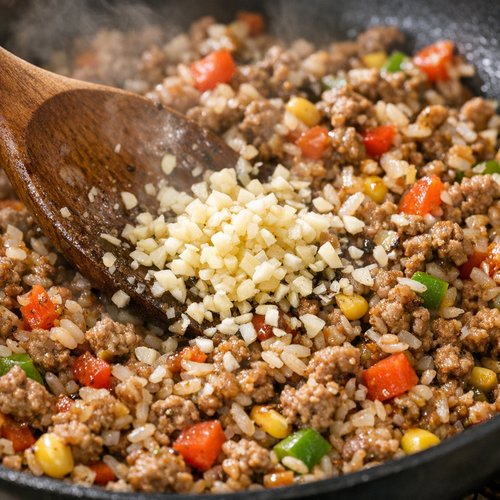
Add your 5 minced garlic cloves to the pan and stir constantly for 1 minute—just until you smell that sharp, garlicky aroma. Do not let it sit untouched or burn; keep stirring. Burnt garlic tastes bitter and ruins the whole dish. That 1-minute window is where the magic happens—the raw garlic flavor mellows and becomes savory and deep.
Step 7: Brown the Ground Beef Properly
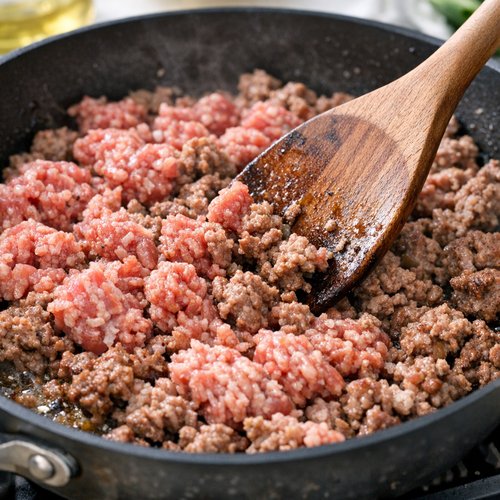
Add your 1 pound of ground beef to the pan. Use a wooden spoon or spatula to break it apart as it cooks. Don’t just stir constantly—let it sit for 30 seconds at a time so it browns instead of steaming. Brown meat is flavorful meat. This takes about 5-6 minutes total. You want to see no pink inside, and the meat should smell rich and cooked through. If you’re using ground turkey or chicken, the cooking time is the same.
Step 8: Add Tomatoes and Seasonings
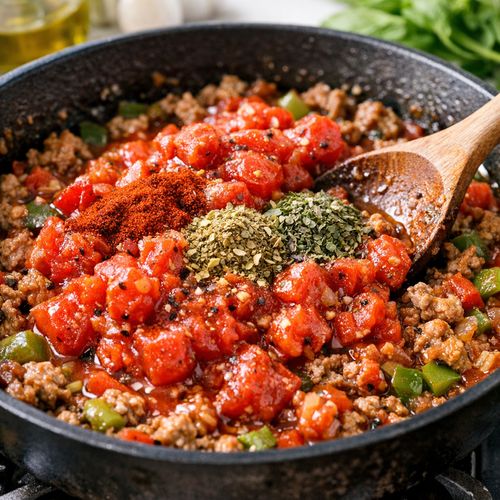
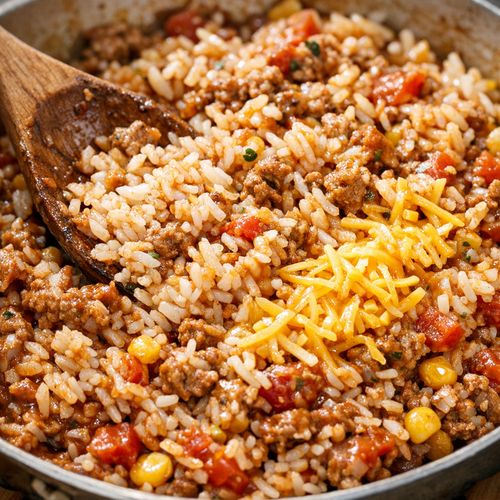
Pour in your can of fire-roasted tomatoes (juice and all) and add your paprika, oregano, and basil. Stir everything together and let it cook for 2 minutes so the seasonings bloom and combine. Taste it now and add salt and pepper. It should taste savory and full, not flat. This is your chance to adjust before the rice goes in.
Step 9: Fold In the Rice and Half the Cheese
Add your 1 cup of cooked rice to the filling and stir until everything is combined. The rice should be fully coated with the sauce. Now stir in half of your shredded cheddar cheese—about ½ cup. This melts into the filling and helps bind everything together. Remove the pan from heat and let it cool for 3-5 minutes before stuffing. This prevents the cheese from melting everywhere and keeps the texture right.
Step 10: Stuff the Peppers and Add the Topping
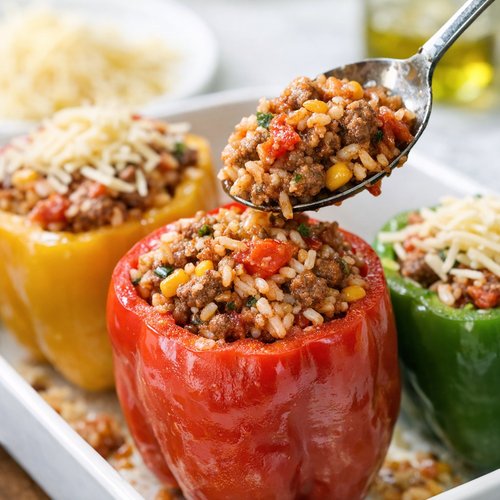
Using a spoon, carefully fill each pepper with the meat and rice mixture. Fill them generously—right up to the top, but don’t cram so hard that filling spills out the sides. You should have enough to fill all your peppers with maybe a little left over (you can eat this). Once all peppers are stuffed, sprinkle the remaining ½ cup of shredded cheese evenly over the tops of each pepper. This will melt into a golden, bubbly layer.
Step 11: Roast Until the Cheese Is Bubbly and Peppers Are Tender
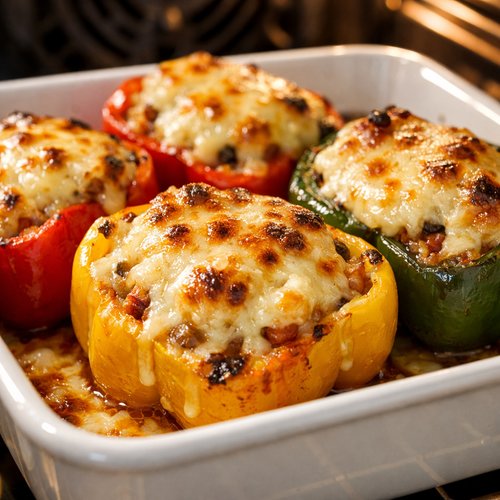
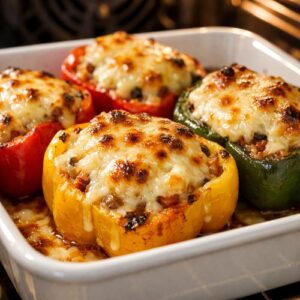
Place the baking dish in your preheated 425°F oven and roast for 15-20 minutes. You’re watching for two things: the cheese on top should be melted, bubbly, and starting to brown slightly, and the pepper flesh should be tender when you pierce it with a fork. If the cheese is browning too fast (getting dark brown), cover the dish loosely with foil for the last 5 minutes.
Step 12: Garnish and Serve
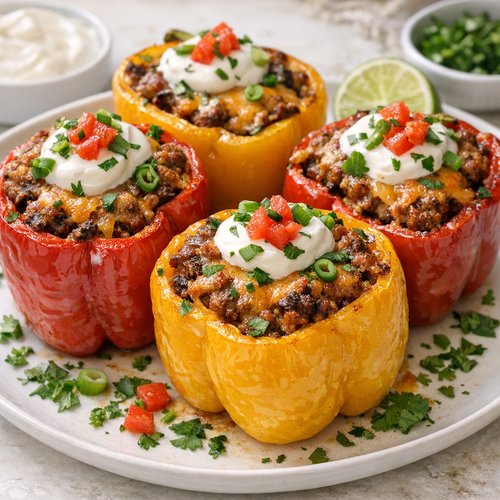
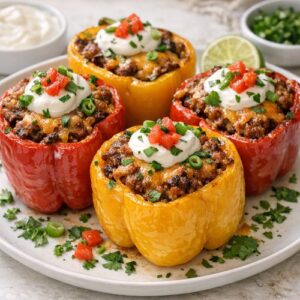
Remove the peppers from the oven and let them cool for 2-3 minutes. This cooling period is important because it lets everything set slightly so the filling doesn’t slide out when you pick them up. Sprinkle fresh parsley over the top and a pinch of red pepper flakes if you like heat. Serve warm, and watch people come back for seconds.
The Most Common Mistakes (And How to Avoid Them)
- Skipping the blanching step. This is why peppers turn out tough and chewy. The blanch softens the skin and flesh so the final roast finishes them properly instead of hardening them. Fifteen minutes saved is not worth rubber peppers. Do the blanch.
- Using underseasoned filling. If your filling tastes plain on its own (before the cheese), the finished dish will too. Taste your filling at Step 8 and add more salt, pepper, or herbs if needed. The cheese isn’t there to save a bland filling—it’s there to complement an already-delicious one.
- Stuffing the peppers while the filling is still hot. Hot filling starts melting the cheese before the peppers even hit the oven, and it runs down the sides. Cool it first, and your stuffed peppers stay neat and hold their shape. This is the difference between a pretty plated dinner and a mess.
- Overstuffing so filling falls out. I get excited and pack them tight. Then the filling pops out the sides during cooking. Fill generously, but not so tight that it’s spilling. Your peppers will thank you.
How Do I Know When It’s Done?
The cheese on top should be melted, bubbly, and just starting to show golden-brown spots. This tells you the cheese has reached the right temperature to melt completely without becoming rubbery. The pepper flesh itself should be tender but not falling apart—when you pierce it with a fork, it should give easily without being mushy. If the pepper skin is starting to split or look collapsed, it’s overcooked. The filling inside should be hot all the way through (you can check by touching a fork to the inside at the thickest part—it should be hot).
Timing alone isn’t enough here because every oven runs differently. Check at 15 minutes and look for those visual cues. You’ll be done somewhere between 15-20 minutes in most cases.
Troubleshooting: When Things Go Wrong
- The peppers are still tough and chewy after roasting. You either skipped the blanch or didn’t blanch long enough. Next time, do a full 5-minute blanch and make sure the water is truly boiling. If this happened and you’re mid-cook, cover the dish with foil and add 5-10 more minutes to the roast time. It’ll help, though not completely save it. The lesson: always blanch.
- The filling is watery and soggy. Your rice was cooked with too much water, or your tomatoes released extra liquid and didn’t cook down. Use rice that’s cooked to the proper consistency (it should be moist but each grain distinct, not mushy). When you add the tomatoes, let them cook with the beef for a few extra minutes before adding rice so some liquid evaporates. Next time, drain canned tomatoes in a strainer for 30 seconds before adding them.
- The cheese on top burned but the peppers aren’t done. Your oven runs hot. Cover with foil after the cheese browns and finish cooking the peppers. For next time, roast at 400°F instead of 425°F, and plan for 20-25 minutes instead. A lower, slower heat prevents burning while the peppers finish cooking.
- The filling slid out of the peppers when I tried to pick them up. You stuffed them while the filling was hot. Next time, let it cool for 5 minutes before stuffing. If this happened now, carefully use a wide spatula to slide under each pepper and transfer it to a plate. It’s harder to serve, but it’ll still taste good.
Can I Store Cheddar Stuffed Pepper Recipe?
Absolutely. These actually taste better the next day because the flavors marry together. Store leftovers in an airtight container in the refrigerator for up to 4 days. Reheat gently in a 350°F oven for 10-12 minutes (covered with foil so the cheese doesn’t dry out), or microwave individual peppers for 1-2 minutes until warm through.
Make-Ahead Guide: You can prepare these completely up to 24 hours before serving. Assemble the stuffed peppers in your baking dish, cover tightly with plastic wrap, and refrigerate. When you’re ready to cook, remove from the fridge and let them sit at room temperature for 15 minutes, then roast as directed. The roasting time might go 2-3 minutes longer since they start cold. You can also freeze assembled (uncooked) peppers for up to 2 months. Thaw overnight in the refrigerator before roasting, or add 10 extra minutes to the roast time if cooking from frozen.
Nutrition Information
One stuffed pepper (based on dividing the recipe into 6 servings) contains approximately 280 calories, 18 grams of protein, 22 grams of carbohydrates, 12 grams of fat, and 4 grams of fiber. According to USDA data, the ground beef provides iron and B vitamins essential for energy, the peppers offer vitamin C and potassium, and the tomatoes deliver lycopene—an antioxidant that your body absorbs better from cooked tomatoes than raw ones. The rice adds complex carbohydrates that keep you satisfied without a blood sugar spike. This is real comfort food that your body actually recognizes and uses.
What Can I Serve With Cheddar Stuffed Pepper Recipe?
These peppers work as a complete meal, but they pair beautifully with lighter sides that balance the richness. I usually serve them with a simple green salad dressed in vinaigrette, roasted broccoli, or steamed green beans. My Apples and Cabbage Recipe is actually a wonderful side because the brightness cuts through the richness of the cheese and beef.
- A crisp garden salad with vinaigrette. The acidity balances the cheese and tomato sauce, so your meal feels lighter overall.
- Roasted or steamed vegetables. Broccoli, green beans, or Brussels sprouts add texture variety and more nutrients without making the meal feel heavy.
- Crusty bread. Perfect for soaking up any sauce on your plate—comfort food at its best.
- Garlic bread or Texas toast. If you’re going full comfort mode, this is it.
- A cold beverage. Something crisp like unsweetened iced tea or sparkling water cuts through the richness of the cheese and beef.

Cheddar Stuffed Pepper Recipe
Ingredients
Method
- Preheat your oven to 425°F (220°C) and bring a large pot of water to a rolling boil—enough water to submerge your peppers completely. This is not optional. The boiling water softens the pepper skin and flesh, which prevents them from staying tough and chewy in the final roast. If you skip this step, you'll end up with peppers that are tender inside but tough on the outside. I've been there.
- Rinse each bell pepper under cool water. Hold it upright and carefully slice off the top (where the stem is) using a sharp knife. Set this top aside—we're going to chop it and use it in the filling. Now reach inside and pull out all the seeds and the white membrane. These taste bitter, so remove them completely. If your peppers have rounded bottoms, slice a thin piece off the bottom so they sit flat in your baking dish. This is crucial for them staying upright during roasting.
- Once your water is boiling, carefully place each pepper (standing upright) into the water. Set a timer for exactly 5 minutes. Don't go longer than this—you want them softened, not cooked through. After 5 minutes, use a slotted spoon to remove them and set them on paper towels to drain. The skins will look slightly wrinkled. This is perfect. Alternative method: If you'd rather roast them instead, place them in a lightly oiled baking dish, cut-side down, and roast at 400°F for 20 minutes until they're soft but still hold their shape. Both methods work. I use blanching because it's faster and gives me more control.
- Lightly coat a 9x13-inch baking dish (or similar) with a thin layer of olive oil. Arrange your blanched peppers standing upright in the dish. They should fit snugly enough that they don't tip over, but with a little space between each one. If you have 6 peppers and only fit 5 perfectly, you'll stuff the 6th one separately—that's fine. Leave this dish ready to go while you make the filling.
- Heat 1 tablespoon of olive oil in a large skillet over medium heat. Once it shimmers (you'll see it move easily in the pan), add your chopped onion and the chopped pepper tops from Step 2. Cook these for 5 minutes, stirring occasionally. You're looking for the onion to become translucent and soft—this releases the natural sugars and sweetness. If you're using the jalapeño, add it now too.
- Add your 5 minced garlic cloves to the pan and stir constantly for 1 minute—just until you smell that sharp, garlicky aroma. Do not let it sit untouched or burn; keep stirring. Burnt garlic tastes bitter and ruins the whole dish. That 1-minute window is where the magic happens—the raw garlic flavor mellows and becomes savory and deep.
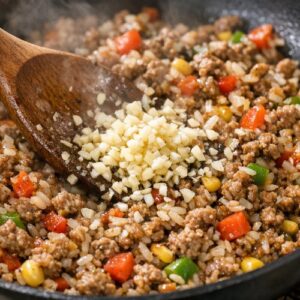
- Add your 1 pound of ground beef to the pan. Use a wooden spoon or spatula to break it apart as it cooks. Don't just stir constantly—let it sit for 30 seconds at a time so it browns instead of steaming. Brown meat is flavorful meat. This takes about 5-6 minutes total. You want to see no pink inside, and the meat should smell rich and cooked through. If you're using ground turkey or chicken, the cooking time is the same.
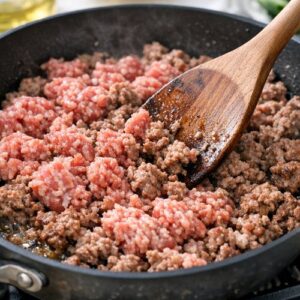
- Pour in your can of fire-roasted tomatoes (juice and all) and add your paprika, oregano, and basil. Stir everything together and let it cook for 2 minutes so the seasonings bloom and combine. Taste it now and add salt and pepper. It should taste savory and full, not flat. This is your chance to adjust before the rice goes in.
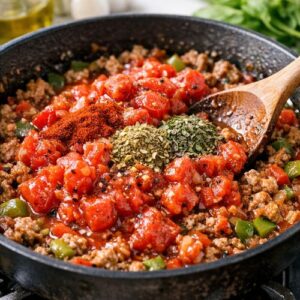
- Add your 1 cup of cooked rice to the filling and stir until everything is combined. The rice should be fully coated with the sauce. Now stir in half of your shredded cheddar cheese—about ½ cup. This melts into the filling and helps bind everything together. Remove the pan from heat and let it cool for 3-5 minutes before stuffing. This prevents the cheese from melting everywhere and keeps the texture right.
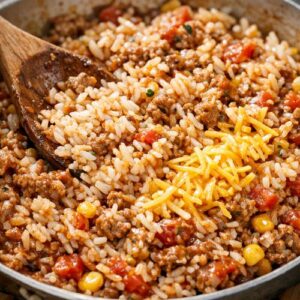
- Using a spoon, carefully fill each pepper with the meat and rice mixture. Fill them generously—right up to the top, but don't cram so hard that filling spills out the sides. You should have enough to fill all your peppers with maybe a little left over (you can eat this). Once all peppers are stuffed, sprinkle the remaining ½ cup of shredded cheese evenly over the tops of each pepper. This will melt into a golden, bubbly layer.
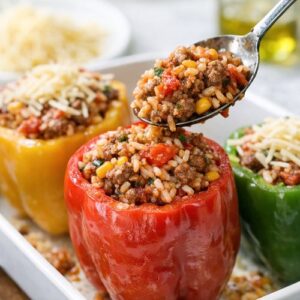
- Place the baking dish in your preheated 425°F oven and roast for 15-20 minutes. You're watching for two things: the cheese on top should be melted, bubbly, and starting to brown slightly, and the pepper flesh should be tender when you pierce it with a fork. If the cheese is browning too fast (getting dark brown), cover the dish loosely with foil for the last 5 minutes.
- Remove the peppers from the oven and let them cool for 2-3 minutes. This cooling period is important because it lets everything set slightly so the filling doesn't slide out when you pick them up. Sprinkle fresh parsley over the top and a pinch of red pepper flakes if you like heat. Serve warm, and watch people come back for seconds.
Notes
FAQs
Can I use ground turkey or chicken instead of beef?
Yes, absolutely. Ground turkey and ground chicken work equally well. The cooking time is the same (5-6 minutes), and they’ll brown just like beef. Turkey is leaner, so the finished dish will be lighter. Chicken is milder, so you might want to add an extra ½ teaspoon of salt to compensate for the less robust flavor. I’ve also used crumbled tofu, and it works beautifully for vegetarian versions—just add an extra teaspoon of soy sauce or tamari for umami depth.
What if my peppers are different sizes?
This is fine and happens in real life. Just know that smaller peppers will cook faster than larger ones. Start checking the smaller ones at 12 minutes and the larger ones at 15. They don’t all have to be done at exactly the same second—stagger them if needed. You can also slice larger peppers in half lengthwise instead of removing just the top, then stuff the halves. This actually works great and looks nice plated.
Can I make these without rice to reduce carbs?
Yes. Replace the rice with an equal amount of finely chopped mushrooms that you’ve sautéed with the onions (they add texture and earthiness), or use cauliflower rice. The filling will be less stretchy and more meat-forward, which changes the flavor profile—it becomes richer and less balanced. If you go this route, add an extra ¼ cup of tomato sauce to compensate for the moisture the rice would have provided. The nutrition will shift to higher protein, lower carbs, which works if that’s your goal.
Do I have to use cheddar, or can I use different cheese?
Use whatever cheese you like. Mozzarella creates a more neutral, stretchy melt. A blend of cheddar and mozzarella is classic for a reason—the cheddar adds flavor, the mozzarella adds stretch. I love pepperjack for subtle heat, and feta adds a tangy crumb. Avoid soft cheeses like goat cheese or cream cheese (they break when hot), but hard and semi-hard cheeses all work. Just know that milder cheeses mean the filling flavors become more prominent, and sharper cheeses (aged cheddar, gruyère) make the whole dish more intense.
Why does my filling look watery, and how do I fix it?
This usually happens because the rice was cooked with too much water, or your tomatoes released extra liquid. To prevent it next time, cook your rice until the grains are separate and any cooking liquid is absorbed. When you add canned tomatoes, let the filling cook for 2-3 minutes after adding the beef but before adding the rice—this lets some liquid evaporate. If it’s happening now and you haven’t cooked yet, drain the tomatoes in a fine strainer for 30 seconds before adding them, and make sure your rice is cooked properly (you can even spread cooked rice on a sheet pan for 5 minutes to let it dry out slightly). If you’ve already stuffed the peppers, just proceed with roasting—the extra heat in the oven will help dry it out a bit.
Can I prep these in a slow cooker instead of the oven?
Not in the traditional way, but you can assemble them and cook them in a slow cooker on low for 4-5 hours or high for 2-3 hours (covered). The peppers will be very soft and the cheese will melt completely, but you won’t get that nice browned, bubbly cheese top. If you go this route, skip the blanching step, stuff the peppers, place them in the slow cooker with a little water on the bottom (½ cup), and cover. Add the cheese topping for the last 15 minutes if your slow cooker has a “warm” setting, or sprinkle it on just before serving. It’s easier for meal prep and hands-off cooking, but the texture and appearance will be different.
Seasonal Variations
Spring: Add fresh peas to the filling and use red or yellow peppers (they’re sweeter and feel lighter). Garnish with fresh mint instead of parsley.
Summer: Swap the fire-roasted tomatoes for fresh diced tomatoes in late summer when they’re in season. Add fresh basil (not dried) and use summer herbs like tarragon or dill. Consider using ground lamb instead of beef for a different flavor profile.
Fall: Add ¼ teaspoon of smoked paprika instead of regular paprika, and include ½ cup of diced roasted sweet potato in the filling. Use orange or red bell peppers. Top with a blend of cheddar and gruyère.
Winter: Add ½ teaspoon of ground cumin and a pinch of chili powder to the filling for warmth. Use darker, earthier herbs like sage and thyme (½ teaspoon each). Include finely diced mushrooms sautéed with the onions for depth.
More Recipes You’ll Love
- Baked Mac and Cheese with Cream Cheese – If you love cheesy comfort, this creamy pasta dish hits the same note with a richer sauce.
- Grilled Stuffed Pork Chops Recipe – Another way to stuff protein for dinner—savory and elegant enough for company.
- Mexican Pinwheels – Similar flavors in a different form if you want to switch up the format but keep the tastes you love.
You now have everything you need to make cheddar stuffed peppers that actually work. No soggy bottoms, no bland filling, no disasters. The blanching step softens your peppers, the seasoned filling tastes complete, and the cheese melts perfectly on top. These are the kinds of dinners that make people feel cared for—not because they’re fancy, but because they’re made thoughtfully and taste genuinely good. Your family deserves that, and honestly, so do you. Cook what makes you happy!