This post contains affiliate links. As an Amazon Associate I earn from qualifying purchases.
Getting your family to eat turkey that’s actually moist and flavorful feels impossible—until you try brining. I learned this trick years ago at my grandmother’s kitchen table in Maryland, where she’d spend the day before Thanksgiving building layers of flavor that made everyone forget about the dry turkey disasters of years past.
A good brine transforms the whole bird, and when you add bright citrus notes with warm spices, something magical happens. Your turkey becomes the star of the meal, not something everyone politely pushes around their plate. In this post, I’m sharing my foolproof citrus brined turkey recipe that keeps families coming back for seconds—and actually makes the whole cooking process feel manageable, even for first-timers.
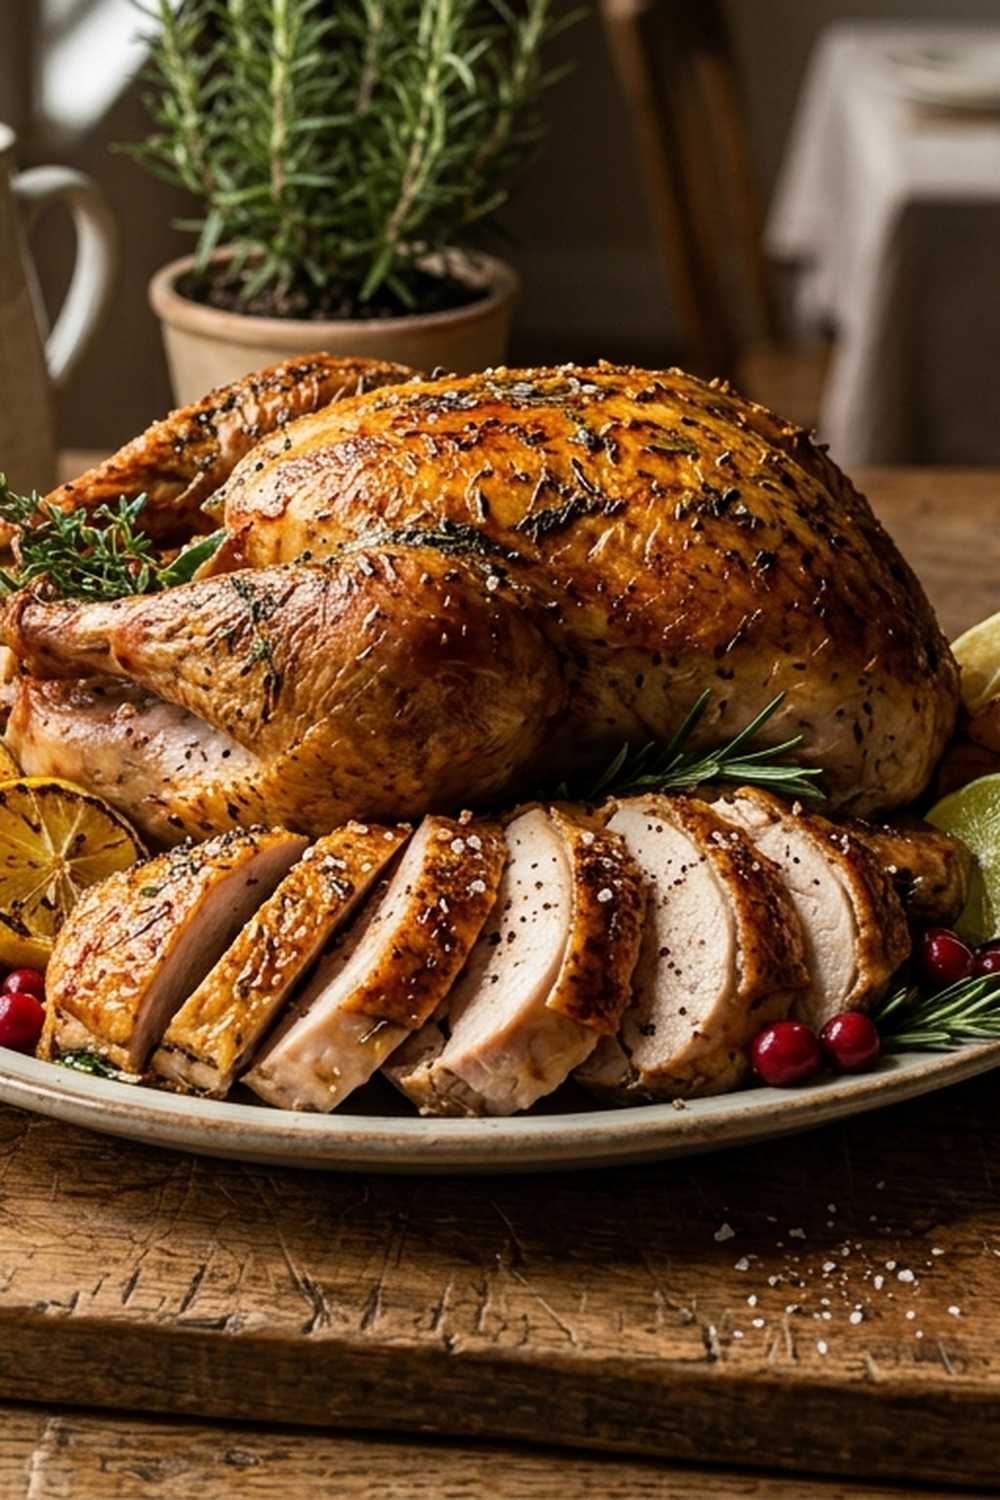
Citrus Brined Turkey the Whole Family Will Actually Eat
I’ll never forget the year my cousin brought her toddler to Thanksgiving dinner and whispered to me, “Please tell me this turkey isn’t going to be rubber.” That’s when I knew I had to share this recipe. It’s the same brining method I’ve used for over a decade, and it works every single time.
The combination of bright lemon and orange juice, warming cinnamon and ginger, plus fresh sage creates a brine that doesn’t just preserve moisture—it actually seasons the turkey from the inside out. When that bird comes out of the oven golden and glistening, the whole table goes quiet for a second. That’s the moment I live for.
My family always notices the difference. My dad actually asked for seconds one year, which had never happened before. The meat stays tender through the entire cooking process, and the citrus notes add just enough brightness to balance the richness of the bird. Even people who claim they don’t like turkey will eat this version.
Why This Brining Method Works So Well
The science here is straightforward, and understanding it helps you feel confident in the process. When you brine poultry, you’re using salt to break down proteins and help the meat retain moisture during cooking. But I don’t stop there. The citrus adds acid that helps tenderize the meat while adding flavor.
The honey brings subtle sweetness that deepens when roasted. The warm spices—cinnamon, ginger, and bay leaves—create complexity that makes people pause mid-bite and say, “What is that amazing flavor?”
- Citrus brightness that doesn’t overpower – The lemon and orange provide acid and flavor without making your turkey taste like juice. The brining liquid infuses gently, creating a balanced taste.
- Moisture retention that actually lasts through cooking – Salt in the brine helps muscle fibers retain water, so your turkey stays juicy even if you slightly overcook it (which happens more often than we’d like to admit).
- Spice warmth that feels like home – The cinnamon, ginger, and sage create that nostalgic flavor profile that makes people feel comforted before they even take a bite.
How to Get Your Whole Family Involved in Brining
This is one of the easiest recipes to make a family activity. Unlike roasting the actual turkey, which requires oven space and heat management, brining is a gentle, mostly hands-off process that multiple family members can help with at different stages.
- Ages 4-7: Slice the citrus and count the spices – Kids this age can use plastic knives to slice lemon and orange halves (with supervision) and count out peppercorns, cinnamon sticks, and bay leaves into a bowl. This teaches them kitchen confidence and lets them claim ownership of the recipe.
- Ages 8-12: Measure and stir the brine – School-age children can measure the salt, honey, and water with your supervision, and they can help stir the pot before it goes on heat. This is where they learn about ratios and why we dissolve salt in hot liquid.
- Ages 13+: Lead the entire brining process – Teenagers can handle this nearly independently. Let them combine ingredients, bring the brine to a boil, cool it properly, and place the turkey in the container. This teaches them food safety and temperature control.
The Ingredients: Building a Flavorful, Foolproof Brine
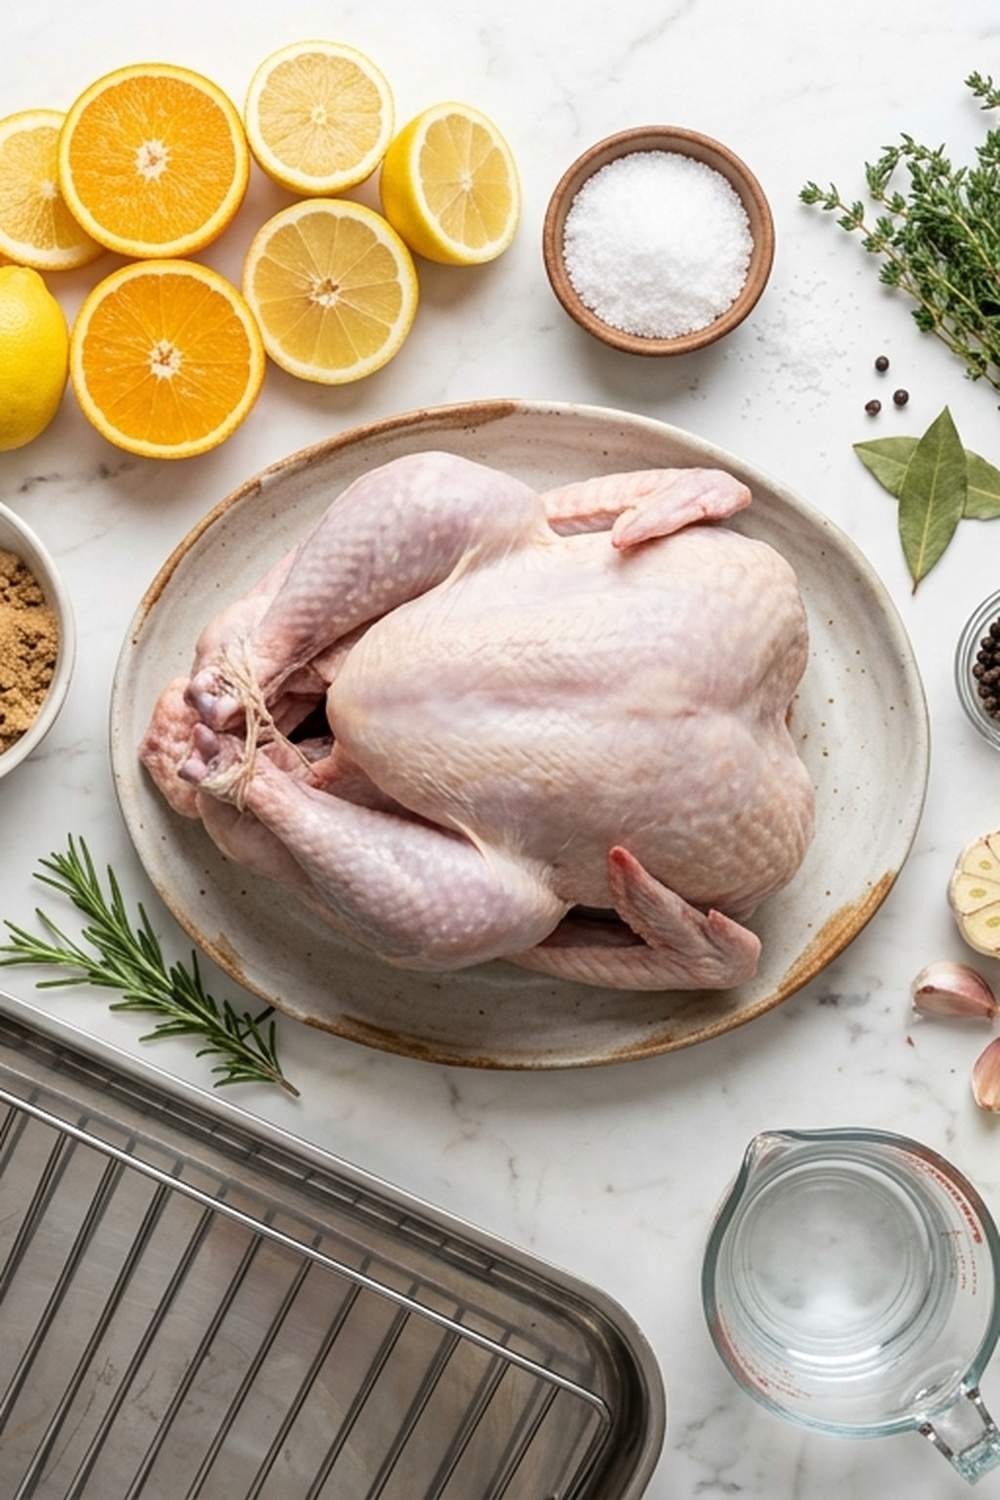
I’ve tested this brine dozens of times, and the ingredient ratios matter. The salt level is high enough to cure but not so high that your turkey tastes like a pretzel. The honey rounds out sharp citrus notes. The fresh sage is non-negotiable—dried sage tastes dusty by comparison.
- 1 cup kosher salt (Diamond Crystal brand preferred, as it dissolves more evenly)
- ½ gallon water (divided: ½ gallon for the hot brine, ½ gallon for cooling)
- ½ cup raw honey (never use processed honey for brining)
- 2 lemons (sliced thin with a sharp knife to release oils)
- 2 oranges (sliced thin for maximum surface area)
- 12 to 15 fresh sage leaves (roughly torn to release their oils)
- 4 cloves garlic (peeled and lightly smashed with the side of a knife)
- 1 tablespoon black peppercorns (whole, not pre-ground)
- 1 cinnamon stick (about 3 inches long, broken in half)
- 2 bay leaves (fresh if possible, dried if necessary)
- 1 teaspoon crystallized ginger (adds warmth without overwhelming)
- 1 tablespoon fresh thyme sprigs (optional but adds complexity)
Expert’s Nutritional Tip: The herbs in this brine—particularly sage and thyme—contain antioxidants that not only flavor the turkey but also support your immune system. Sage especially has been used in traditional medicine for centuries, and modern research backs up its anti-inflammatory properties. When you brine with fresh herbs, you’re building flavor while supporting your body’s natural defenses.
How to Make Your Citrus Brined Turkey: Step by Step
This process takes about 30 minutes of active time, then patience while the magic happens.
Step 1: Combine Your Aromatics and Spices
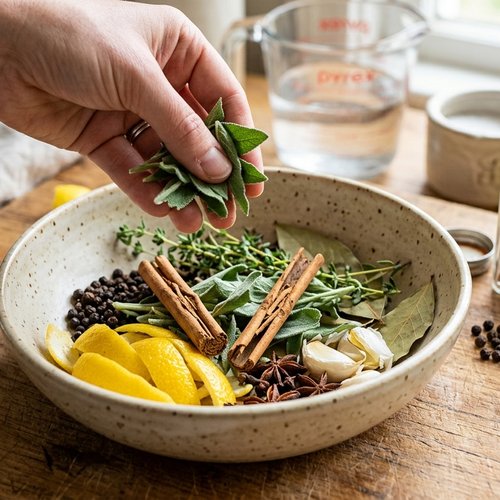
Start by gathering your lemon slices, orange slices, garlic cloves, peppercorns, cinnamon stick, bay leaves, sage, ginger, and thyme in a large stainless steel pot. (Never use aluminum or reactive metals for brining—they can interact with the salt and citrus.) Don’t worry about being precious here. You can break the cinnamon stick into pieces. You can tear the sage into rough pieces. This is about releasing flavors, not creating a spa bath.
Kids can help by: Measuring the peppercorns with a small spoon and dropping them into the pot. Tearing sage leaves. Smashing garlic cloves.
Step 2: Add Salt and Honey, Then Pour in Water
Add the kosher salt and honey to your pot with all the aromatics. Pour in half your water (the ½ gallon). This is where your family members who are learning ratios can see how much salt dissolves in how much water—it’s a practical chemistry lesson.
Safety note for kids: If children are helping, have them step back before you turn on the heat. Hot liquid and young hands don’t mix.
Step 3: Bring the Brine to a Boil
Turn your heat to medium-high and watch until you see active bubbles breaking across the entire surface—that’s a rolling boil. This takes about 8 to 10 minutes. Let it boil for exactly 1 minute. This dissolves the salt completely and makes sure the honey is fully incorporated. The brine will smell incredible at this point—warm, citrusy, herbaceous. Take a moment to appreciate this smell.

Step 4: Cool the Brine Completely Before Adding Your Turkey
This step cannot be rushed. I’ve seen people try to shorten it, and it never ends well. Remove your pot from heat. Pour the remaining ½ gallon of cold water into the brine. Stir well. Now let it sit on the counter for at least 15 minutes, or ideally, refrigerate it for 30 minutes until it reaches room temperature. You want this brine completely cool before your turkey touches it, or you’ll start cooking the outer layer of meat while the inside stays raw.
To speed this up: Fill your sink with ice water and set the pot in the ice bath, stirring occasionally. This cuts cooling time to about 10 minutes.
Step 5: Prepare Your Turkey
Remove your turkey from the packaging. Rinse it under cool running water, inside and out. Pat it completely dry with paper towels. This step matters more than people realize—excess moisture on the skin prevents browning. Pat until your towels come away barely damp.
Check that your turkey fits in your brining vessel (a large food-grade plastic container or a brining bag). If you’re using a bag, set it in a large bowl first—this prevents leaks and makes it easier to pour the brine.
Safety reminder: Raw poultry requires clean hands and surfaces. Wash your hands thoroughly after handling, and don’t let the turkey touch surfaces where you’ve prepared other foods.
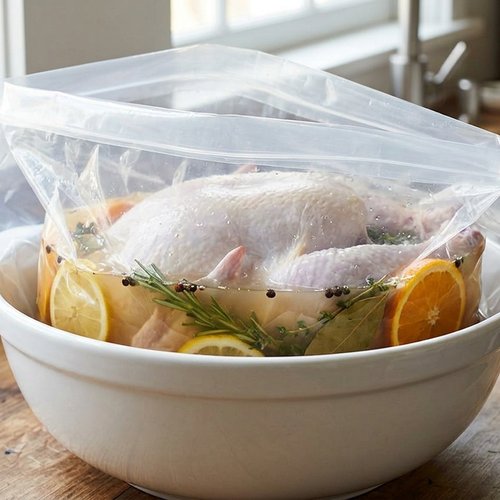
Step 6: Submerge Your Turkey in the Brine
Carefully place your turkey into your brining vessel. Pour the cooled brine over the turkey until it’s completely covered. Every part of the bird should be submerged. If any part sticks above the brine, it won’t cure properly. If your turkey keeps floating, you can weigh it down with a small plate on top.
Kids can help with: Pouring the brine (with adult guidance) and watching to make sure the turkey is completely covered.
Step 7: Refrigerate for 24 Hours
Cover your container and place it in the refrigerator. Set a timer for 24 hours. This is the patience part. Do not skip this step or shorten it. The brining time is when the magic happens—the salt breaks down proteins, the herbs infuse, the citrus tenderizes the meat from the inside. You cannot rush excellence.
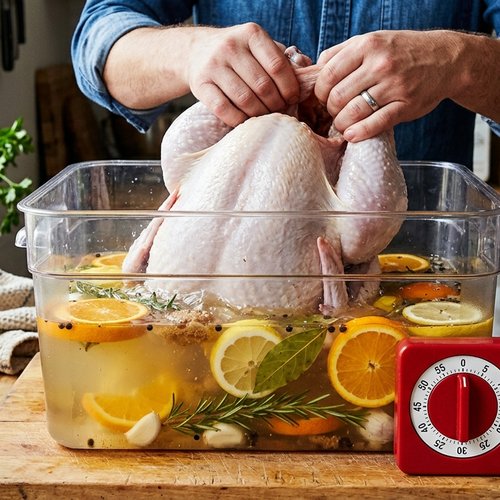
Step 8: Remove, Rinse, and Dry Your Turkey
After exactly 24 hours, remove your turkey from the brine. Hold it over the container to let the brine drain, then transfer it to your sink. Rinse it thoroughly under cool running water, inside and out. You’re removing excess salt from the surface. Pat it completely dry with paper towels.
Now your turkey is ready to roast using your favorite method. The brining is done—everything from here is standard roasting technique.
Make-Ahead Guide: The Brining Timeline
Here’s how I structure Thanksgiving week to avoid chaos:
Monday before Thanksgiving: Buy your turkey (if it’s frozen, it needs time to thaw safely in the refrigerator—plan 24 hours for every 4 to 5 pounds). Make your brine in the morning or evening.
Tuesday before Thanksgiving: Place your turkey in the brine by early morning. Set a phone reminder for 24 hours later.
Wednesday before Thanksgiving: Remove your turkey from the brine in the morning. Rinse and pat dry. At this point, your turkey can sit uncovered in the refrigerator for up to 8 hours—this actually helps the skin crisp up during roasting.
Thursday (Thanksgiving): Your turkey is ready to roast whenever you need it. The brining work is completely done.
Common Mistakes to Avoid
I’ve learned these lessons the hard way, so you don’t have to:
Mistake 1: Using table salt instead of kosher salt. Table salt is much denser than kosher salt. If you measure by volume, table salt will make your brine too salty and your turkey will taste like a ham. If you must use table salt, reduce the amount by 25%. Better yet, buy kosher salt—it’s inexpensive and you’ll use it for other brining projects.
Mistake 2: Skipping the cooling step. I understand the temptation to add a warm turkey to warm brine to save time. Don’t do it. You’ll partially cook the exterior while the interior stays raw, and you’ll introduce food safety risks. Cool that brine completely.
Mistake 3: Not keeping the turkey fully submerged. Any part of the turkey that sits above the brine won’t be cured properly, and you’ll end up with uneven seasoning and moisture retention. Use a plate or a heavy-bottomed bowl to weigh down the turkey if it floats.
Mistake 4: Opening the refrigerator constantly to peek at the turkey. Every time you open the door, you’re raising the temperature of your fridge. Trust the process. Your turkey is fine.
Seasonal Variations: Making This Recipe Your Own
The beauty of this brine is its flexibility. Here’s how I adapt it throughout the year:
Winter version (traditional): Use the recipe as written. The warm spices feel perfect when it’s cold outside, and the citrus provides brightness when everything else feels heavy.
Spring version: Add a few sprigs of fresh dill and tarragon to the brine. Keep the citrus and sage, but replace the cinnamon stick with a star anise pod. The result is lighter and more herbaceous.
Summer version: Increase the citrus to 3 lemons and 3 oranges. Add fresh mint and fresh basil to the brine. Use white peppercorns instead of black (they’re slightly milder). This brine is bright and refreshing, perfect for roasted turkey served at room temperature.
Fall version (harvest time): Add 2 tablespoons of pure maple syrup along with the honey. Add a pinch of nutmeg and cloves. Replace one orange with a grapefruit for a more complex citrus profile. This version celebrates autumn flavors.
Customization Station: Making It Work for Your Family
Here’s the thing about brining: once you master the basic technique, you can customize it endlessly. The salt-to-water ratio and the cooking time are non-negotiable, but the flavoring ingredients are flexible.
- If someone dislikes citrus: Keep the salt, water, and honey constant, but replace the lemon and orange with 3 cups of apple cider and 3 cups of chicken broth. Add fresh rosemary instead of sage. This creates an apple-herb brine that’s equally delicious.
- If your family loves spice: Add 1 teaspoon of red pepper flakes, 1 tablespoon of fresh ginger slices (not just the crystallized), and 2 dried chile peppers to the brine. Your turkey will have subtle heat.
- If you want to keep it simple: You can make a basic brine with just salt, water, honey, and fresh thyme. It won’t have the same complexity, but it will still produce a juicy turkey.
The point is: this is your kitchen. Make it taste like your family.
Scaling for Different Family Sizes
The recipe I’ve given you is designed for a 12 to 16-pound turkey, which serves 8 to 12 people with leftovers.
For a family of 2 to 3: Use a 6 to 8-pound turkey or a bone-in turkey breast. Halve all the brine ingredients. Brine for 12 hours instead of 24. Use a smaller container or a brining bag.
For a family of 4 to 6: Use a 10 to 12-pound turkey. Use the full recipe as written, but reduce brining time to 18 hours.
For a family of 8 to 10: Use a 16 to 18-pound turkey. Use the full recipe as written. Brine for the full 24 hours. You might need a larger container—consider a 5-gallon food-grade bucket.
For a family of 12+: Make two separate brines with two turkeys. You can’t scale this recipe up infinitely without changing the salt-to-water ratio, which would ruin the brine. Two smaller turkeys will cook faster than one enormous turkey anyway, and you’ll have more even brining.
Can I Store Citrus Brined Turkey?
Yes, and here’s exactly how:
After brining, before roasting: Your rinsed and dried turkey can sit uncovered in the refrigerator for up to 8 hours. This actually helps the skin dry out and crisp up during roasting.
After roasting: Let your turkey cool to room temperature. Remove all meat from the bones. Store the meat in airtight containers in the refrigerator for up to 4 days. Store the bones and carcass separately for making broth.
Leftover turkey meat for lunches: Layer it between lettuce or whole grain bread with a touch of cranberry sauce. Pack it with a side of roasted vegetables (like bacon wrapped carrots). These sandwiches stay fresh in the lunchbox for up to 3 days if you keep them in an insulated container with an ice pack.
Freezing: You can freeze cooked turkey meat in airtight containers or freezer bags for up to 3 months. Thaw in the refrigerator overnight before using. The meat will be slightly drier after freezing, so use it in casseroles, soups, or shredded preparations rather than sliced.
Nutrition Information
According to USDA data, a 3-ounce serving of roasted turkey meat (about the size of a deck of cards) contains:
– 140 calories
– 26 grams of protein
– 3 grams of fat
– 0 grams of carbohydrates
Turkey is one of the leanest poultry options available, making it an excellent source of protein for active families. The protein supports muscle growth and repair, which is especially important for growing children and teenagers.
The B vitamins in turkey—particularly B6 and niacin—support energy production and brain function. If you serve your turkey with complex carbohydrates (like sweet potatoes or whole grain stuffing) and vegetables, you’re building a nutritionally complete meal.
The brining process adds sodium, so if your family needs to monitor salt intake, you can use a low-sodium brining method by reducing the salt to ¾ cup and using low-sodium chicken broth in place of some of the water.
What to Serve Alongside for a Complete Family Meal
Your brined turkey deserves supporting flavors that don’t compete but rather complement. Here’s what I always serve:
- Roasted root vegetables (carrots, parsnips, Brussels sprouts) – The caramelized sweetness balances the savory turkey. Toss with olive oil and fresh thyme before roasting at 425°F for 30 to 35 minutes.
- A simple green salad with citrus vinaigrette – Since your turkey already has citrus notes, a bright lemon vinaigrette ties the whole plate together without being redundant.
- Creamy mashed potatoes or a cauliflower mash – The richness here grounds the meal and gives you something comforting to pair with the turkey.
- Whole grain stuffing or herb bread – This soaks up the turkey’s natural juices and prevents the meal from feeling too lean.
- Cranberry sauce with orange zest – The tartness cuts through the richness and echoes the citrus notes in your turkey.
If you’re planning an appetizer spread beforehand, consider making appetizer pizza to keep guests happy while your turkey roasts. Light, shareable, and it won’t fill anyone up before the main meal.
FAQs
Can I use a frozen turkey for this brine?
Absolutely, but plan ahead. A frozen turkey needs to thaw in the refrigerator before you can brine it. The general rule is 24 hours of thawing for every 4 to 5 pounds of turkey. A 12-pound turkey needs about 3 days to thaw safely. Once it’s completely thawed, it can go straight into the brine. Never try to brine a partially frozen turkey—the brine won’t penetrate evenly.
What if I don’t have fresh sage?
I understand—fresh herbs aren’t always available. You can use dried sage, but use only 4 to 5 leaves’ worth (about 1 teaspoon dried sage). Dried herbs are more concentrated, so you need less. However, fresh sage really does taste better here. If you can, buy it once—fresh sage keeps in the refrigerator for weeks wrapped in a damp paper towel in a plastic bag.
Can I reuse the brine?
No. Once raw poultry has been in the brine, the brine is no longer safe to reuse, even if you reheat it. Bacteria from the raw meat contaminate the liquid. Always discard used brine. (You can compost it or pour it down the drain with cold water.)
Do I need special equipment?
You need a container large enough to hold your turkey fully submerged. Most people use a large food-grade plastic container (the kind restaurants use for deli items) or a brining bag. A 5-gallon bucket works too. You need a pot for making the brine. Everything else in your kitchen works fine. You don’t need special equipment—you just need planning.
What if my turkey is still slightly frozen when I need to brine it?
Stop. Don’t brine a frozen turkey. The brine can’t penetrate frozen meat. If your turkey is frozen and you don’t have time to thaw it properly, skip the brining and use a dry rub instead. You won’t get the same results, but at least you’ll have a safe meal. Next year, plan better—future you will thank present you.
More Family-Friendly Recipes
- BBQ Spatchcock Chicken Recipe – A faster alternative to whole roasted chicken, perfect for families who want crispy skin and juicy meat without the long cooking time.
- Grilled Lobster Tails – If you’re looking to elevate your holiday meal beyond turkey, this elegant-but-simple seafood option impresses everyone at the table.
- Ahi Tuna BBQ Recipe – A lighter protein option that brings restaurant-quality flavor to your backyard gathering.
- my holiday turkey guide – A deeper dive into brining techniques if you want to explore variations and advanced methods.

Citrus Brined Turkey Recipe
Ingredients
Method
- Start by gathering your lemon slices, orange slices, garlic cloves, peppercorns, cinnamon stick, bay leaves, sage, ginger, and thyme in a large stainless steel pot. (Never use aluminum or reactive metals for brining—they can interact with the salt and citrus.) Don’t worry about being precious here. You can break the cinnamon stick into pieces. You can tear the sage into rough pieces. This is about releasing flavors, not creating a spa bath.
- Kids can help by: Measuring the peppercorns with a small spoon and dropping them into the pot. Tearing sage leaves. Smashing garlic cloves.
- Add the kosher salt and honey to your pot with all the aromatics. Pour in half your water (the ½ gallon). This is where your family members who are learning ratios can see how much salt dissolves in how much water—it’s a practical chemistry lesson.
- Safety note for kids: If children are helping, have them step back before you turn on the heat. Hot liquid and young hands don’t mix.
- Turn your heat to medium-high and watch until you see active bubbles breaking across the entire surface—that’s a rolling boil. This takes about 8 to 10 minutes. Let it boil for exactly 1 minute. This dissolves the salt completely and makes sure the honey is fully incorporated. The brine will smell incredible at this point—warm, citrusy, herbaceous. Take a moment to appreciate this smell.
- This step cannot be rushed. I’ve seen people try to shorten it, and it never ends well. Remove your pot from heat. Pour the remaining ½ gallon of cold water into the brine. Stir well. Now let it sit on the counter for at least 15 minutes, or ideally, refrigerate it for 30 minutes until it reaches room temperature. You want this brine completely cool before your turkey touches it, or you’ll start cooking the outer layer of meat while the inside stays raw.
- To speed this up: Fill your sink with ice water and set the pot in the ice bath, stirring occasionally. This cuts cooling time to about 10 minutes.
- Remove your turkey from the packaging. Rinse it under cool running water, inside and out. Pat it completely dry with paper towels. This step matters more than people realize—excess moisture on the skin prevents browning. Pat until your towels come away barely damp.
- Check that your turkey fits in your brining vessel (a large food-grade plastic container or a brining bag). If you’re using a bag, set it in a large bowl first—this prevents leaks and makes it easier to pour the brine.
- Safety reminder: Raw poultry requires clean hands and surfaces. Wash your hands thoroughly after handling, and don’t let the turkey touch surfaces where you’ve prepared other foods.
- Carefully place your turkey into your brining vessel. Pour the cooled brine over the turkey until it’s completely covered. Every part of the bird should be submerged. If any part sticks above the brine, it won’t cure properly. If your turkey keeps floating, you can weigh it down with a small plate on top.
- Kids can help with: Pouring the brine (with adult guidance) and watching to make sure the turkey is completely covered.
- Cover your container and place it in the refrigerator. Set a timer for 24 hours. This is the patience part. Do not skip this step or shorten it. The brining time is when the magic happens—the salt breaks down proteins, the herbs infuse, the citrus tenderizes the meat from the inside. You cannot rush excellence.
- After exactly 24 hours, remove your turkey from the brine. Hold it over the container to let the brine drain, then transfer it to your sink. Rinse it thoroughly under cool running water, inside and out. You’re removing excess salt from the surface. Pat it completely dry with paper towels.
- Now your turkey is ready to roast using your favorite
Notes
Make-Ahead Guide: The Brining Timeline
Here’s how I structure Thanksgiving week to avoid chaos: Monday before Thanksgiving: Buy your turkey (if it’s frozen, it needs time to thaw safely in the refrigerator—plan 24 hours for every 4 to 5 pounds). Make your brine in the morning or evening. Tuesday before Thanksgiving: Place your turkey in the brine by early morning. Set a phone reminder for 24 hours later. Wednesday before Thanksgiving: Remove your turkey from the brine in the morning. Rinse and pat dry. At this point, your turkey can sit uncovered in the refrigerator for up to 8 hours—this actually helps the skin crisp up during roasting. Thursday (Thanksgiving): Your turkey is ready to roast whenever you need it. The brining work is completely done.Final Thoughts
Cooking a brined turkey has taught me something over the years: it’s not the fancy techniques or the expensive ingredients that make family meals memorable. It’s the care you put in. It’s the 24 hours you’re willing to wait because you know it matters. It’s the moment when your family sits down and tastes something you prepared with intention, and their eyes light up because it’s exactly what they needed.
Your turkey will be juicy. The flavors will be balanced. People will ask for your recipe. But more than that, you’ll have given your family something that tastes like home, like comfort, like you cared enough to get it right.
That’s what I learned at my grandmother’s table, and that’s what I’m passing along to you.
Cook what makes you happy.
— Lauren