This post contains affiliate links. As an Amazon Associate I earn from qualifying purchases.
I’ll never forget the Easter Sunday when my grandmother pulled this dish from the oven at exactly the right moment—golden, steaming, and absolutely showstopping. The kitchen filled with the aroma of buttery cornflakes and melted cheese, and I watched my cousins’ faces light up as she plated each roll with quiet pride. That’s when I understood that some recipes aren’t just about feeding people. They’re about creating moments where everyone at the table feels truly cared for. This chicken ham recipe is one of those dishes. It looks fancy enough for your fanciest occasion, but the technique is forgiving enough that you won’t stress in the kitchen. I’ve made it for everything from intimate dinners for two to holiday spreads for twenty, and it never fails to deliver that perfect balance of comfort and elegance. If you’re looking for other impressive main dishes that don’t require fussing, check out my BBQ Spatchcock Chicken Recipe for a completely different flavor profile.
Chicken Ham Recipe That Impresses Every Time (Make-Ahead Friendly!)
My grandmother didn’t call this recipe anything fancy. She simply said she was making “the chicken rolls” when family was coming over. But there was something magical about how she transformed four simple chicken breasts into something that looked like it came from a restaurant kitchen. The secret wasn’t complexity—it was knowing exactly how to build layers of flavor and texture in a way that felt both nostalgic and special. She taught me that the best comfort food isn’t about using exotic ingredients or complicated techniques. It’s about respecting the quality of what you have and treating it with intention. This recipe reflects that philosophy perfectly.
When to Make Chicken Ham Recipe
This dish has a unique gift: it’s elegant enough for your most important occasions, but accessible enough for any Tuesday night when you want to feel proud of what you’ve made. I’ve used it countless times in different seasons and situations, and it always lands perfectly.
- Easter Sunday or Holiday Dinners – The golden, glistening exterior and impressive presentation make this feel special without requiring you to spend all day cooking. Prep it the day before and slide it into the oven while you’re setting the table.
- Date Night at Home – Scaling this down to two portions feels indulgent and restaurant-quality, which means you can impress someone you care about without the noise and expense of going out.
- Spring Dinner Parties – When you’re hosting and want something that can be made ahead, stays moist when held warm, and looks beautiful on the plate, this is your recipe. Your guests will think you spent hours in the kitchen.
- Summer Entertaining – Serve it at room temperature alongside a bright salad and fresh vegetables, making it perfect for outdoor gatherings where you want something heartier than typical summer fare.
- Weeknight Victory Meals – On those nights when you want to prove to yourself that you can make something restaurant-quality, this delivers that feeling without requiring you to be a trained chef.
What Makes This Chicken Ham Recipe Special
Here’s what I’ve learned as a registered dietitian working with comfort food: the best versions of nostalgic dishes aren’t stripped-down or apologetic. They’re intentional. This chicken ham recipe exemplifies that approach. You’re taking lean chicken breast—nutritious but often dry—and wrapping it with protein-rich ham and calcium-loaded cheese. Then you’re coating it with a whole grain (cornflakes contain B vitamins and fiber) and baking it instead of frying. The result is a dish that nourishes your body while genuinely satisfying your soul. The mustard-mayo sauce adds brightness and richness without heaviness. What elevates this above everyday cooking is the care in the assembly. Taking time to pound the chicken evenly, roll it tightly, and chill it properly changes everything about the final result. You’re not just cooking; you’re creating something with intention.
Scaling for Your Crowd
One of the reasons I love this recipe is how beautifully it scales. Whether you’re cooking for two or twenty, the technique stays exactly the same—you’re just multiplying the components. Here’s how I approach it based on who’s coming to my table.
- For Two People (Intimate Dinner) – Use 1 large chicken breast (halved), 2 slices ham, 1 ounce of cheese, and divide all sauce ingredients in half. Reduce baking time to 20-22 minutes since you have less volume. This version feels special without creating leftovers unless you want them.
- For Four to Six People (Family Dinner) – Use 2 boneless, skinless chicken breasts (creates 4 rolls), 4 slices ham, 2 ounces of cheese. Keep sauce at full recipe. Baking time stays around 25-28 minutes depending on thickness. This is the sweet spot for weeknight entertaining.
- For Eight People (Dinner Party) – Double the full recipe (4 chicken breasts, 8 slices ham, 4 ounces cheese, full sauce). You can bake these on two sheet pans on different racks, rotating halfway through. Total baking time is still approximately 30 minutes.
- For Twelve to Twenty People (Holiday Gathering) – Triple or quadruple the recipe. Spread rolls across 3-4 sheet pans. This is where the make-ahead element becomes essential—assemble everything the day before, and all you need to do is bake for 30-32 minutes. Your oven will thank you, and your stress level will plummet.
The Ingredients
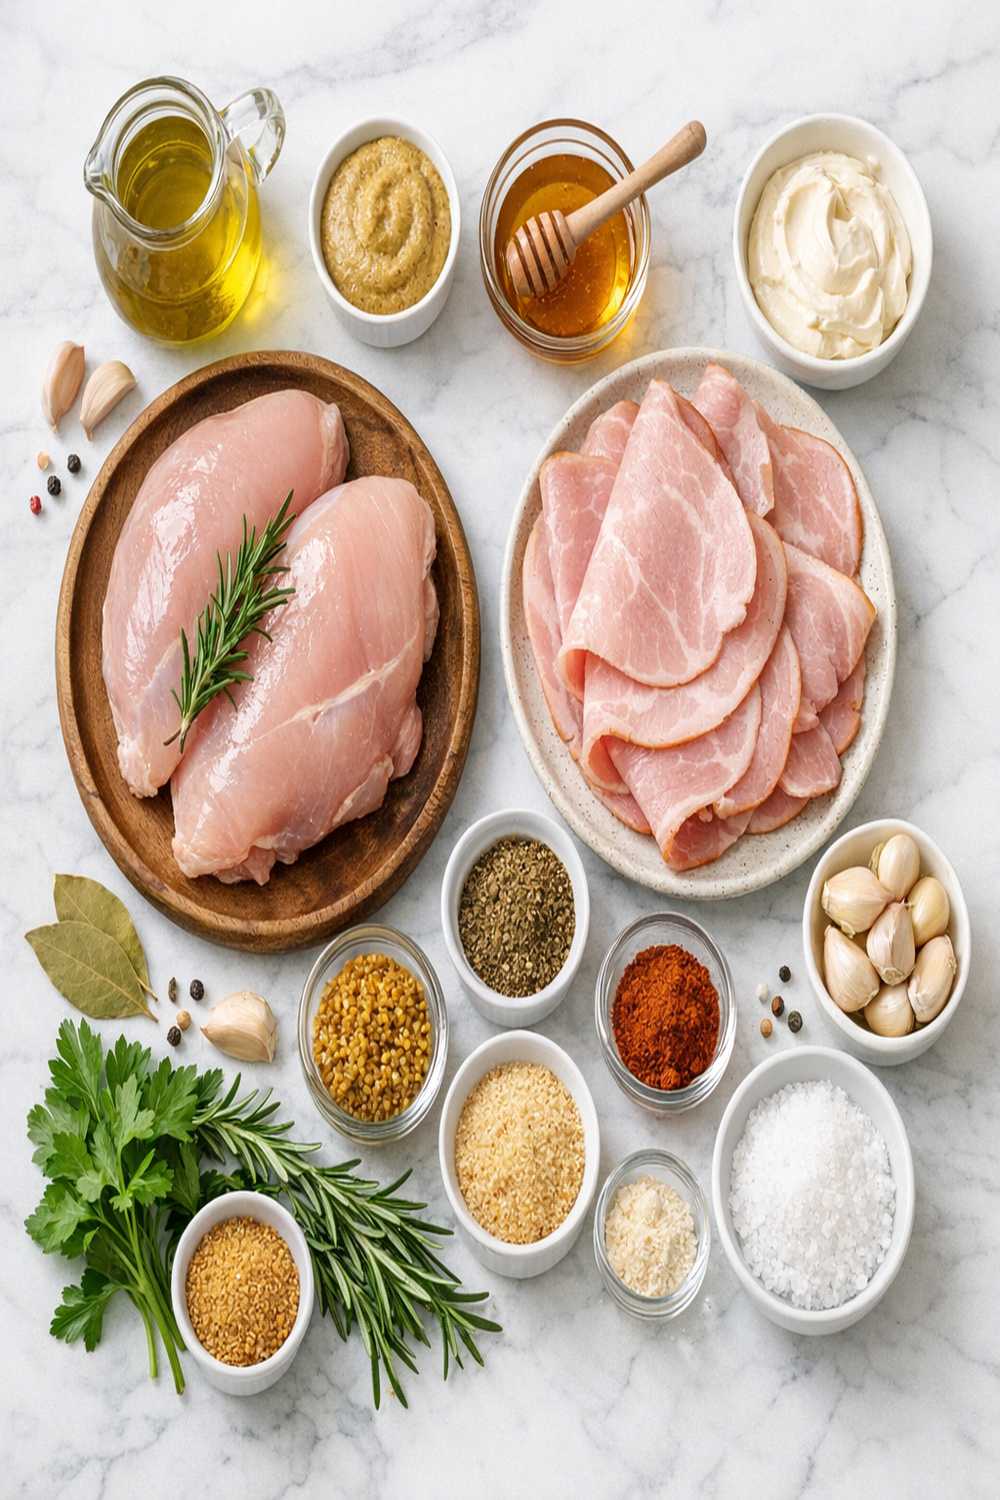
Here’s everything you need to create something that will make your guests believe you spent far more time in the kitchen than you actually did. Each ingredient serves a purpose—from creating moisture and flavor to building that impressive golden exterior.
- 1 cup mayonnaise (full-fat creates the best sauce texture)
- ½ teaspoon paprika (adds color and a whisper of smokiness to the exterior)
- 3 cups cornflakes cereal (crushed into fine crumbs, or substitute with panko breadcrumbs for a slightly different texture)
- 6 tablespoons unsalted butter (melted and slightly cooled before dipping)
- 4 boneless, skinless chicken breasts (about 2 pounds total, as uniform in size as possible)
- 8 thin slices deli ham (the quality matters here—look for ham without excess water or fillers)
- 1 to 2 teaspoons yellow mustard (to taste—this brightens the entire sauce)
- Salt and freshly ground black pepper (generous amounts for seasoning the chicken before coating)
- 1 teaspoon garlic powder (optional but recommended—adds subtle depth without overpowering)
- 8 ounces Swiss cheese (I prefer sliced rather than shredded for easier rolling, but shredded works fine)
How to Make Chicken Ham Recipe for Your Occasion
I’m going to walk you through this step-by-step in a way that removes the guesswork. This isn’t a recipe where precision matters more than paying attention. You’re looking for visual and tactile cues as much as exact measurements. By the end, you’ll have something that looks like it came from a special kitchen, and that knowledge will stick with you.
Step 1: Prepare Your Chicken Breasts
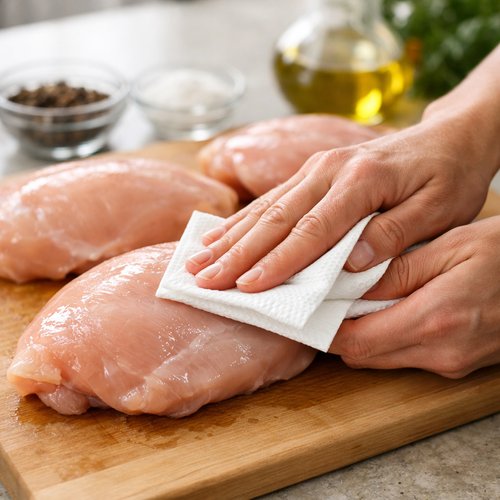
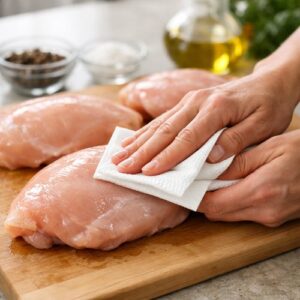
Start by removing your chicken breasts from the refrigerator and patting them completely dry with paper towels. This step matters more than you might think—excess moisture prevents browning and can make the coating slip off. Once they’re dry, place one chicken breast on a cutting board and use a sharp chef’s knife to carefully slice it horizontally, creating two thinner pieces that are roughly even in thickness. Repeat with all four breasts until you have eight thinner pieces. If your knife is sharp and you take your time, this becomes surprisingly easy. A dull knife will tear the meat and frustrate you—this is worth taking five minutes to sharpen properly.
Step 2: Pound the Chicken Evenly
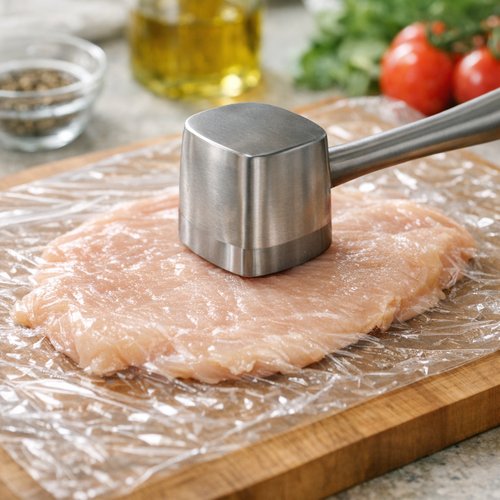
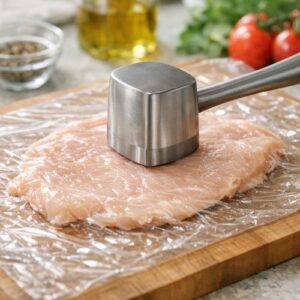
Place one piece of chicken between two sheets of plastic wrap. Using a meat mallet (the flat side, not the textured side), gently pound the chicken to create an even thickness—about ¼ inch. The goal here isn’t to pulverize the meat; it’s to create uniform thickness so it cooks evenly. If you see a hole appearing in the meat, you’ve pounded too hard. A few gentle whacks from the side of the mallet works better than aggressive pounding from above. Repeat with all eight pieces. As you do this, notice how the chicken becomes more tender and easier to work with. This step takes maybe five minutes total, and it’s one of the most important things you’ll do.
Step 3: Layer and Roll Your Filling
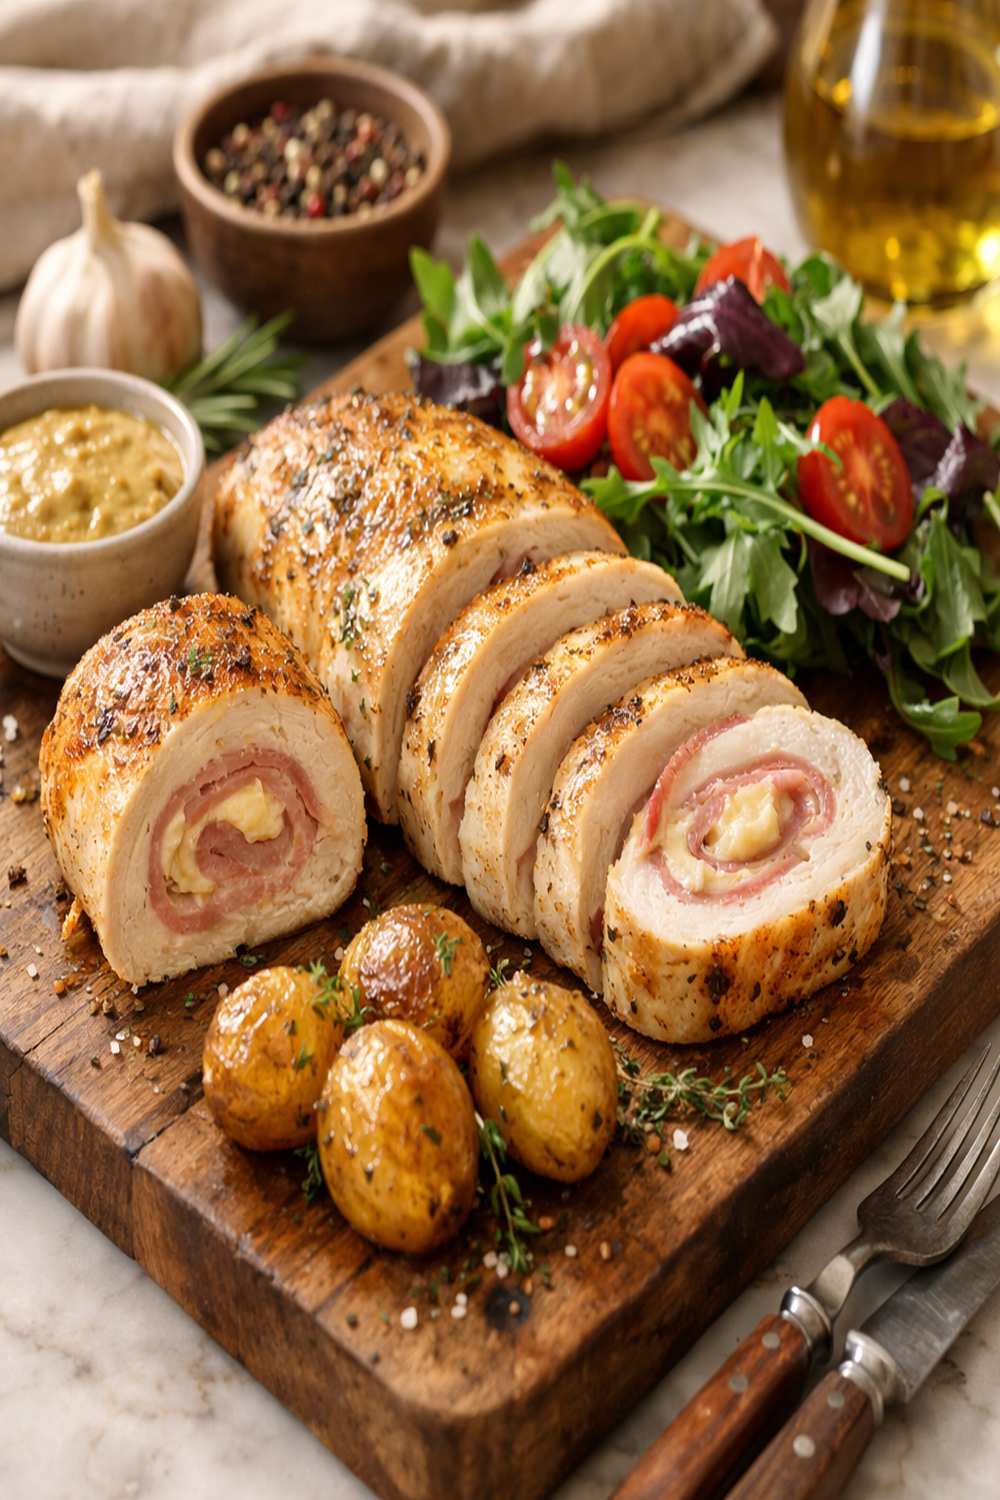
Now comes the part that feels like a small act of creation. Lay one piece of pounded chicken in front of you on a clean surface. Top it with one slice of ham—let it drape a bit over the edges. Top the ham with about one ounce of cheese (roughly a handful if you’re eyeballing it, or an actual ounce if you’re being precise). Starting from the short end, roll the chicken tightly toward you, tucking the sides in as you go. You’re aiming for something that looks like a tight cigar or cinnamon roll. The ham and cheese should stay mostly inside as you roll. Repeat with all remaining pieces.
Step 4: Wrap and Chill for Structure
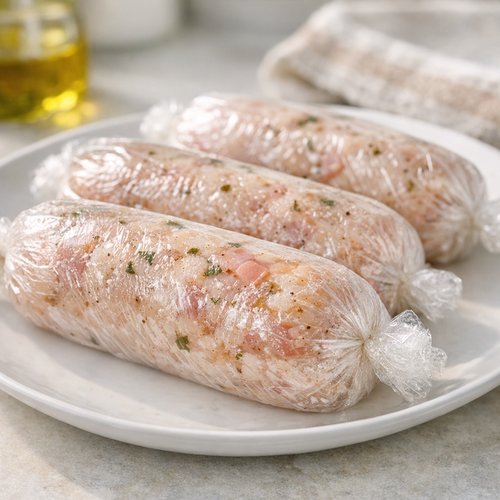
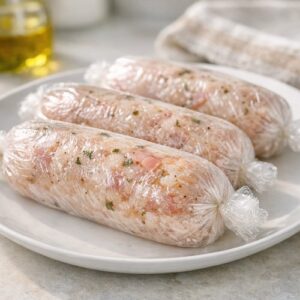
Here’s a step that many recipes skip but that makes a real difference: wrapping each roll tightly in plastic wrap and chilling them. Place each roll on a fresh piece of plastic wrap and wrap it tightly, twisting the ends like a tootsie roll so the plastic holds the shape firmly. Refrigerate for at least 30 minutes, though up to one full day is even better. This chilling period allows the filling to set and the chicken to relax, which prevents the rolls from unraveling in the oven. If you’re making these the day before your event, this step becomes your secret weapon for stress-free cooking.
Step 5: Prepare Your Coating Station
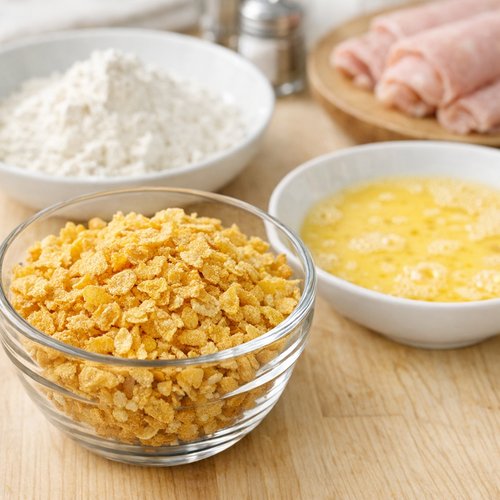
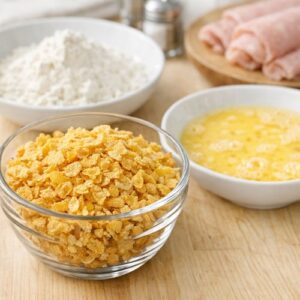
About 15 minutes before you’re ready to bake, preheat your oven to 400°F. While it’s heating, set up your assembly line. Measure out your cornflakes cereal and add them to a food processor. Pulse until they’re broken into fine crumbs—think breadcrumb texture, not powder. You’re looking for tiny, uniform pieces that will create a crispy exterior. Pour the crumbs into a shallow dish or pie plate. In a separate shallow dish, pour your melted (but cooled) butter. Pat your chilled chicken rolls with paper towels to remove any condensation, then season them generously with salt, pepper, and the optional garlic powder and paprika. This is where flavor happens at the surface level.
Step 6: Coat and Arrange
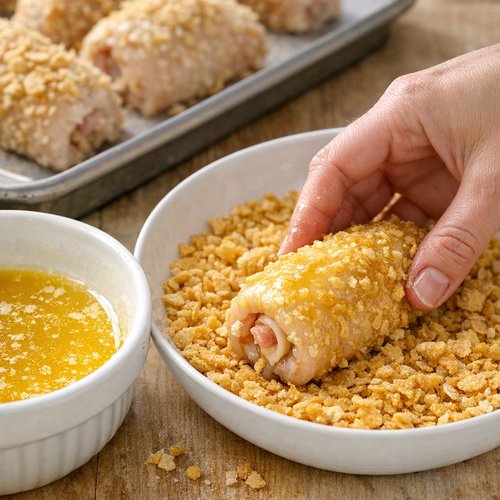
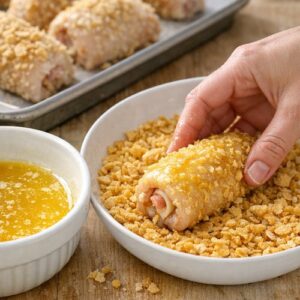
Working with one roll at a time, dip it into the melted butter until it’s evenly coated, then immediately roll it in the cornflake crumbs, pressing gently so the crumbs adhere to the wet surface. Don’t be timid with the coating—this is what creates that gorgeous golden exterior and adds textural interest. Transfer each coated roll to a lightly greased baking sheet, placing them seam-side down and spacing them about two inches apart. They should not touch. This spacing allows hot air to circulate evenly, which creates even browning.
Step 7: Bake Until Golden and Cooked Through
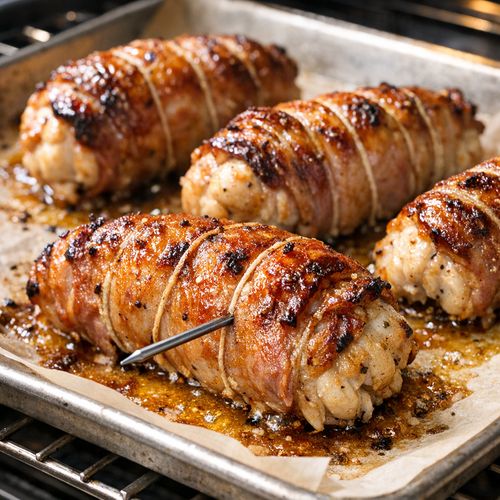
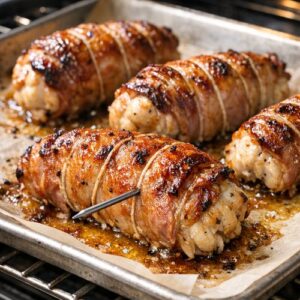
Place your baking sheet on the center oven rack and bake for approximately 30 minutes, or until the exterior is golden brown and crispy. To verify doneness without cutting into them and releasing the filling, insert a meat thermometer into the thickest part of one roll—it should read 165°F. Make sure you’re inserting the thermometer into the chicken itself, not the filling. The coating should be deeply golden, almost burnished-looking. If it’s still pale after 25 minutes, give it another 5 minutes. Every oven runs slightly differently, so visually checking the color is as important as the timer.
Step 8: Make Your Sauce
While the chicken bakes, combine your mayonnaise and mustard in a small bowl. Start with 1 teaspoon of mustard and whisk it into the mayo, tasting as you go. Add more mustard gradually if you like more tang—this is entirely about your preference. Some people want a subtle mustard whisper; others want it to be clearly present. Taste with a small spoon and adjust until it feels right. This sauce should taste bright and creamy, with no bitter notes. It’s the finishing touch that ties everything together.
Make-Ahead Timeline
As someone who believes that the best cooking happens when you’re not stressed, I’m deeply committed to planning ahead. Here’s exactly how I approach timing for this recipe so that nothing feels rushed.
- One Day Before – Assemble the entire recipe through the rolling and wrapping stage. Keep the wrapped rolls on a baking sheet (so you can transport them all at once) and refrigerate overnight. This is genuinely the hardest part of the recipe, and doing it ahead means you’re more than halfway done.
- Morning of the Event – You can prepare your cornflake crumbs by pulsing them in a food processor, storing them in an airtight container at room temperature. Make your mustard-mayo sauce and store it in the refrigerator in a covered container. Both of these can wait happily for hours.
- One Hour Before Serving – Remove your wrapped chicken rolls from the refrigerator. Preheat your oven to 400°F. Pat the rolls dry, season them, set up your coating station with melted butter and cornflake crumbs.
- 30 Minutes Before Serving – Coat and arrange all rolls on your baking sheet. Slide into the oven. By the time your guests arrive or sit down, you’ll be pulling golden rolls from the oven while you’re calmly plating everything.
How to Present and Plate Chicken Ham Recipe
The visual presentation of this dish is part of what makes it special. You’ve put in the effort to create something beautiful—now let that beauty shine on the plate.
- Plate the Roll Whole – Don’t slice it. The cross-section is beautiful when you cut into it at the table, revealing the layers of ham, cheese, and chicken. Present each roll seam-side down on a warm plate for the cleanest presentation.
- Add a Generous Dollop of Sauce – Place a spoonful of your mustard-mayo sauce on the plate next to (not on top of) each roll. It acts both as a flavor component and as an elegant visual element. You want guests to see the golden exterior, not cover it immediately with sauce.
- Garnish with Fresh Elements – A small handful of fresh greens, a few fresh herbs (parsley looks beautiful), or even a thin lemon wedge adds color and signals that you’ve thought about the complete plate experience.
- Use Warm Plates – Keep your serving plates warm in a low oven for five minutes before plating. This keeps the chicken at the right temperature and elevates the entire experience. It’s a small detail that your guests might not consciously register but will absolutely feel.
Seasonal Variations
The beauty of this base recipe is how easily it adapts to what’s available and what feels right in each season. Here’s how I modify it throughout the year.
- Spring and Summer Version – Replace the Swiss cheese with a younger, milder cheese like gouda for a slightly different flavor profile. Serve the rolls at room temperature alongside fresh spring greens tossed with a bright lemon vinaigrette. Add fresh dill or tarragon to your mustard-mayo sauce for an herbal freshness. Consider serving it with fresh asparagus or roasted baby carrots instead of heavier sides.
- Fall and Winter Version – Stick with Swiss cheese but add a thin layer of apple butter or whole grain mustard under the ham before rolling. Serve hot with roasted root vegetables and a side of creamed spinach. The heavier accompaniments feel right alongside the richness of this dish when the weather turns cold. For sauce variation, add a teaspoon of horseradish to your mayo for subtle heat.
What to Serve Alongside Chicken Ham Recipe
This dish is substantial and impressive enough to be the centerpiece, but building a complete meal around it creates an experience rather than just dinner. Here’s how I think about rounding out the plate.
Start with a fresh, acidic element to cut through the richness. A simple salad with a tangy vinaigrette works beautifully—I often use a combination of mixed greens, thinly sliced red onion, and a lemon-based dressing. The brightness acts as a palate cleanser between bites. For a warm side, roasted vegetables offer nutrition and color without competing for attention. Roasted asparagus, green beans, or Brussels sprouts all work perfectly. If you want a starch, a simple herb rice pilaf or creamy mashed potatoes provides comfort without heaviness.
For a lighter appetizer that won’t overload your guests before the main course, consider serving a simple Ahi Tuna Grilled Recipe as a first course if you’re planning a multi-course meal. If you prefer staying in the comfort food realm, start with something simple like a small cheese board or soup.
The mustard-mayo sauce is your companion for this entire meal, so having it available for everything on the plate creates cohesion and flavor throughout. Pair this with a crisp white wine like Sauvignon Blanc or a light-bodied pinot grigio if you’re serving alcohol.
Can I Store Chicken Ham Recipe?
Yes, and this is one of the reasons this recipe works so well for event planning. Refrigerate cooked rolls in an airtight container for up to three days. They keep their moisture and flavor beautifully. To reheat, I place them on a baking sheet, cover loosely with foil, and warm at 325°F for about 10 minutes until heated through. This prevents them from drying out.
If you want to freeze them, you can do so uncoated after rolling and wrapping. Freeze for up to two months. When you’re ready to bake them, there’s no need to thaw—simply coat them (they’ll be thawed by the time you’re ready to bake) and add an extra 5-7 minutes to the baking time. The sauce keeps refrigerated for about one week, making it perfect for using with leftover rolls.
Pro tip: If you’re storing cooked rolls, let them come almost completely to room temperature before refrigerating. This prevents condensation from building up under the coating and making it soggy.
Common Mistakes to Avoid
After making this recipe dozens of times and watching others prepare it, I’ve noticed patterns in where things go slightly wrong. Here’s how to sidestep the most common pitfalls.
- Over-pounding the Chicken – The most frequent mistake is pounding too aggressively, which creates tears in the meat that allow filling to escape during cooking. Remember: you’re tenderizing and evening thickness, not tenderizing meat for a schnitzel. Gentle pressure is your friend here.
- Skipping the Chilling Step – I understand the temptation to skip this when you’re eager to bake. Don’t. The chilling period allows everything to set and prevents the rolls from unraveling. It’s 30 minutes that genuinely matters. If you’re short on time, even 15 minutes helps significantly.
- Not Drying the Chicken Before Coating – Condensation from the refrigerator will cause your coating to slip off if the rolls aren’t patted completely dry. Take 30 seconds per roll with paper towels. It matters.
- Using Old or Stale Cornflakes – Cereal loses its crispness over time. Make sure you’re using cornflakes from a box you opened recently. Stale cereal creates a dull, less-crispy coating. If you’re unsure about your cereal’s freshness, use panko breadcrumbs instead.
Expert’s Nutritional Insight
As a registered dietitian, I’m always thinking about how to nourish people while honoring what makes comfort food actually comforting. Here’s what I want you to know about this recipe from a nutritional perspective:
This dish is actually more balanced than many people expect. You’re getting lean protein from the chicken breast and ham, calcium from the cheese, and whole grain fiber from the cornflakes coating. The baking method instead of frying keeps the fat content reasonable. A single roll contains approximately 340-380 calories, 35 grams of protein, and healthy fats from the cheese and ham. That protein-to-calorie ratio is excellent for satiety—meaning you’ll feel satisfied with a reasonable portion.
The mustard in your sauce is worth noting specifically. Research consistently shows that mustard (and the compounds in mustard seeds) may have anti-inflammatory properties and supports healthy digestion. It’s one reason pairing something rich like this dish with a mustard-based sauce is both delicious and nutritionally intuitive—your body is getting help processing that richness.
According to USDA nutrition data, this recipe as written provides complete protein (containing all nine essential amino acids), significant B vitamins from the ham and chicken, and bioavailable calcium from the cheese. It’s genuinely nourishing food, not just comforting food.
Nutrition Information
Per serving (1 chicken ham roll with approximately 2 tablespoons of sauce), based on USDA nutrition database analysis:
- Calories: 360
- Protein: 36 grams
- Fat: 14 grams (mostly from cheese and butter)
- Carbohydrates: 18 grams
- Fiber: 1 gram
- Sodium: 740 mg (largely from ham and cheese)
- Calcium: 240 mg
This analysis assumes a yield of 8 rolls total using the ingredient quantities listed. Recipe serves 4 as a main course (2 rolls per person) or 8 as part of a multi-course meal (1 roll per person).

Chicken Ham Recipe
Ingredients
Method
- Start by removing your chicken breasts from the refrigerator and patting them completely dry with paper towels. This step matters more than you might think—excess moisture prevents browning and can make the coating slip off. Once they're dry, place one chicken breast on a cutting board and use a sharp chef's knife to carefully slice it horizontally, creating two thinner pieces that are roughly even in thickness. Repeat with all four breasts until you have eight thinner pieces. If your knife is sharp and you take your time, this becomes surprisingly easy. A dull knife will tear the meat and frustrate you—this is worth taking five minutes to sharpen properly.
- Place one piece of chicken between two sheets of plastic wrap. Using a meat mallet (the flat side, not the textured side), gently pound the chicken to create an even thickness—about ¼ inch. The goal here isn't to pulverize the meat; it's to create uniform thickness so it cooks evenly. If you see a hole appearing in the meat, you've pounded too hard. A few gentle whacks from the side of the mallet works better than aggressive pounding from above. Repeat with all eight pieces. As you do this, notice how the chicken becomes more tender and easier to work with. This step takes maybe five minutes total, and it's one of the most important things you'll do.
- Now comes the part that feels like a small act of creation. Lay one piece of pounded chicken in front of you on a clean surface. Top it with one slice of ham—let it drape a bit over the edges. Top the ham with about one ounce of cheese (roughly a handful if you're eyeballing it, or an actual ounce if you're being precise). Starting from the short end, roll the chicken tightly toward you, tucking the sides in as you go. You're aiming for something that looks like a tight cigar or cinnamon roll. The ham and cheese should stay mostly inside as you roll. Repeat with all remaining pieces.
- Here's a step that many recipes skip but that makes a real difference: wrapping each roll tightly in plastic wrap and chilling them. Place each roll on a fresh piece of plastic wrap and wrap it tightly, twisting the ends like a tootsie roll so the plastic holds the shape firmly. Refrigerate for at least 30 minutes, though up to one full day is even better. This chilling period allows the filling to set and the chicken to relax, which prevents the rolls from unraveling in the oven. If you're making these the day before your event, this step becomes your secret weapon for stress-free cooking.
- About 15 minutes before you're ready to bake, preheat your oven to 400°F. While it's heating, set up your assembly line. Measure out your cornflakes cereal and add them to a food processor. Pulse until they're broken into fine crumbs—think breadcrumb texture, not powder. You're looking for tiny, uniform pieces that will create a crispy exterior. Pour the crumbs into a shallow dish or pie plate. In a separate shallow dish, pour your melted (but cooled) butter. Pat your chilled chicken rolls with paper towels to remove any condensation, then season them generously with salt, pepper, and the optional garlic powder and paprika. This is where flavor happens at the surface level.
- Working with one roll at a time, dip it into the melted butter until it's evenly coated, then immediately roll it in the cornflake crumbs, pressing gently so the crumbs adhere to the wet surface. Don't be timid with the coating—this is what creates that gorgeous golden exterior and adds textural interest. Transfer each coated roll to a lightly greased baking sheet, placing them seam-side down and spacing them about two inches apart. They should not touch. This spacing allows hot air to circulate evenly, which creates even browning.
- Place your baking sheet on the center oven rack and bake for approximately 30 minutes, or until the exterior is golden brown and crispy. To verify doneness without cutting into them and releasing the filling, insert a meat thermometer into the thickest part of one roll—it should read 165°F. Make sure you're inserting the thermometer into the chicken itself, not the filling. The coating should be deeply golden, almost burnished-looking. If it's still pale after 25 minutes, give it another 5 minutes. Every oven runs slightly differently, so visually checking the color is as important as the timer.
- While the chicken bakes, combine your mayonnaise and mustard in a small bowl. Start with 1 teaspoon of mustard and whisk it into the mayo, tasting as you go. Add more mustard gradually if you like more tang—this is entirely about your preference. Some people want a subtle mustard whisper; others want it to be clearly present. Taste with a small spoon and adjust until it feels right. This sauce should taste bright and creamy, with no bitter notes. It's the finishing touch that ties everything together.
Notes
FAQs
Can I Make This Recipe Without Ham?
Absolutely, though I’d recommend replacing the ham with something flavorful. Prosciutto creates an elegant version. Smoked turkey offers a lighter alternative. Crispy bacon woven under the cheese adds smokiness. The ham here serves two purposes: it adds flavor and helps keep the lean chicken moist during baking. Whatever you substitute should bring moisture and salt to the party. I don’t recommend omitting it entirely because plain chicken breast, even when wrapped in cheese, tends toward dryness.
What If I Don’t Have Swiss Cheese?
Swiss is traditional because it melts beautifully and has a slightly nutty flavor that complements ham and chicken. But I’ve made this successfully with sharp cheddar (which adds bite), provolone (which is mild and buttery), gruyere (which is elegant and complex), or even a combination of cheeses. Avoid soft cheeses like brie or cream cheese—they melt too quickly and don’t add enough structural support. Choose a cheese that melts smoothly and holds some shape.
How Do I Know When the Chicken Is Completely Cooked Through?
This is important for food safety, so I’m going to be specific: use a meat thermometer inserted into the thickest part of the roll, aiming for the chicken portion rather than the filling. It should read 165°F. If you don’t have a thermometer, cut into the thickest part and look for no pink color in the chicken portion. The ham and cheese will be brown, so don’t judge by those. The chicken itself should be completely opaque white with no pink whatsoever.
Can I Prepare This Recipe Up to Three Days Ahead?
You can prepare it through the rolling and wrapping stage up to one day ahead. After that, I recommend freezing rather than refrigerating beyond 24 hours, because the raw chicken filling can develop off-flavors over time. However, once it’s baked and cooled, you can absolutely refrigerate it for three days and reheat it when needed. This makes it perfect for meal planning—bake it one day, reheat and serve it over the next three days for different meals.
What Should I Do If the Coating Looks Pale But the Chicken Is Done?
This sometimes happens if your oven runs cool or if you need to remove the rolls because the internal temperature reached 165°F but the exterior didn’t brown sufficiently. You have two options: turn on your oven’s broiler and slide the rolls under it for 1-2 minutes, watching carefully so they don’t burn. Or, increase your oven temperature to 425°F for the final 3-4 minutes. Watch them carefully. The coating browns faster at higher temperatures. Alternatively, this is when a light brushing with melted butter and a quick pan-sear in a hot skillet for 30 seconds per side can create that golden color without further cooking the interior.
More Recipes for Your Table
- BBQ Spatchcock Chicken Recipe – A completely different approach to entertaining with chicken that’s equally impressive and even easier to scale.
- this simple cake – If you’re looking for another make-ahead appetizer or main course that feels special, these deliver that same satisfaction.
- Basic Roux Recipe – Master this foundational technique and you’ll understand how to build creamy sauces to accompany any protein.
Making this chicken ham recipe has taught me something I return to again and again: the food that matters most isn’t about being complicated. It’s about being intentional. It’s about taking time to dry your chicken, chilling it properly, coating it carefully, and baking it patiently. These small acts of care transform simple ingredients into something that makes people feel truly seen at your table. I hope you make this dish and create your own memory around it—maybe with family you’ve gathered, a friend you’re trying to impress, or simply yourself on a night when you deserve something special. You absolutely have the skills to make this beautifully. Cook what makes you happy!