This post contains affiliate links. As an Amazon Associate I earn from qualifying purchases.
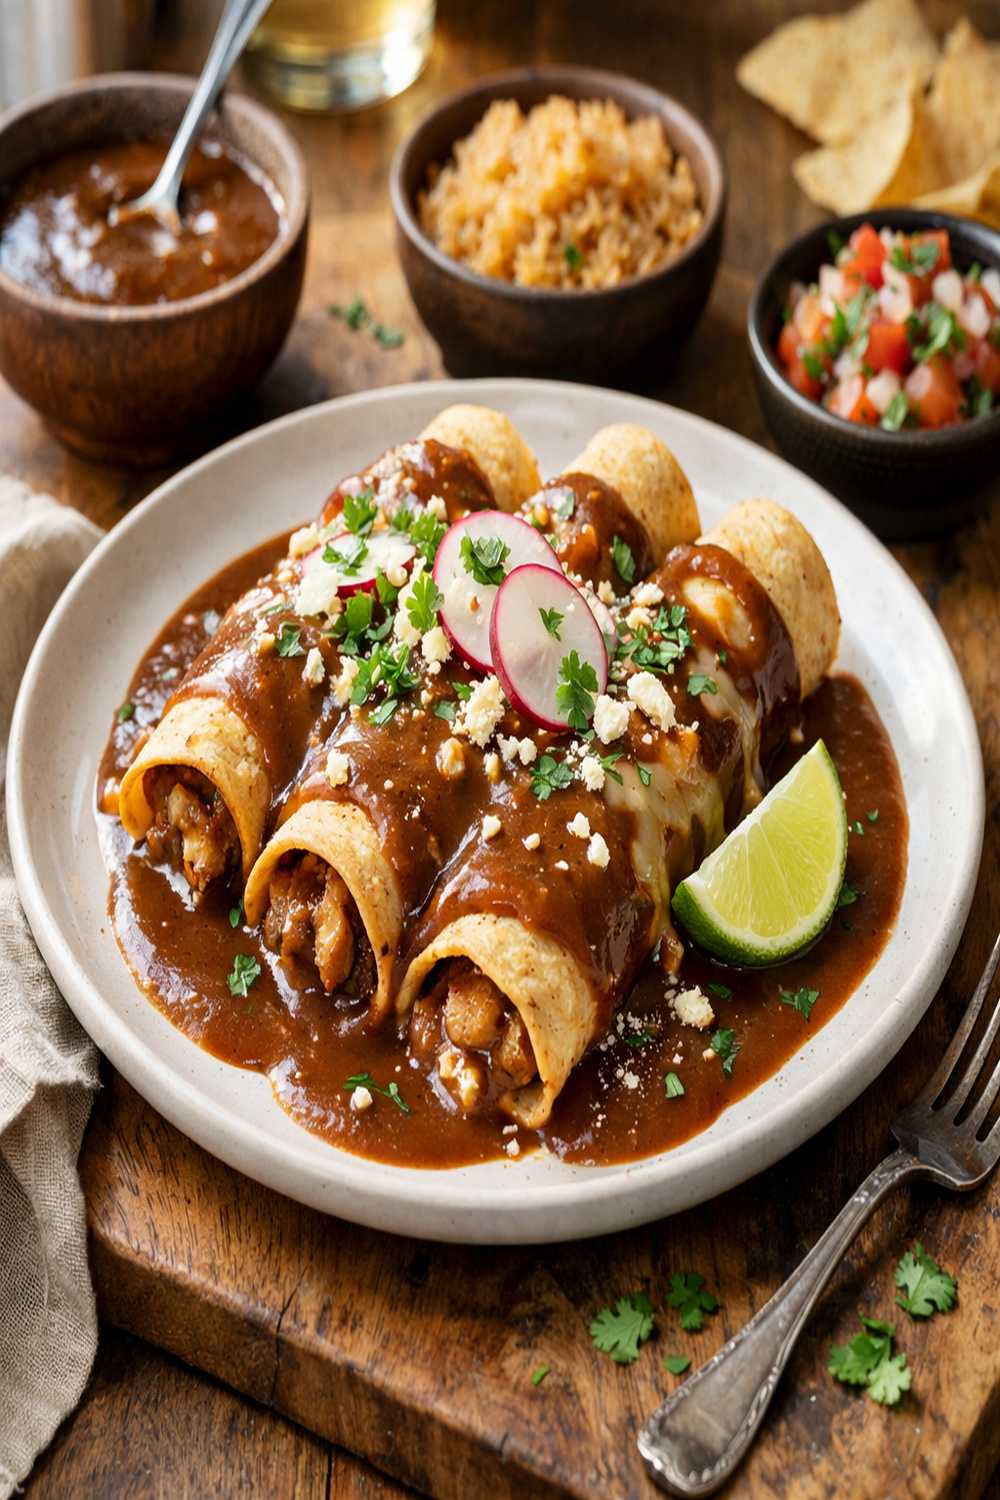
Learning to make brown enchilada gravy isn’t just about this dish—it’s about mastering a technique that unlocks dozens of other recipes. I still remember the moment this clicked for me. I was standing in my grandmother’s kitchen in Baltimore, watching her build a roux from scratch, and she said something I’ve never forgotten: “Lauren, this brown base is how you build flavor. Once you understand this, you’ll never buy a jar of sauce again.” That lesson transformed how I cook. The basic roux technique is the foundation of countless comfort food classics, and brown enchilada gravy is one of the most rewarding places to practice it.
Master the Technique Behind Brown Enchilada Gravy (And Never Struggle in the Kitchen Again)
I was probably twenty-three years old when I first tried to make enchiladas for a family dinner. I whisked my flour and fat together, added spices, and poured in the broth—but my gravy broke. It was lumpy, thin, and frankly disappointing. I called my grandmother in tears (yes, really), and she walked me through it over the phone. She explained that I was rushing the roux, not letting it develop its deep brown color, and that I was pouring in the liquid too fast. That single conversation changed everything for me.
The breakthrough came when I understood that making brown enchilada gravy wasn’t about following steps—it was about watching and feeling for specific signals that told me when to move forward. The smell, the color change, the texture of the roux—these were my guides. Once I learned to trust those signals, I could make this gravy every single time with confidence.
The Core Technique Explained
Brown enchilada gravy teaches you the roux-making technique, which is a French culinary foundation that shows up in gravies, sauces, and soups across every cuisine. A roux is simply equal parts fat and flour cooked together, and it serves one critical purpose: it thickens liquids while adding deep, complex flavor.
Here’s the science: when you heat fat (whether it’s lard, butter, or oil) and add flour, the heat gelatinizes the starch granules in the flour. This creates a network that can trap and thicken liquid. But here’s where brown enchilada gravy becomes special—by cooking your roux longer than you would for a blonde or white roux, you develop nutty, toasted flavors that add tremendous depth to your gravy.
The key is timing and temperature. You want medium-high heat (not screaming hot), constant whisking (so the flour doesn’t scorch), and patience. A proper brown roux takes about one to two minutes of cooking before you add your spices. This extra time allows the flour to toast gradually, developing those complex flavors your taste buds will remember.
Once your roux reaches that perfect brown color, you’ll add your spices (chili powder, cumin, garlic powder, oregano) and cook them for just a few seconds. This “blooming” technique releases the oils in the spices, intensifying their flavor. Then comes the most important step: slowly whisking in your liquid while maintaining constant contact with the bottom of the pot. This prevents lumps from forming and ensures smooth, silky gravy every single time.
What This Technique Unlocks
Once you master brown roux, you’ve got the keys to an entire kitchen of comfort food classics. This isn’t just about enchiladas—this technique shows up everywhere:
- Beef gravy for mashed potatoes – uses the exact same roux foundation with beef broth instead of chili
- Cajun and Creole gravies – brown roux is the holy trinity starter for everything from gumbo to jambalaya
- Chicken and dumplings – that silky sauce that makes dumplings unforgettable starts with a proper roux
- Pan gravies for roasted meats – learn this, and you’ll never need store-bought gravy again
- Mexican chile-based sauces – brown roux techniques apply to mole, enchilada sauce variations, and chile relleno preparations
- Vegetable cream sauces – mushroom gravy, asparagus sauce, and countless vegetable preparations all start here
The Ingredients—Chosen to Teach the Technique
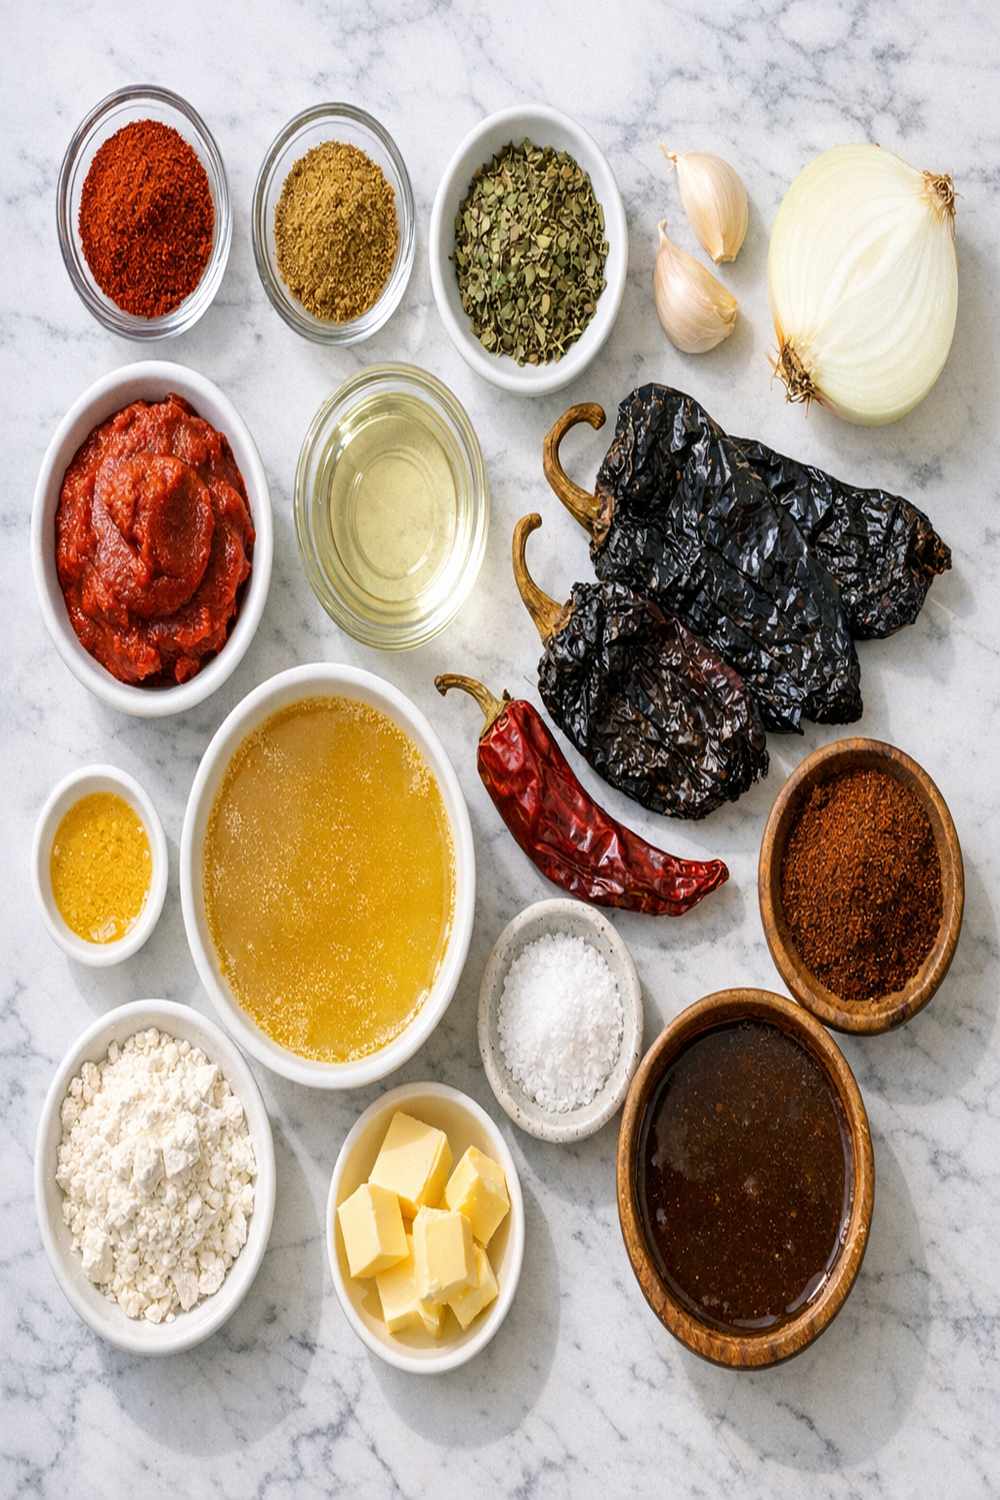
I’ve selected these ingredients specifically because each one teaches you something essential about the roux-making process. Nothing fancy here—these are real ingredients from real kitchens, chosen because they demonstrate the technique beautifully.
For the Gravy Base
- ¼ cup all-purpose flour (spooned and leveled, never packed—this is your thickening agent and flavor builder)
- ½ teaspoon black pepper (freshly ground black pepper if possible—pre-ground loses potency)
- ¼ cup lard or vegetable oil (the fat carrier that creates your roux foundation and adds authentic flavor)
- ½ teaspoon dried oregano (brings herbal complexity and authenticity)
- 2 cups beef broth, chicken broth, or water (the liquid that transforms your roux into silky gravy)
- 1 teaspoon garlic powder (concentrated garlic flavor that won’t scorch like fresh garlic)
- 2 tablespoons chili powder (the backbone spice that defines enchilada flavor)
- 1 teaspoon ground cumin (adds earthiness and warmth that deepens the gravy)
- 1 tablespoon tomato paste (adds subtle depth and richness that makes people ask for your secret)
- ½ teaspoon kosher salt (enhances all flavors and should be tasted and adjusted)
For the Enchiladas
- 1 medium yellow onion, diced (adds texture, sweetness, and traditional flavor)
- Pickled jalapeños, for serving (provides heat and bright acidity that balances richness)
- 2 tablespoons vegetable oil (for warming tortillas to make them pliable)
- 3 cups shredded Colby-Jack cheese (melts beautifully and adds mild, approachable creaminess)
- 8 corn tortillas (the vehicle for your delicious filling and gravy)
Why these specific choices: Lard or neutral oil creates the best roux for this gravy—it won’t brown the way butter does. All-purpose flour is your best friend here because it’s reliable and neutral. The spices are dried, not fresh, because they bloom more intensely and won’t burn in your hot roux. Tomato paste is my addition because it adds depth without adding extra liquid, and it’s something my family has always used in ours. Finally, corn tortillas (not flour) are traditional because they hold up better to the gravy and add authentic texture.
The Masterclass: How to Make Brown Enchilada Gravy
I’m going to walk you through each step not just as a recipe, but as a teaching moment. Pay attention to the sensory signals—what you see, smell, and feel. These signals matter more than any timer.
Step 1: Heat Your Fat and Begin Building Your Roux
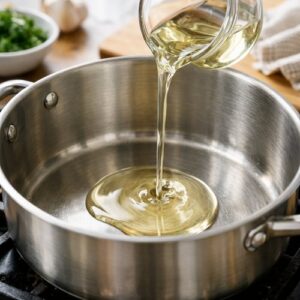
Pour ¼ cup of lard or vegetable oil into a heavy-bottomed pot (cast iron or stainless steel works beautifully). Set your heat to medium-high. You want the oil hot but not smoking—if it starts to shimmer and move easily when you tilt the pot, you’re at the right temperature.
This is your first sensory checkpoint: the oil should be hot enough that when you add flour, it immediately begins to sizzle and smell toasted, not like raw flour. If it doesn’t sizzle, wait another 30 seconds. Don’t skip this step—a cold roux will never develop the deep, nutty flavor you’re after.
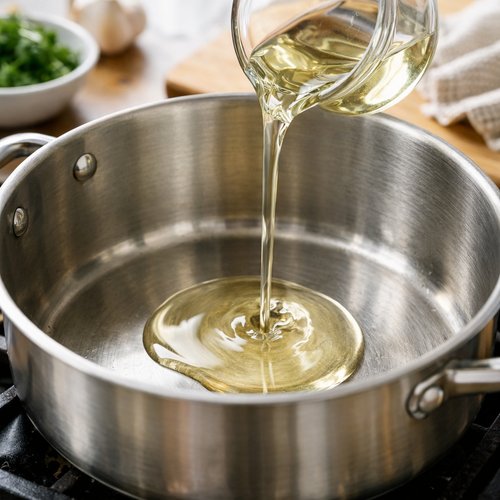
Now add your ¼ cup of flour all at once. Immediately grab a whisk and begin stirring constantly. This is critical. You’re preventing lumps from forming and ensuring even cooking. The flour will combine with the hot oil almost instantly, creating a paste-like mixture at the bottom of your pot.
Step 2: Toast Your Roux to Perfect Brown
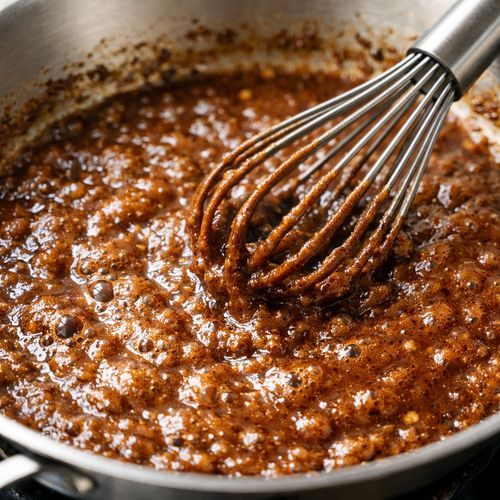
Keep whisking. This is where patience becomes your greatest skill. You’re going to cook this flour and fat mixture for 1 to 2 minutes, watching carefully as it transforms color. It will start pale tan, then gradually deepen to golden, then light brown. This is the moment that separates good enchilada gravy from exceptional enchilada gravy.
Watch the color like a hawk. You’re looking for a milk chocolate brown—not black, not pale, but that gorgeous deep brown that smells toasty and almost nutty. Your nose is actually a better guide than your eyes here. When it smells deeply toasted (like you’ve just opened a bag of cocoa powder), you’re close. When it smells like that toasted aroma plus something faintly caramelized, you’re there.
The whole pot will smell incredible at this point. Don’t skip ahead because of impatience. That extra 30 seconds of cooking is what makes the difference between gravy and exceptional gravy. I’ve made this hundreds of times, and the magic is always in that toasting moment.
Step 3: Bloom Your Spices
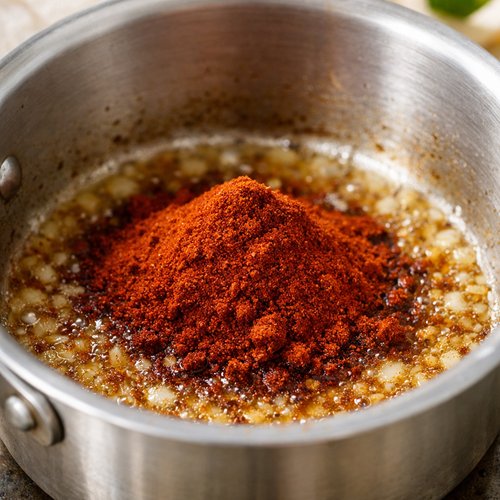
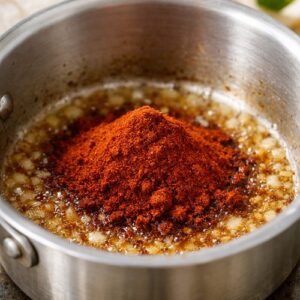
Remove your pot from the heat for just 10 seconds—you want the temperature to drop slightly so your spices don’t scorch. Add your 2 tablespoons chili powder, 1 teaspoon cumin, 1 teaspoon garlic powder, ½ teaspoon oregano, ½ teaspoon salt, and ½ teaspoon black pepper all at once.
Whisk everything together immediately. You’ll notice the spices combine with the roux, and suddenly the mixture looks darker and more fragrant. That’s the bloom happening—the heat is releasing the essential oils in the spices, intensifying their flavor. Work quickly here, whisking for about 15 seconds, and then immediately move to the next step.
Add your 1 tablespoon tomato paste and whisk until it’s completely incorporated. The mixture will look almost black at this point, and the aroma will be deeply savory.
Step 4: Slowly Add Your Liquid
This is the most critical technique moment of the entire recipe. Place your pot back on medium heat. Pour your 2 cups of broth (beef, chicken, or water—your choice) into a separate container so you can control the pour.
Now, here’s the professional secret: add your liquid slowly while whisking constantly. I start by adding about ¼ cup of broth and whisking it into the roux until it’s completely smooth. This creates a thin paste. Then I add another ¼ cup and whisk. Then another. I’m building up gradually, letting each addition fully incorporate before adding more.
This technique prevents lumps because you’re giving the starch granules time to absorb the liquid evenly. If you dump all the liquid in at once, you’ll get clumps of unhydrated flour that create lumps in your finished gravy. Slow and steady is how you win this race.
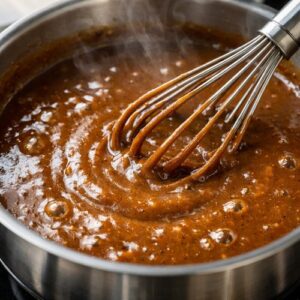
Once you’ve added about half your liquid and the mixture looks like thick cream, you can add the rest a bit faster. Keep whisking constantly as you go. You should feel the whisk moving more freely as the gravy thins out.
Step 5: Thicken and Taste
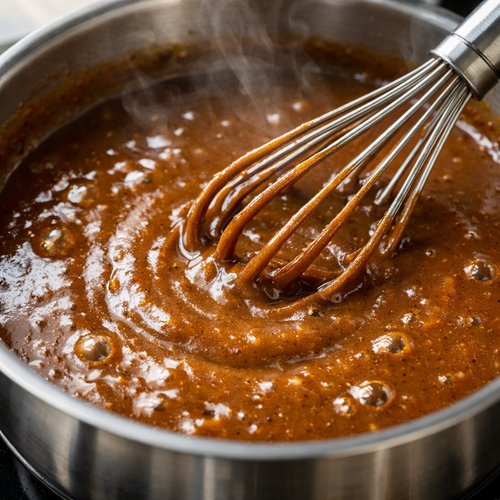
Increase your heat slightly to medium and keep whisking as your gravy heats through. You’ll notice it thickening as it approaches a simmer. This is where you discover the actual texture—in the heat, not before. The gravy will look thinner when it’s cold and thicken as it warms.
Within 3 to 5 minutes of constant whisking, your gravy should reach a beautiful simmer with small bubbles breaking the surface. This is perfect—you’ve cooked out any flour taste, and your spices have fully incorporated. Now taste it. Seriously, taste it right now while it’s hot.
Does it need more salt? More heat? Taste is personal, and this is where you get to own your recipe. Add a pinch more of whatever it needs. This is your moment to make it yours.
Step 6: Let It Mellow
Reduce your heat to low and let this gravy simmer quietly for 15 minutes. This time allows flavors to marry and deepen. You’re not looking for any action here—just the occasional small bubble. This is passive cooking at its finest, and it’s where the flavors really develop.
If your gravy gets too thick during this simmering time, whisk in more broth or water, a tablespoon at a time. You want it the consistency of heavy cream—thick enough to coat your spoon but thin enough to pour.
Step 7: Prepare Your Tortillas and Build Your Enchiladas
While your gravy is simmering, preheat your oven to 450°F. Pour 2 tablespoons of vegetable oil into a large baking dish or cast-iron skillet. Layer your 8 corn tortillas in the dish (it’s fine if they overlap) and make sure they’re coated with oil on both sides.
Place the uncovered baking dish in your preheating oven for 3 to 5 minutes. You’re not cooking the tortillas—you’re warming them and making them flexible. They’ll soften beautifully and become pliable for rolling. Remove the dish and cover the tortillas with a clean kitchen towel so they stay warm and soft.
Pour ½ cup of your finished gravy into the bottom of a clean baking dish. This creates a base layer that prevents sticking and adds flavor.
Step 8: Roll and Arrange
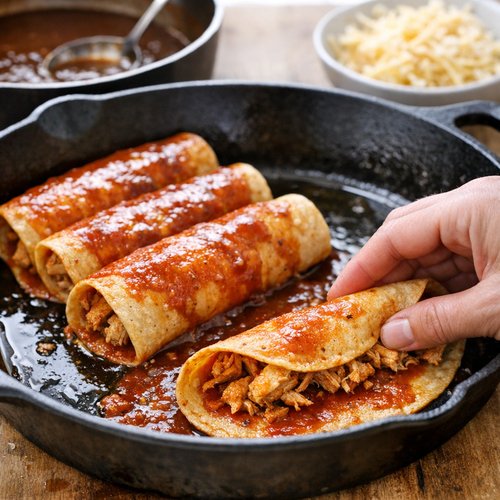
Take one warm tortilla and place it on a clean work surface. Sprinkle ¼ cup of your shredded Colby-Jack cheese down the center, then add 1 tablespoon of diced yellow onion. Don’t overstuff—you want room to roll without the filling spilling out.
Roll the tortilla tightly, starting from one edge and rolling toward the other. Place it seam-side down in your gravy-lined baking dish. Continue with all remaining tortillas until your dish is full. They should fit snugly but not be crammed.
Step 9: Add Gravy and Cheese, Then Bake
Pour the remaining gravy evenly over your rolled enchiladas. You want them well-coated but not swimming—the gravy should come about halfway up the sides of the rolls. Sprinkle the remaining cheese over the top, then scatter the remaining diced onion over everything.
Bake uncovered at 450°F for exactly 10 minutes. You’re looking for the sauce to bubble at the edges (that’s your signal that heat has penetrated all the way through) and the cheese to melt and turn golden in spots. Don’t overbake, or your tortillas will get crispy at the edges.
Step 10: Serve and Celebrate
Remove from the oven and let rest for 2 minutes. Serve warm with pickled jalapeños on the side. These bright, spicy jalapeños cut through the richness of the cheese and gravy, balancing the entire plate beautifully.
How to Know You’ve Mastered the Technique
When you’ve truly mastered brown enchilada gravy, you’ll recognize these specific signs:
- Your roux reaches that deep chocolate-brown color – It smells toasty and nutty, not burnt or raw. The transformation happens gradually over that 1-2 minute window, and you anticipate it rather than being surprised by it.
- Your gravy is silky-smooth with zero lumps – When you whisk it with the back of a spoon, it flows smoothly without any graininess or texture. This tells you that your liquid-adding technique was perfect.
- The finished gravy coats a spoon evenly – Dip a spoon in and lift it out. The gravy should coat the back evenly, and when you run your finger across it, a line stays clear. This is your visual confirmation of proper thickness.
- Your enchiladas bake without curdling or separating – When they come out of the oven, the gravy is smooth and glossy, not broken or oily. This tells you that your heat management was appropriate throughout.
- You taste it and instinctively know what it needs – Instead of following the recipe blindly, you’ve developed that internal sense of when something needs salt, more depth, or more heat. This is mastery.
Common Technique Mistakes and How to Fix Them
- My gravy is lumpy – This happens when you add liquid too fast or don’t whisk constantly while adding it. Fix: push your gravy through a fine-mesh strainer to remove lumps, then gently reheat it. For next time, slow down your liquid addition and maintain constant whisking contact with the bottom of your pot.
- My roux tastes burnt and bitter – You cooked it at too-high heat or for too long. Fix: start over (it’s only flour and fat, no waste). Lower your heat to medium-high and watch more carefully. You want toasty, not charred.
- My gravy is too thin – You either didn’t cook your roux long enough or added too much liquid. Fix: make a small slurry by mixing 1 tablespoon flour with 2 tablespoons cold water, then whisk it slowly into your simmering gravy. This will thicken it beautifully.
- My gravy is too thick – You didn’t add enough liquid or cooked it too long. Fix: whisk in more broth or water a tablespoon at a time until you reach the consistency of heavy cream. Don’t add too much at once.
- My enchiladas came out dry – You didn’t add enough gravy before baking. Fix: check that your enchiladas are well-coated with gravy before they go in the oven. They should be saucy, not dry.
Practice Variations to Build Your Skill
Mastery comes from repetition and slight variations. Here are three progressively more challenging versions of this recipe to build your confidence:
Level 1: The Basic Recipe (Your Foundation)
Make this version exactly as written 2-3 times. Your only job is to get comfortable with the roux technique and liquid addition. Don’t change anything. Build muscle memory by repeating the same steps until your hands know what to do before your brain tells them.
Level 2: Make It with Different Broths
Once you’re comfortable with the basic technique, make this gravy three different ways: once with beef broth, once with chicken broth, and once with water. Pay attention to how each one tastes. Which brings out the spices most? Which do you prefer? This teaches you how different liquids interact with your spice base and helps you understand flavor development.
Level 3: Create Your Own Variation
After you’ve mastered the basic technique twice, make it your own. Add a small pinch of cinnamon (¼ teaspoon) to the spice bloom for warmth. Or reduce the chili powder slightly and add 1 tablespoon of anchovy paste to the roux for umami depth. Or use half broth and half coffee (sounds odd, but it adds incredible depth). These small variations teach you how different ingredients interact with your roux base and develop your instinct as a cook.
Can I Store Brown Enchilada Gravy?
Yes, and this is where your new skill becomes even more valuable. Made-from-scratch gravy is something you can batch-prepare and have ready all week.
Refrigerator storage: Let your cooled gravy rest at room temperature for 30 minutes, then transfer to an airtight container. It will keep for up to 4 days in the refrigerator. When you’re ready to use it, gently reheat it over low heat, whisking occasionally. If it thickens too much in storage, whisk in a tablespoon of broth to return it to the right consistency.
Freezer storage: This gravy freezes beautifully. Let it cool completely, then pour it into freezer bags or ice cube trays. Frozen gravy keeps for up to 3 months. Thaw overnight in the refrigerator, then reheat gently. The texture remains smooth and beautiful.
Make-ahead guide: I recommend making your gravy the day before you plan to serve enchiladas. This gives flavors time to develop even further, and you’ll have one less thing to worry about on cooking day. Simply reheat gently before assembling your enchiladas.
Expert’s Nutritional Tip: This brown gravy provides something many people overlook—the fat and flour combination actually helps your body absorb fat-soluble vitamins like vitamins A and E from any vegetables you’re serving alongside. The Colby-Jack cheese adds bioavailable calcium and protein, making this comfort food far more nourishing than people realize.
Nutrition Information
This recipe makes approximately 8 enchiladas with generous gravy. Per serving (1 enchilada with gravy):
- Calories: 285
- Protein: 12 grams (from cheese and the small amount of flour)
- Fat: 18 grams (mostly from the oil-based gravy and cheese)
- Carbohydrates: 19 grams (primarily from the corn tortilla)
- Fiber: 2 grams (from the corn tortilla)
- Sodium: 485 milligrams (adjust based on broth choice—low-sodium broths will reduce this)
According to USDA nutritional data, corn tortillas provide complete protein when combined with cheese, making this a surprisingly balanced meal. The spices in your gravy (chili powder, cumin, oregano) all contain antioxidants and antimicrobial compounds that add nutritional benefit beyond just flavor.
What to Serve With Brown Enchilada Gravy Enchiladas?
Brown enchilada gravy enchiladas are rich and deeply flavored, so you want sides that either complement or contrast with that richness:
- Simple Mexican rice – provides a neutral base that lets your gravy shine without competing flavors
- Black beans or refried beans – adds protein and fiber, creating a more complete, satisfying meal
- Bright cilantro-lime slaw – cuts through richness with acidity and freshness, balancing the plate beautifully
- Charred corn with cotija cheese – adds sweetness, texture, and a traditional Mexican complement
- Pickled vegetables – the acid and brine cut through the richness of the cheese and gravy
- Simple green salad with lime vinaigrette – provides freshness without competing with your enchiladas
I often pair these with something from homemade crema mexicana drizzled on top, or a side of ranchero sauce for those who want even more sauce. Yes, this household is sauce-forward, and we’re not apologizing for it.
Common Mistakes to Avoid
- Skipping the full brown roux development – I see people try to rush this. That toasty brown color is where the magic lives. Don’t skip it trying to save 30 seconds. It’s not worth it.
- Using hot liquid added all at once – This creates lumps and broken gravy. Cold or room-temperature liquid whisked in slowly is your friend here. This single change will transform your gravies forever.
- Not tasting and adjusting seasoning – Everyone’s salt preference is different, and different broths have different sodium levels. Taste as you go. Your palate is the best guide.
- Overcrowding enchiladas in the pan – They need space to cook evenly. If you’re squishing them in, the ones in the middle won’t heat through properly. Use two baking dishes if you need to.
Seasonal Variations
Summer version: When fresh chiles are in season, replace the chili powder with 2 tablespoons of ground dried chiles you’ve toasted and ground yourself. Add fresh cilantro as a garnish. Serve alongside fresh corn and heirloom tomato salad.
Fall and winter version: Add ¼ teaspoon ground cinnamon and ¼ teaspoon ground clove to your spice bloom. These warm spices become more welcome as weather cools. Pair with roasted root vegetables.
Spring version: Add 1 tablespoon fresh lime juice and ½ tablespoon fresh cilantro to the finished gravy. Serve with fresh asparagus on the side. The brightness cuts through the richness beautifully.

Brown Enchilada Gravy Recipe
Ingredients
Method
- Pour ¼ cup of lard or vegetable oil into a heavy-bottomed pot (cast iron or stainless steel works beautifully). Set your heat to medium-high. You want the oil hot but not smoking—if it starts to shimmer and move easily when you tilt the pot, you're at the right temperature. This is your first sensory checkpoint: the oil should be hot enough that when you add flour, it immediately begins to sizzle and smell toasted, not like raw flour. If it doesn't sizzle, wait another 30 seconds. Don't skip this step—a cold roux will never develop the deep, nutty flavor you're after. Now add your ¼ cup of flour all at once. Immediately grab a whisk and begin stirring constantly. This is critical. You're preventing lumps from forming and ensuring even cooking. The flour will combine with the hot oil almost instantly, creating a paste-like mixture at the bottom of your pot.
- Keep whisking. This is where patience becomes your greatest skill. You're going to cook this flour and fat mixture for 1 to 2 minutes, watching carefully as it transforms color. It will start pale tan, then gradually deepen to golden, then light brown. This is the moment that separates good enchilada gravy from exceptional enchilada gravy. Watch the color like a hawk. You're looking for a milk chocolate brown—not black, not pale, but that gorgeous deep brown that smells toasty and almost nutty. Your nose is actually a better guide than your eyes here. When it smells deeply toasted (like you've just opened a bag of cocoa powder), you're close. When it smells like that toasted aroma plus something faintly caramelized, you're there. The whole pot will smell incredible at this point. Don't skip ahead because of impatience. That extra 30 seconds of cooking is what makes the difference between gravy and exceptional gravy. I've made this hundreds of times, and the magic is always in that toasting moment.
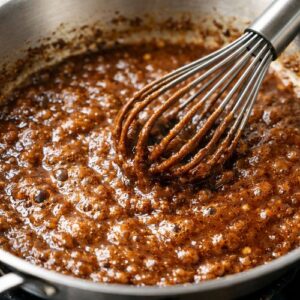
- Remove your pot from the heat for just 10 seconds—you want the temperature to drop slightly so your spices don't scorch. Add your 2 tablespoons chili powder, 1 teaspoon cumin, 1 teaspoon garlic powder, ½ teaspoon oregano, ½ teaspoon salt, and ½ teaspoon black pepper all at once. Whisk everything together immediately. You'll notice the spices combine with the roux, and suddenly the mixture looks darker and more fragrant. That's the bloom happening—the heat is releasing the essential oils in the spices, intensifying their flavor. Work quickly here, whisking for about 15 seconds, and then immediately move to the next step. Add your 1 tablespoon tomato paste and whisk until it's completely incorporated. The mixture will look almost black at this point, and the aroma will be deeply savory.
- This is the most critical technique moment of the entire recipe. Place your pot back on medium heat. Pour your 2 cups of broth (beef, chicken, or water—your choice) into a separate container so you can control the pour. Now, here's the professional secret: add your liquid slowly while whisking constantly. I start by adding about ¼ cup of broth and whisking it into the roux until it's completely smooth. This creates a thin paste. Then I add another ¼ cup and whisk. Then another. I'm building up gradually, letting each addition fully incorporate before adding more. This technique prevents lumps because you're giving the starch granules time to absorb the liquid evenly. If you dump all the liquid in at once, you'll get clumps of unhydrated flour that create lumps in your finished gravy. Slow and steady is how you win this race. Once you've added about half your liquid and the mixture looks like thick cream, you can add the rest a bit faster. Keep whisking constantly as you go. You should feel the whisk moving more freely as the gravy thins out.
- Increase your heat slightly to medium and keep whisking as your gravy heats through. You'll notice it thickening as it approaches a simmer. This is where you discover the actual texture—in the heat, not before. The gravy will look thinner when it's cold and thicken as it warms. Within 3 to 5 minutes of constant whisking, your gravy should reach a beautiful simmer with small bubbles breaking the surface. This is perfect—you've cooked out any flour taste, and your spices have fully incorporated. Now taste it. Seriously, taste it right now while it's hot. Does it need more salt? More heat? Taste is personal, and this is where you get to own your recipe. Add a pinch more of whatever it needs. This is your moment to make it yours.
- Reduce your heat to low and let this gravy simmer quietly for 15 minutes. This time allows flavors to marry and deepen. You're not looking for any action here—just the occasional small bubble. This is passive cooking at its finest, and it's where the flavors really develop. If your gravy gets too thick during this simmering time, whisk in more broth or water, a tablespoon at a time. You want it the consistency of heavy cream—thick enough to coat your spoon but thin enough to pour.
- While your gravy is simmering, preheat your oven to 450°F. Pour 2 tablespoons of vegetable oil into a large baking dish or cast-iron skillet. Layer your 8 corn tortillas in the dish (it's fine if they overlap) and make sure they're coated with oil on both sides. Place the uncovered baking dish in your preheating oven for 3 to 5 minutes. You're not cooking the tortillas—you're warming them and making them flexible. They'll soften beautifully and become pliable for rolling. Remove the dish and cover the tortillas with a clean kitchen towel so they stay warm and soft. Pour ½ cup of your finished gravy into the bottom of a clean baking dish. This creates a base layer that prevents sticking and adds flavor.
- Take one warm tortilla and place it on a clean work surface. Sprinkle ¼ cup of your shredded Colby-Jack cheese down the center, then add 1 tablespoon of diced yellow onion. Don't overstuff—you want room to roll without the filling spilling out. Roll the tortilla tightly, starting from one edge and rolling toward the other. Place it seam-side down in your gravy-lined baking dish. Continue with all remaining tortillas until your dish is full. They should fit snugly but not be crammed.

- Pour the remaining gravy evenly over your rolled enchiladas. You want them well-coated but not swimming—the gravy should come about halfway up the sides of the rolls. Sprinkle the remaining cheese over the top, then scatter the remaining diced onion over everything. Bake uncovered at 450°F for exactly 10 minutes. You're looking for the sauce to bubble at the edges (that's your signal that heat has penetrated all the way through) and the cheese to melt and turn golden in spots. Don't overbake, or your tortillas will get crispy at the edges.
- Remove from the oven and let rest for 2 minutes. Serve warm with pickled jalapeños on the side. These bright, spicy jalapeños cut through the richness of the cheese and gravy, balancing the entire plate beautifully.
Notes
FAQs
Can I make this gravy without lard?
Absolutely. Use vegetable oil, avocado oil, or even bacon fat (if you have it). What matters is that you use a neutral-flavored fat with a high smoke point. Avoid olive oil—it will add flavors that don’t belong here. The key is having fat that browns your flour without adding competing flavors.
What if my gravy breaks or separates?
Broken gravy happens when the fat and liquid separate—it usually looks oily on top and watery below. This usually means the heat got too high. Here’s your fix: remove it from heat and let it cool for 5 minutes. Then, slowly whisk in a cold splash of water (just 2-3 tablespoons). The cooler liquid and slower whisking often bring it back together. If it’s really broken, strain it and start fresh with a new roux, then slowly whisk in your broken gravy bit by bit like you would broth.
Can I use flour other than all-purpose?
For a traditional roux, all-purpose is your best choice. Whole wheat flour will work but will create a grainier texture. Cornstarch works differently—use half the amount (2 tablespoons instead of ¼ cup) because it’s a stronger thickener. However, cornstarch doesn’t create that toasty, nutty flavor, so you’ll lose something special about this gravy.
How do I know if my roux is truly brown enough?
Trust your nose more than your eyes. When it smells toasty (like cocoa powder or toasted nuts), it’s close. When it smells like that plus something faintly caramelized, it’s perfect. If it smells burnt (acrid, harsh), you’ve gone too far. The color should be milk chocolate brown, not black. Keep your heat at medium-high, not high, and you’ll give yourself room to get it right.
Can I make this with vegetable broth instead of meat broth?
Yes, and it will still be delicious, though the flavor will be lighter and more about the spices than the savory depth. I actually prefer vegetable broth sometimes because it lets the chili and cumin shine brighter. Use it if that appeals to you. The technique remains exactly the same.
Should I use fresh or dried chiles instead of chili powder?
If you want to get ambitious, absolutely. Toast 2-3 dried chiles (ancho or guajillo are traditional), remove the seeds, then grind them into a powder. Add that to your roux instead of chili powder. This is Level 2 or 3 cooking—the technique gets slightly more complex, but the reward is incredible depth of flavor. Fresh chiles won’t work in the roux because the moisture will create steam and prevent browning.
More Recipes Using This Technique
- Basic Roux Recipe – the foundational technique explained in its purest form
- BBQ Spatchcock Chicken Recipe – pairs beautifully with gravy made from the pan drippings using this same roux technique
- How to Brown Ground Beef – teaches you proper browning that creates the foundation for rich gravies
You’ve just mastered one of the most valuable techniques in the home kitchen. Brown roux isn’t flashy—it doesn’t have the Instagram appeal of a perfectly seared steak—but it’s the technique that separates good home cooks from great ones. It’s the technique that means you’ll never buy canned gravy again. It’s the technique that lets you build incredible flavors from simple ingredients.
My grandmother taught me that food has the power to soothe and heal, but I’ve learned that it’s the technique behind the food that gives you the confidence to cook from your heart instead of your fears. You now understand brown roux. You can make this gravy perfectly every single time. And that means you can make dozens of other dishes that rely on this same foundation.
The next time you’re standing in your kitchen and someone asks you to make enchiladas, you won’t feel nervous anymore. You’ll remember the smell of the toasted roux, the whisking of the liquid, the way flavors marry and deepen. You’ve got this.
Cook what makes you happy!
META DESCRIPTION: Master brown enchilada gravy with this foolproof roux technique. Learn the foundational cooking skill that unlocks dozens of comfort food recipes.